DIY Bathroom Shelf (For the Non-DIYer)
Thanks to technology, we can find ways to DIY just about everything. Things like decorative coffee mugs, mason jar tissue holders, and glow-in-the-dark bubbles. If you think of it, you can “DIY” it. Problem is, all those DIY tutorials and pictures can’t teach you how to cut in a straight line or paint a smooth stroke. If you don’t consider yourself a crafty person, a simple project can turn into a real train wreck. There’s even a website dedicated to the hilarity of our DIY project fails.
That’s my struggle. I love the look of something handmade, but I’m what you call a Non-DIYer. Exacto knives and felt fabric intimidate me, and I’d much rather pay someone to make my wall art than use craftsmanship I don’t have.
On rare occasions, there are projects I can’t resist trying; projects that require minimal skills and the least amount of time. For me it was this DIY bathroom shelf.
Inspiration:
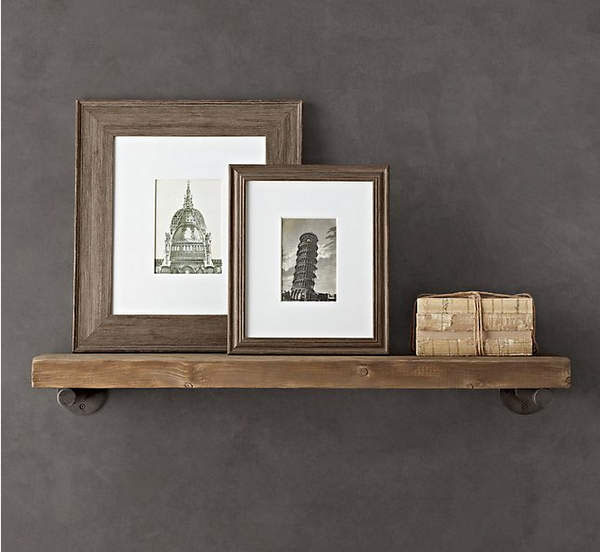
Image Source: Restoration Hardware
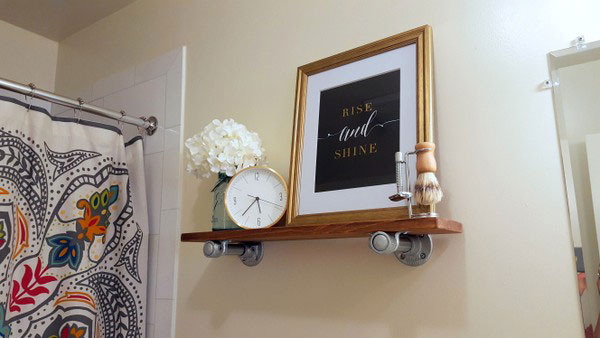
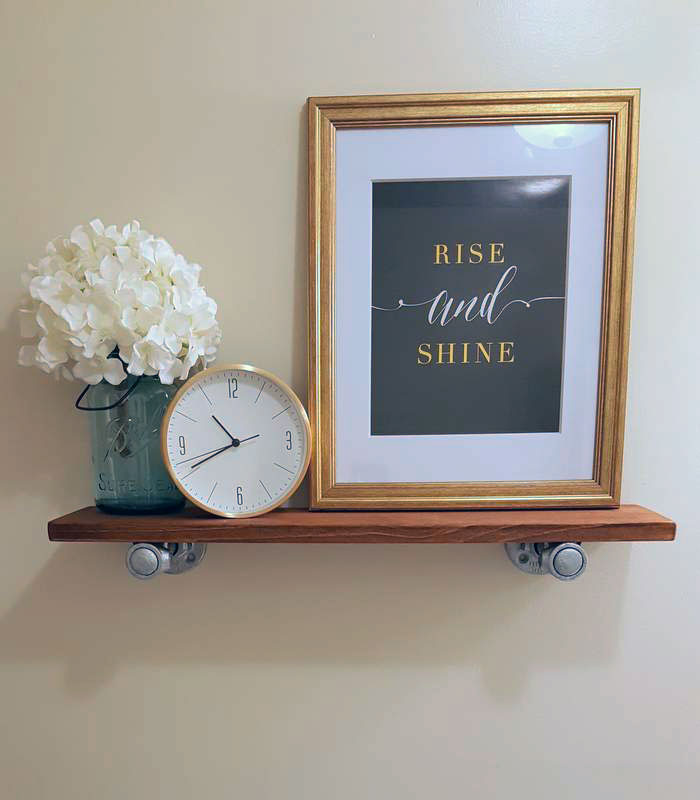
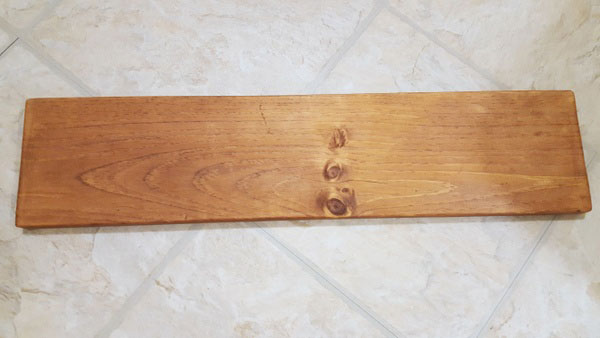
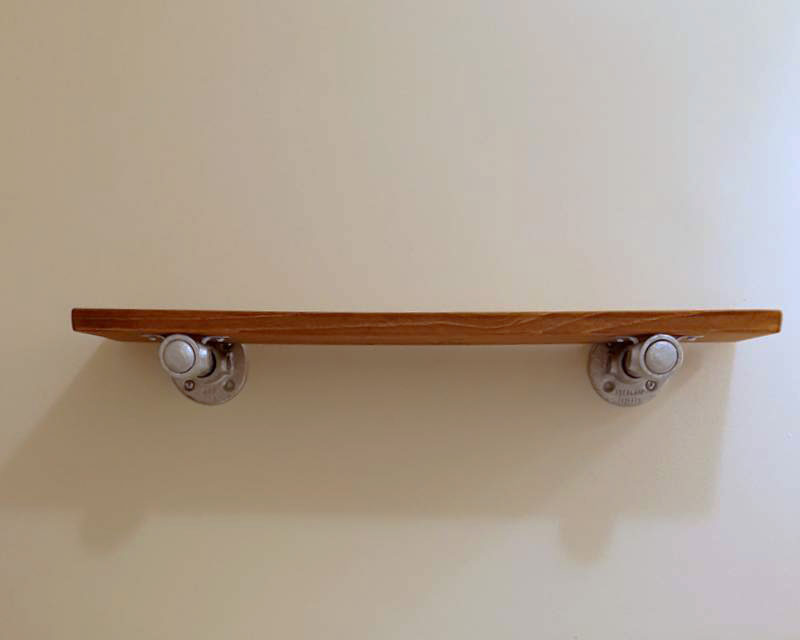
End Result:
Non-DIYer Guide to Becoming a Fabulous DIYer
If you can relate to being a Non-DIYer, here’s what I suggest...
The Tip: Fake it ‘till you make it.
The Secret: Ask others to help with the “heavy lifting”, like the drilling, cutting, etc.
The Trick: Choose accessible and affordable materials that are easy to work with.
For this bathroom shelf, Kee Klamps are the perfect solution. Here’s a step-by-step guide on how to build your own industrial style, bathroom shelf.
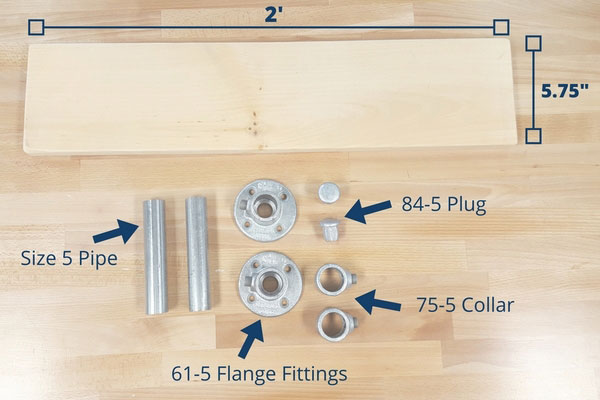
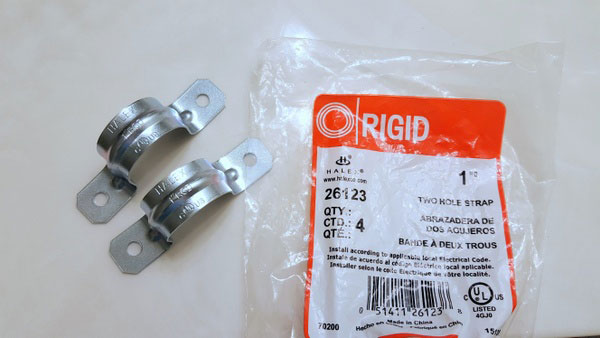
Parts You'll Need
- 2 x 61-5 Flange Fitting
- 2 x 84-5 Malleable Plug
- 2 x 75-5 Collar
- 1/2” Wood Screws
- 2 x 1” Two Hole Straps
- Size 5 Pipe cut @ 5.75” (Same width as the shelf piece)
- Drywall Anchors
- Wood Shelf Piece @ 5.75” Wide x 2 FT Long
- Pre-Stain and Wood Stain (Optional)
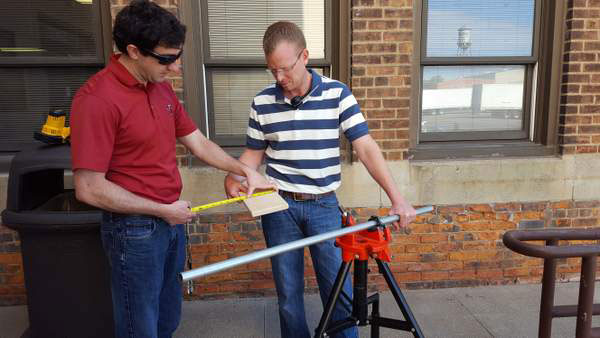
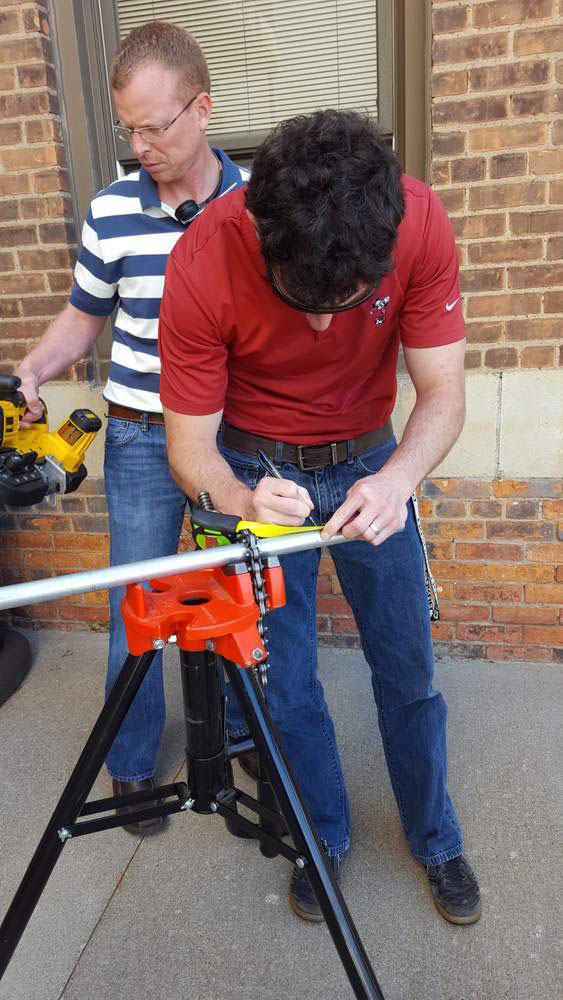
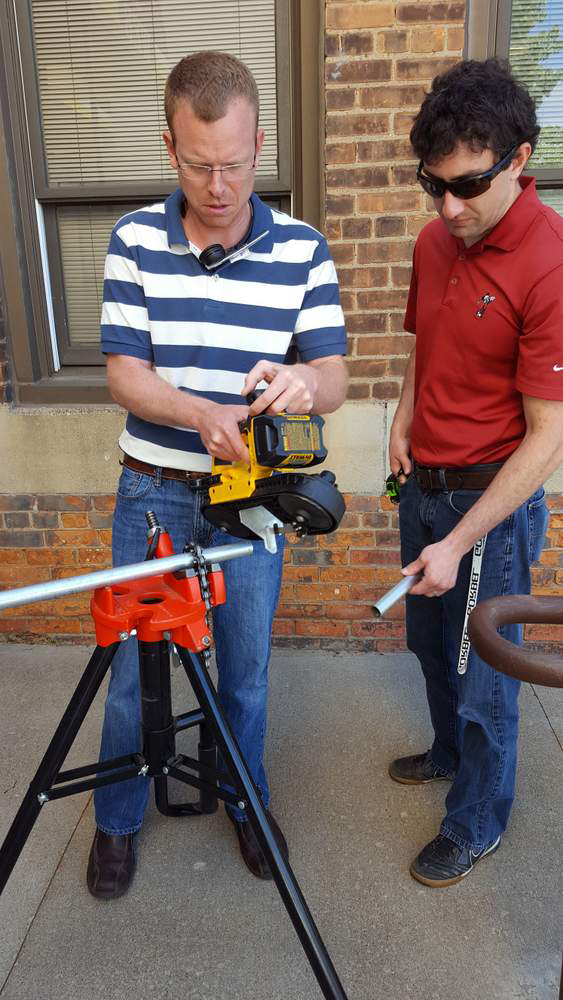
Step 1. Cut Pipe
For my pipe pieces, I started with a full length piece of Size 5 Pipe. Luckily, I had friends willing to cut the pieces for me. (Non-DIYer Tip: If you don’t have the tools, phone a friend.)
You can easily purchase pipe cut to length on our Simplified Building website.
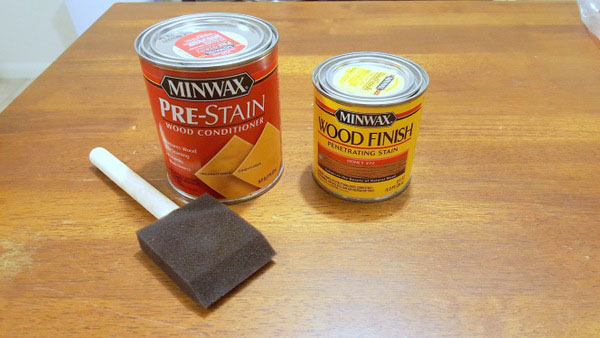
Step 2. Paint or Stain Your Shelf
To add some color, I used Minwax wood stain. I primed the shelf using Minwax Pre-Stain wood conditioner so the stain wouldn’t turn out blotchy. Here’s a video tutorial on staining wood.
Step 3. Assemble and Attach Brackets to Wall
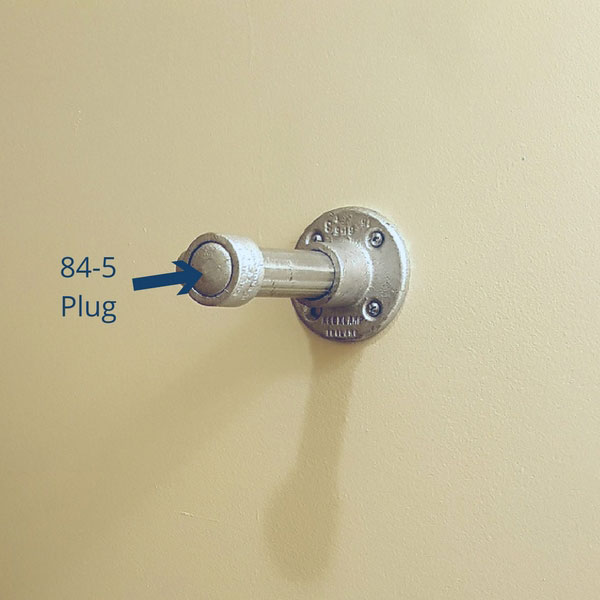
- Before you attach anything to the wall, cover the 84-5 plugs with cardboard or a rag and gently hammer them into pipe pieces. Result:
- Set one 61-5 flange fitting in place and mark holes for drilling (a.)
- Install drywall anchors. See how to here (b.)
- Screw one flange fitting into wall (c.)
- Repeat process for the second flange (d.- f.)
- Insert pipe pieces and slightly tighthen set screws (g.- i.)
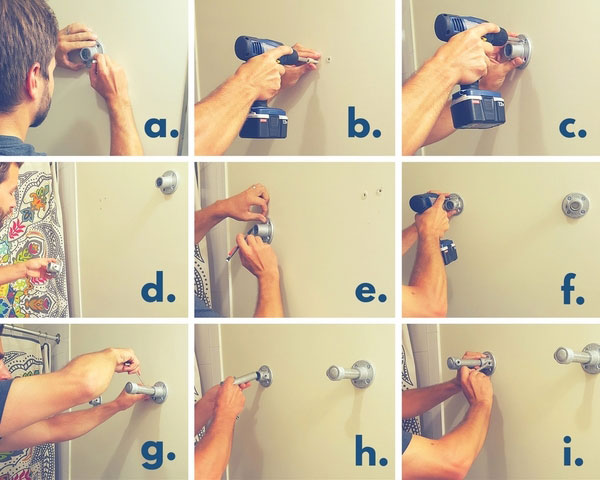
To Attach Brackets to Wall:
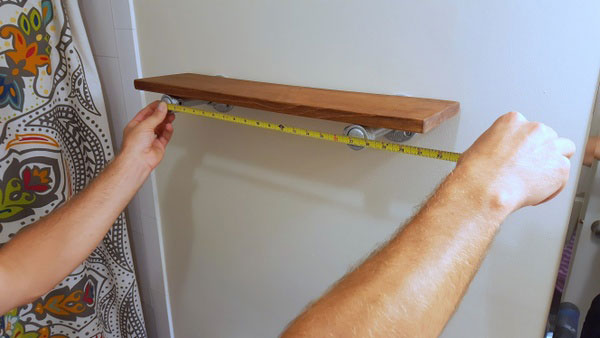
Note: I suggest you level the shelf first, with the 75-5 collars attached. Then, completely tighten the set screws on the 61-5 flange fittings. This will ensure that you don’t have a wobbly shelf.
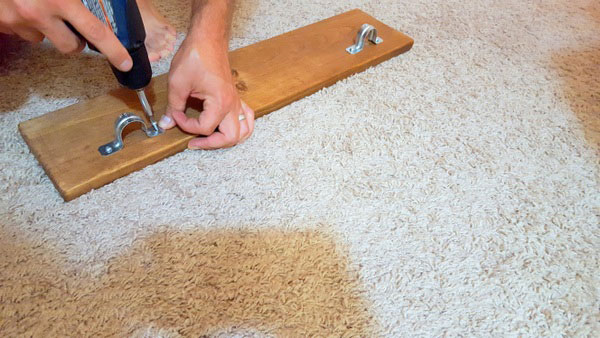
Step 4. Attach Two-Hole Straps to Shelf
With your shelf piece on, place the two-hole straps underneath to adhere the shelf to the brackets. Note: The straps are a bit wider than the pipe, so just shape them around the pipe until it fits snug. Then mark where the holes are.
Next, attach the straps using wood screws.
Step 5. Slide Shelf Into Place
Remove the 75-5 collars. Slide the shelf on with the two-hole straps attached. Re-attach the 75-5s, and tighten the set screws to secure the shelf in place.
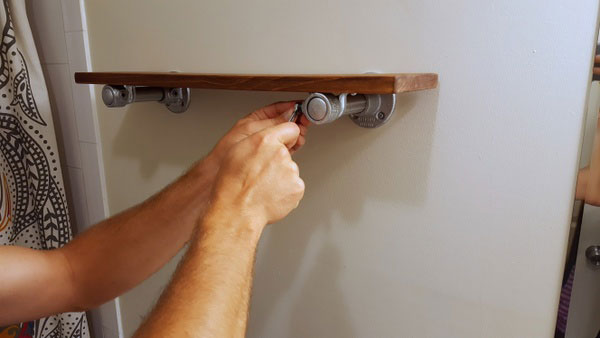
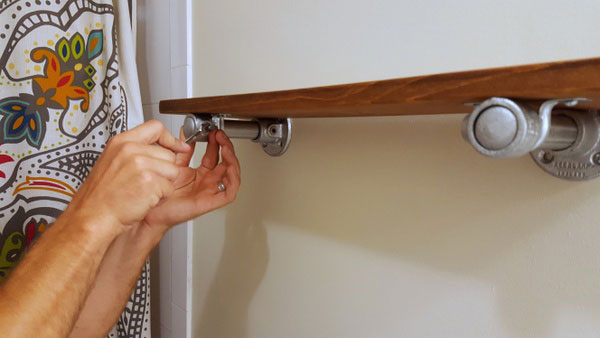
And, BAM! You have a simple bathroom shelf that takes less than 30 minutes to install!
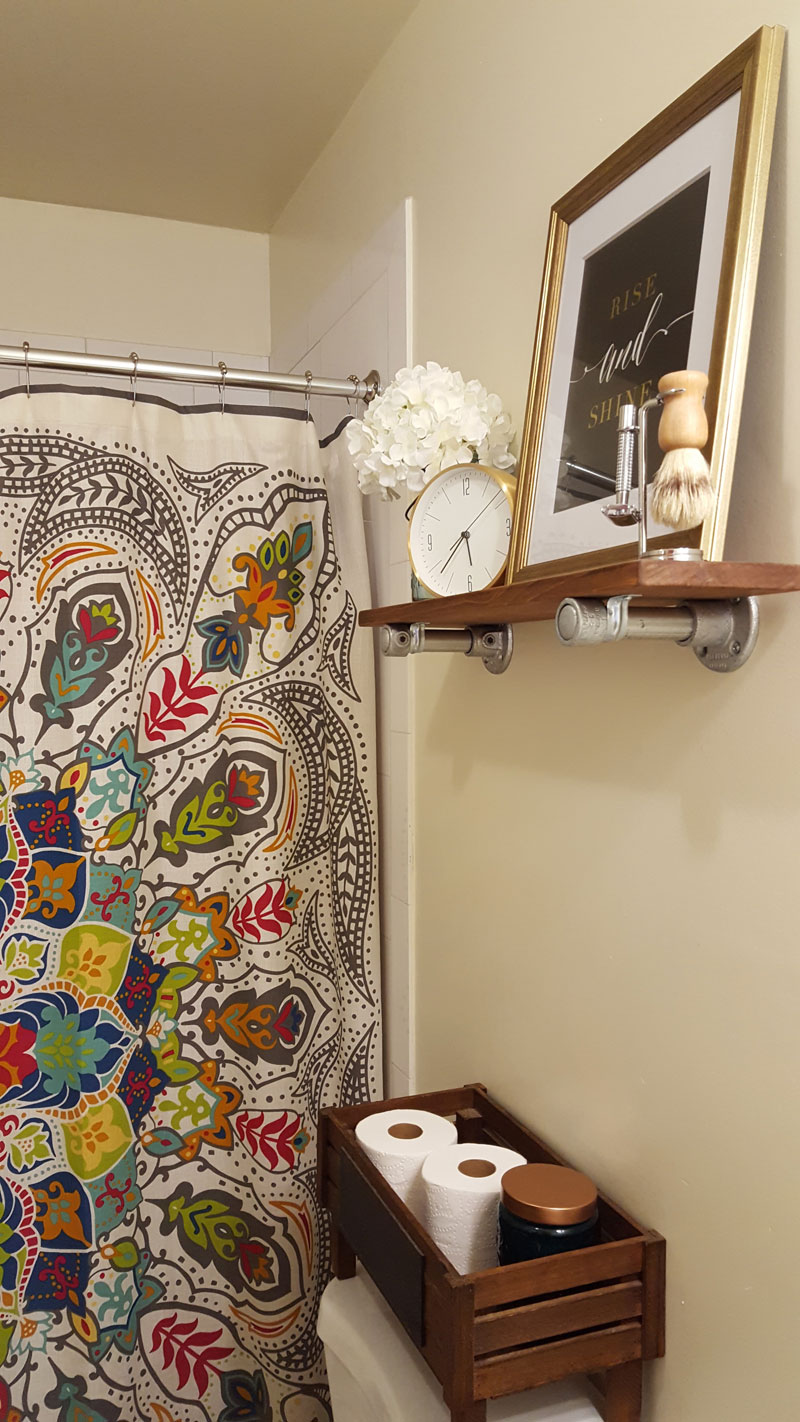
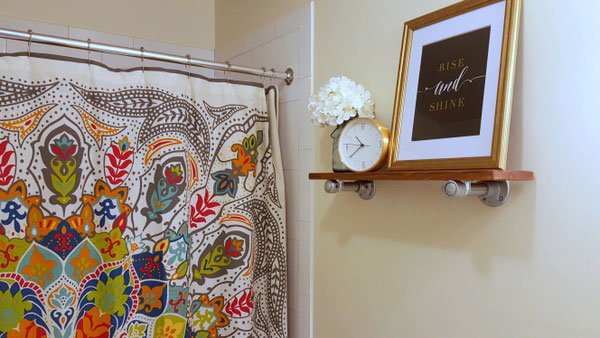
Step 6. Decorate!
There’s not much to a project like this, but when you add your own flair it makes a huge statement.

Now it’s your turn! If you're a beginner or an expert DIYer, this shelf is a great project for anyone to try. Contact us at projects@simplifiedbuilding.com if you need help creating your own shelving unit. We’re excited to see what you come up with!


