DIY Entertainment Center with Bookshelves
After moving to a new apartment in a Georgian house, we needed some bigger than normal shelving units to be the right scale for the higher ceilings. I've always loved the old school retro/warehouse look of the Ralph Lauren shops, so after a bit of Googling I found an awesome company who have actually made units for them. If I was in the states I would have gladly bought some, but not wanting to ship them over to London it was time to get a pen, a post-it and a cup of coffee....
This project was contributed by Duncan Wilkinson. If you like this project, vote for it on Instructables.com.
The Design
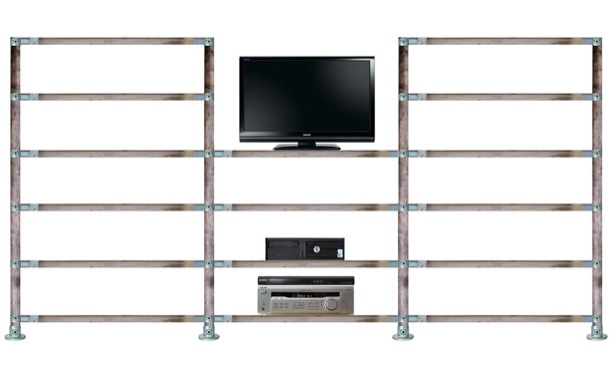
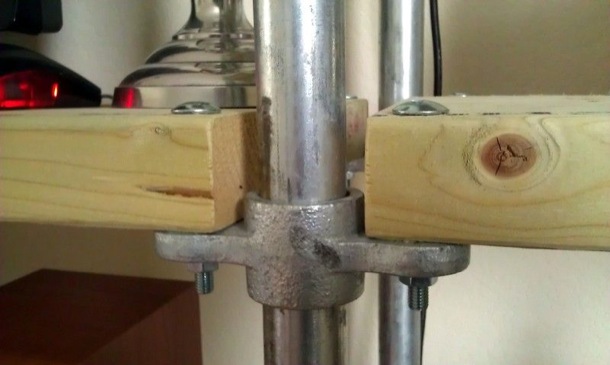
My original idea was to simply copy the shelves I'd seen, so I started looking for scaffolding poles and a way to cut them. This lead me to Kee Klamp, an awesome system of poles and clamps - or Klamps :) - that you can literally build anything with as long as you have an Allen Key.
The original design I'd seen had each shelf supporting the next by using the flange bases. The only problem with this was that I'd need to do a lot of pole cutting and the height between the shelves would be forever fixed. If I changed the design so that the poles were at the edges of the shelves rather then between them, I could keep the poles as one long length and use the side mounting clamps at whatever height the shelves needed to be. I also saw that double clamps were available, so by rejigging the design I could make one long shelving unit rather than three separate ones and share the mountings and pole between them.
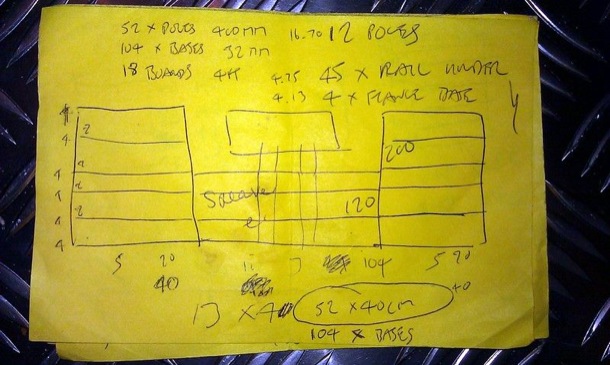
Getting Wood
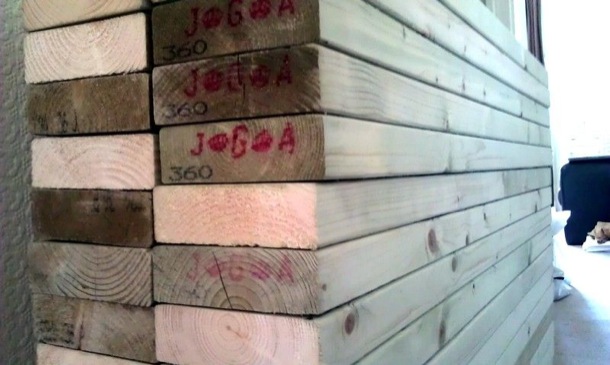
With the design complete it was time to go shopping! After a trip to a local wood merchant and a delivery from Key Systems, I had a hallway full of Kee Klamp scaffolding poles and wood (already cut to size by the timber yard). I wanted the shelves to have that used industrial retro look (not battered but definitely not clean cut), so I only wanted to sand down the edges of each piece of timber to remove any rough edges whilst still leaving the odd scuff and saw mark. This took a fair bit of time and a fair bit of sandpaper - even with an electric sander! If you are planning on doing this make sure you have a couple of packs!
Making The Outer Units
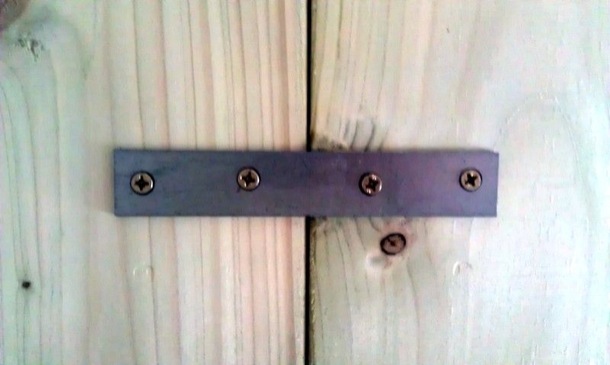
To make good, deep shelves, 2 lengths of timber were screwed together using joist brackets. I used three brackets spaced out along the length of each shelf and they were very securely held together.
(Apologies for the lack of pictures for this next step but I will try and explain as best I can how I then fitted everything together.)
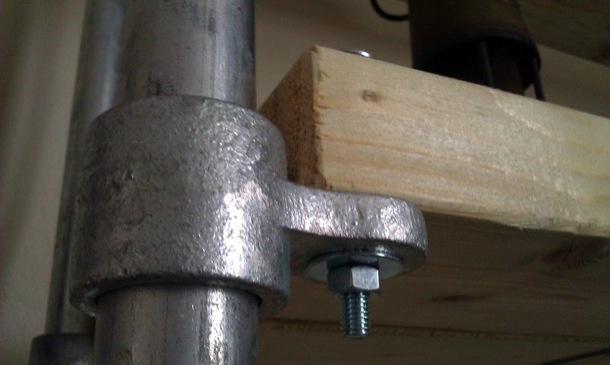
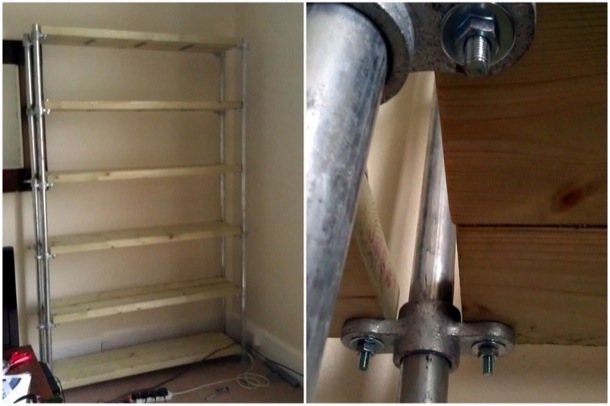
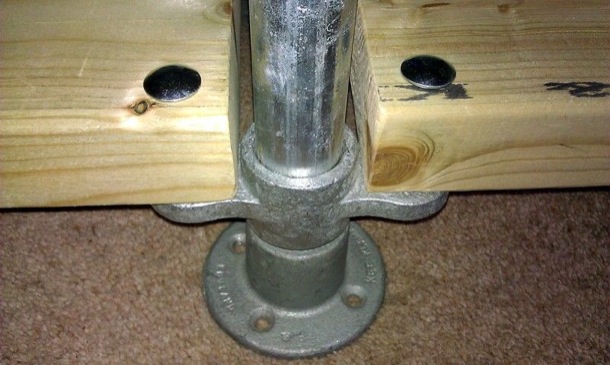
The poles were laid down on the floor and then the side mounting brackets slid along each of the poles so that they could be positioned and tightened in the right place (single brackets for where there would only be a single shelf and double for where they would also support the middle shelves). The bottom and top shelves were then drilled and bolted (using coach bolts and penny washers) to two of the poles that would support them (the ones which would be the back pair). By doing this, I knew that the poles would be flush to the shelves. The whole thing was then flipped over so that the front pair of poles could then be fitted in the same way. The rest of the shelves could then be fitted, again without having to support any of the weight as everything was resting on the floor. The base flanges were fitted to the poles and the unit then stood upright. The whole process was then repeated for the second outer unit.
Fixing Together
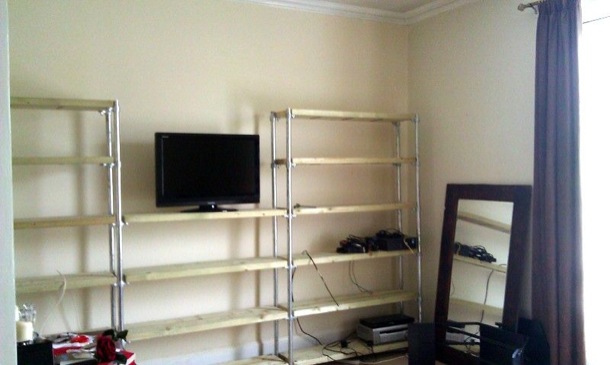
Once the two outer units were upright, the additional shelves could then be bolted on to the other side of the dual clamps, making the middle unit and holding the whole structure together at the same time....
Voila!
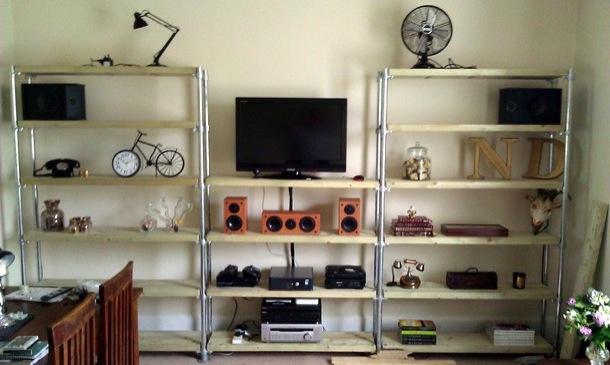
And voila! Your retro, industrial shelves are done.
If you liked my project, I'd be most grateful if you could vote for it in the Instructables Design Competition - Thank you :)


