Understanding ADA Handrail Requirements
A Guide on the ADA Code for Railing and Handrails
ADA handrails help to create safe access for individuals with disabilities of any kind. The Americans with Disabilities Act (ADA) has written very specific requirements on how these rails should function and when they are needed.
Sometimes, these codes can be difficult to understand or navigate. Here are the basics you need to know if an ADA-compliant handrail is required.
When is ADA Handrail Needed?
General. Handrails provided along walking surfaces complying with 403, required at ramps complying with 405, and required at stairs complying with 504 shall comply with 505.
Where Required. Handrails shall be provided on both sides of stairs and ramps.
EXCEPTION: In assembly areas, handrails shall not be required on both sides of aisle ramps where a handrail is provided at either side or within the aisle width.
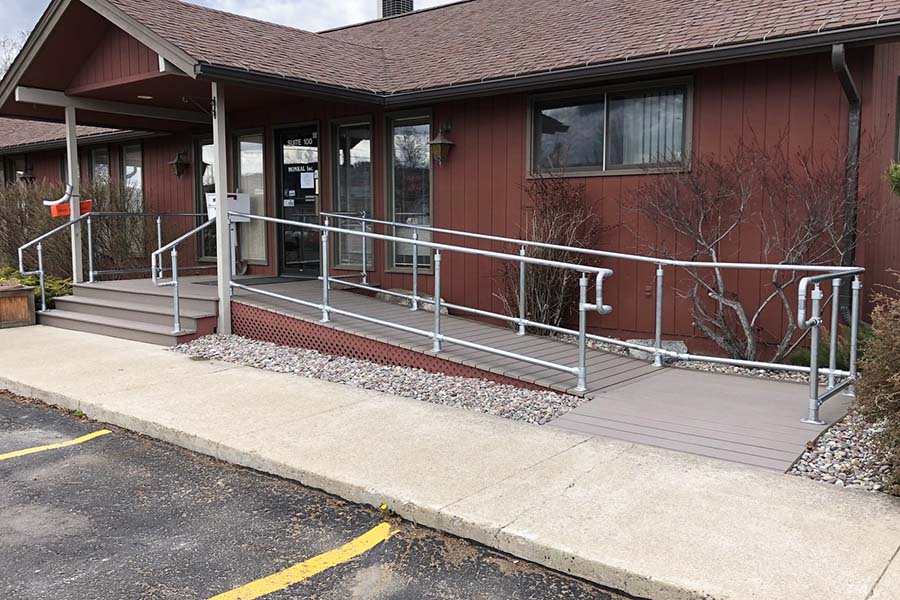
The first thing to know is when you need to have a handrail. If you have a stair or a ramp, then you need to have a handrail. You will also need to have a handrail on both sides of the stair or ramp if you serve the public, which will affect how you design the railing.
If you have a walking surface that is less than a 1:20 slope, then you don’t need to have a handrail. However, if you choose to install one, then it needs to comply with the standards that are set in 505.
It’s important to know that the handrails required by the ADA are not the same railing that is needed to comply with building code or OSHA. Learn more about OSHA and Building Code requirements.
Need Help with Your ADA Railing?

We've helped thousands of customers secure their stairs and ramps with ADA-compliant railing systems.
What are the ADA Handrail Dimensions?
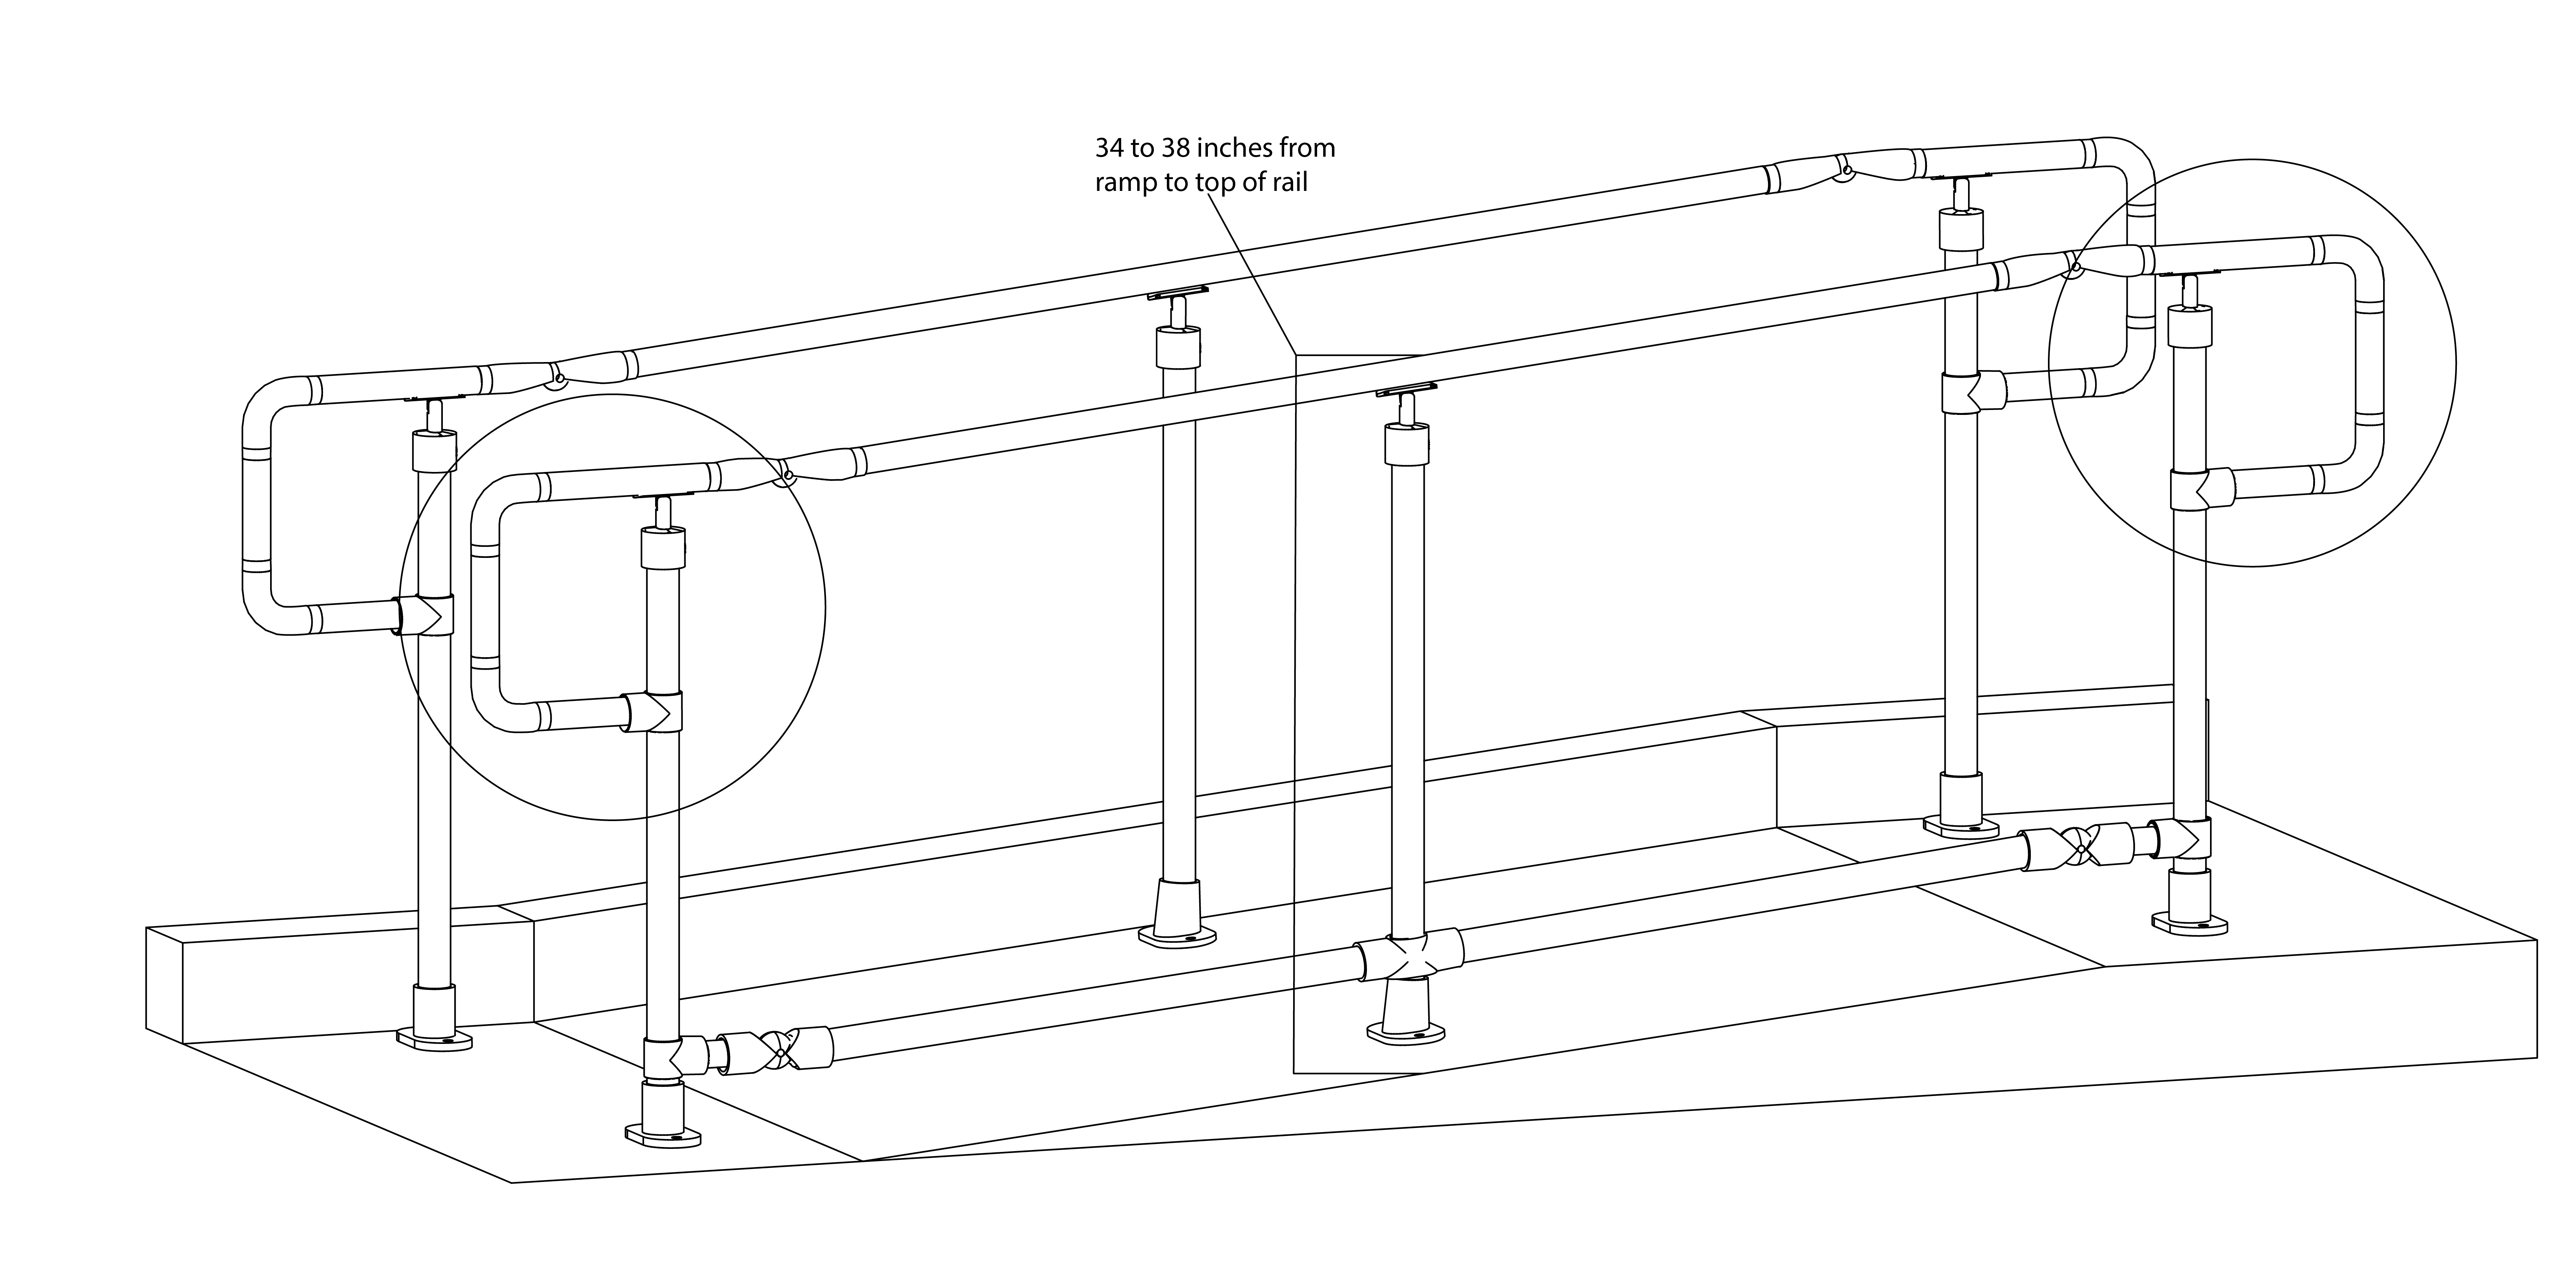
Height. Top of gripping surfaces of handrails shall be 34 inches (865 mm) minimum and 38 inches (965 mm) maximum vertically above walking surfaces, stair nosings, and ramp surfaces. Handrails shall be at a consistent height above walking surfaces, stair nosings, and ramp surfaces.
Clearance. Clearance between handrail gripping surfaces and adjacent surfaces shall be 1 1/2 inches (38 mm) minimum.
Cross Section. Handrail gripping surfaces shall have a cross section complying with 505.7.1 or 505.7.2.
Circular Cross Section.Handrail gripping surfaces with a circular cross section shall have an outside diameter of 1 1/4 inches (32 mm) minimum and 2 inches (51 mm) maximum.
Non-Circular Cross Section. Handrail gripping surfaces with a non-circular cross section shall have a perimeter dimension of 4 inches (100 mm) minimum and 6 1/4 inches (160 mm) maximum, and a cross-section dimension of 2 1/4 inches (57 mm) maximum.
The handrail height should be between 34 inches and 38 inches above the walking surface. This should be consistent throughout the length of the handrail.
It’s important to note that this considers adults. If children are the primary users of the ramps or stairs, like in an elementary school, then you should provide a second set of handrails to aid in preventing accidents. It is recommended that this should be no higher than 28 inches. Also, make sure that there are at least 9 inches between the upper and lower handrails to ensure no one is entrapped.
The handrail diameter should be 1-1/4 inches to 2 inches. If it is non-circular, then it shouldn’t have a cross-section greater than 2-1/4 inches and its perimeter should be 4 inches to 6-1/4 inches.
The handrail should have at least 1-1/2 inches of clearance to any adjacent surface.
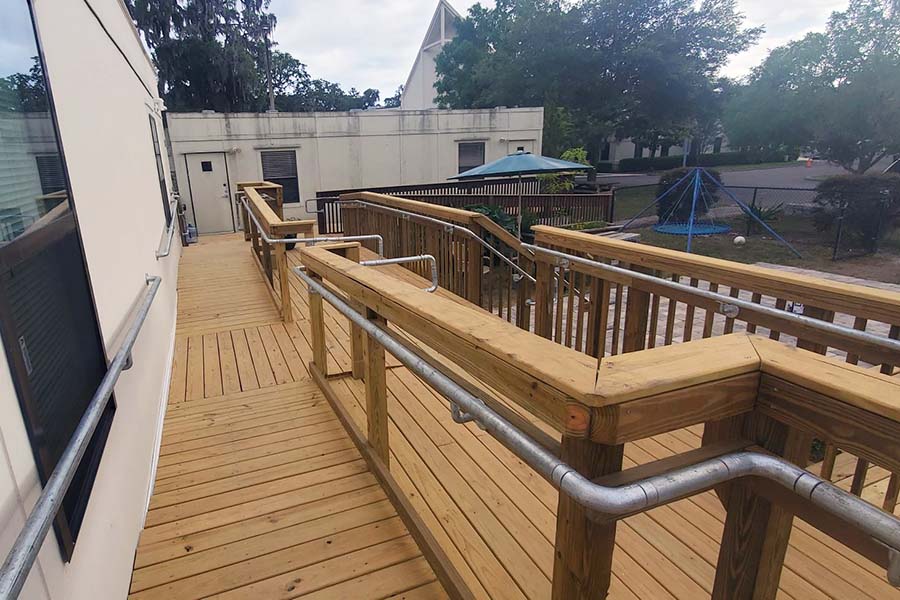
If you have a need for guardrail, then that should be a separate railing. The good news is that there are systems that allow you to integrate both guardrail and handrail, like the Kee Klamp railing system. The dimensions for this railing will be different. For example, the height of the top rail should be 42”. A middle rail is required and should be located halfway between the top rail and the walking surface so that a sphere of 19 inches cannot pass through. Learn more about OSHA compliant guardrail guidelines.
Additional ADA Railing Specifications
Continuity. Handrails shall be continuous within the full length of each stair flight or ramp run. Inside handrails on switchback or dogleg stairs and ramps shall be continuous between flights or runs.
Gripping Surface Handrail gripping surfaces shall be continuous along their length and shall not be obstructed along their tops or sides. The bottoms of handrail gripping surfaces shall not be obstructed for more than 20 percent of their length. Where provided, horizontal projections shall occur 1 1/2 inches (38 mm) minimum below the bottom of the handrail gripping surface.
Surfaces. Handrail gripping surfaces and any surfaces adjacent to them shall be free of sharp or abrasive elements and shall have rounded edges.
Fittings. Handrails shall not rotate within their fittings.
All gripping surfaces on an ADA handrail and any surfaces adjacent to them shall be free of anything sharp or abrasive. They should also have rounded edges. The last thing you want someone worrying about is cutting themselves on something that is supposed to help them gain access to your location.
The gripping surface of the handrail shall be continuous and without obstruction on the top or the side of the railing. It's okay if you have obstructions on the bottom, like the support connections, but that should not exceed 20 percent of the railing.
If you use fittings with your handrail, then you need to make sure that the handrail doesn’t rotate inside of it. This could cause someone to lose balance as they grip onto the railing.
ADA Railing Requirements for Ramps
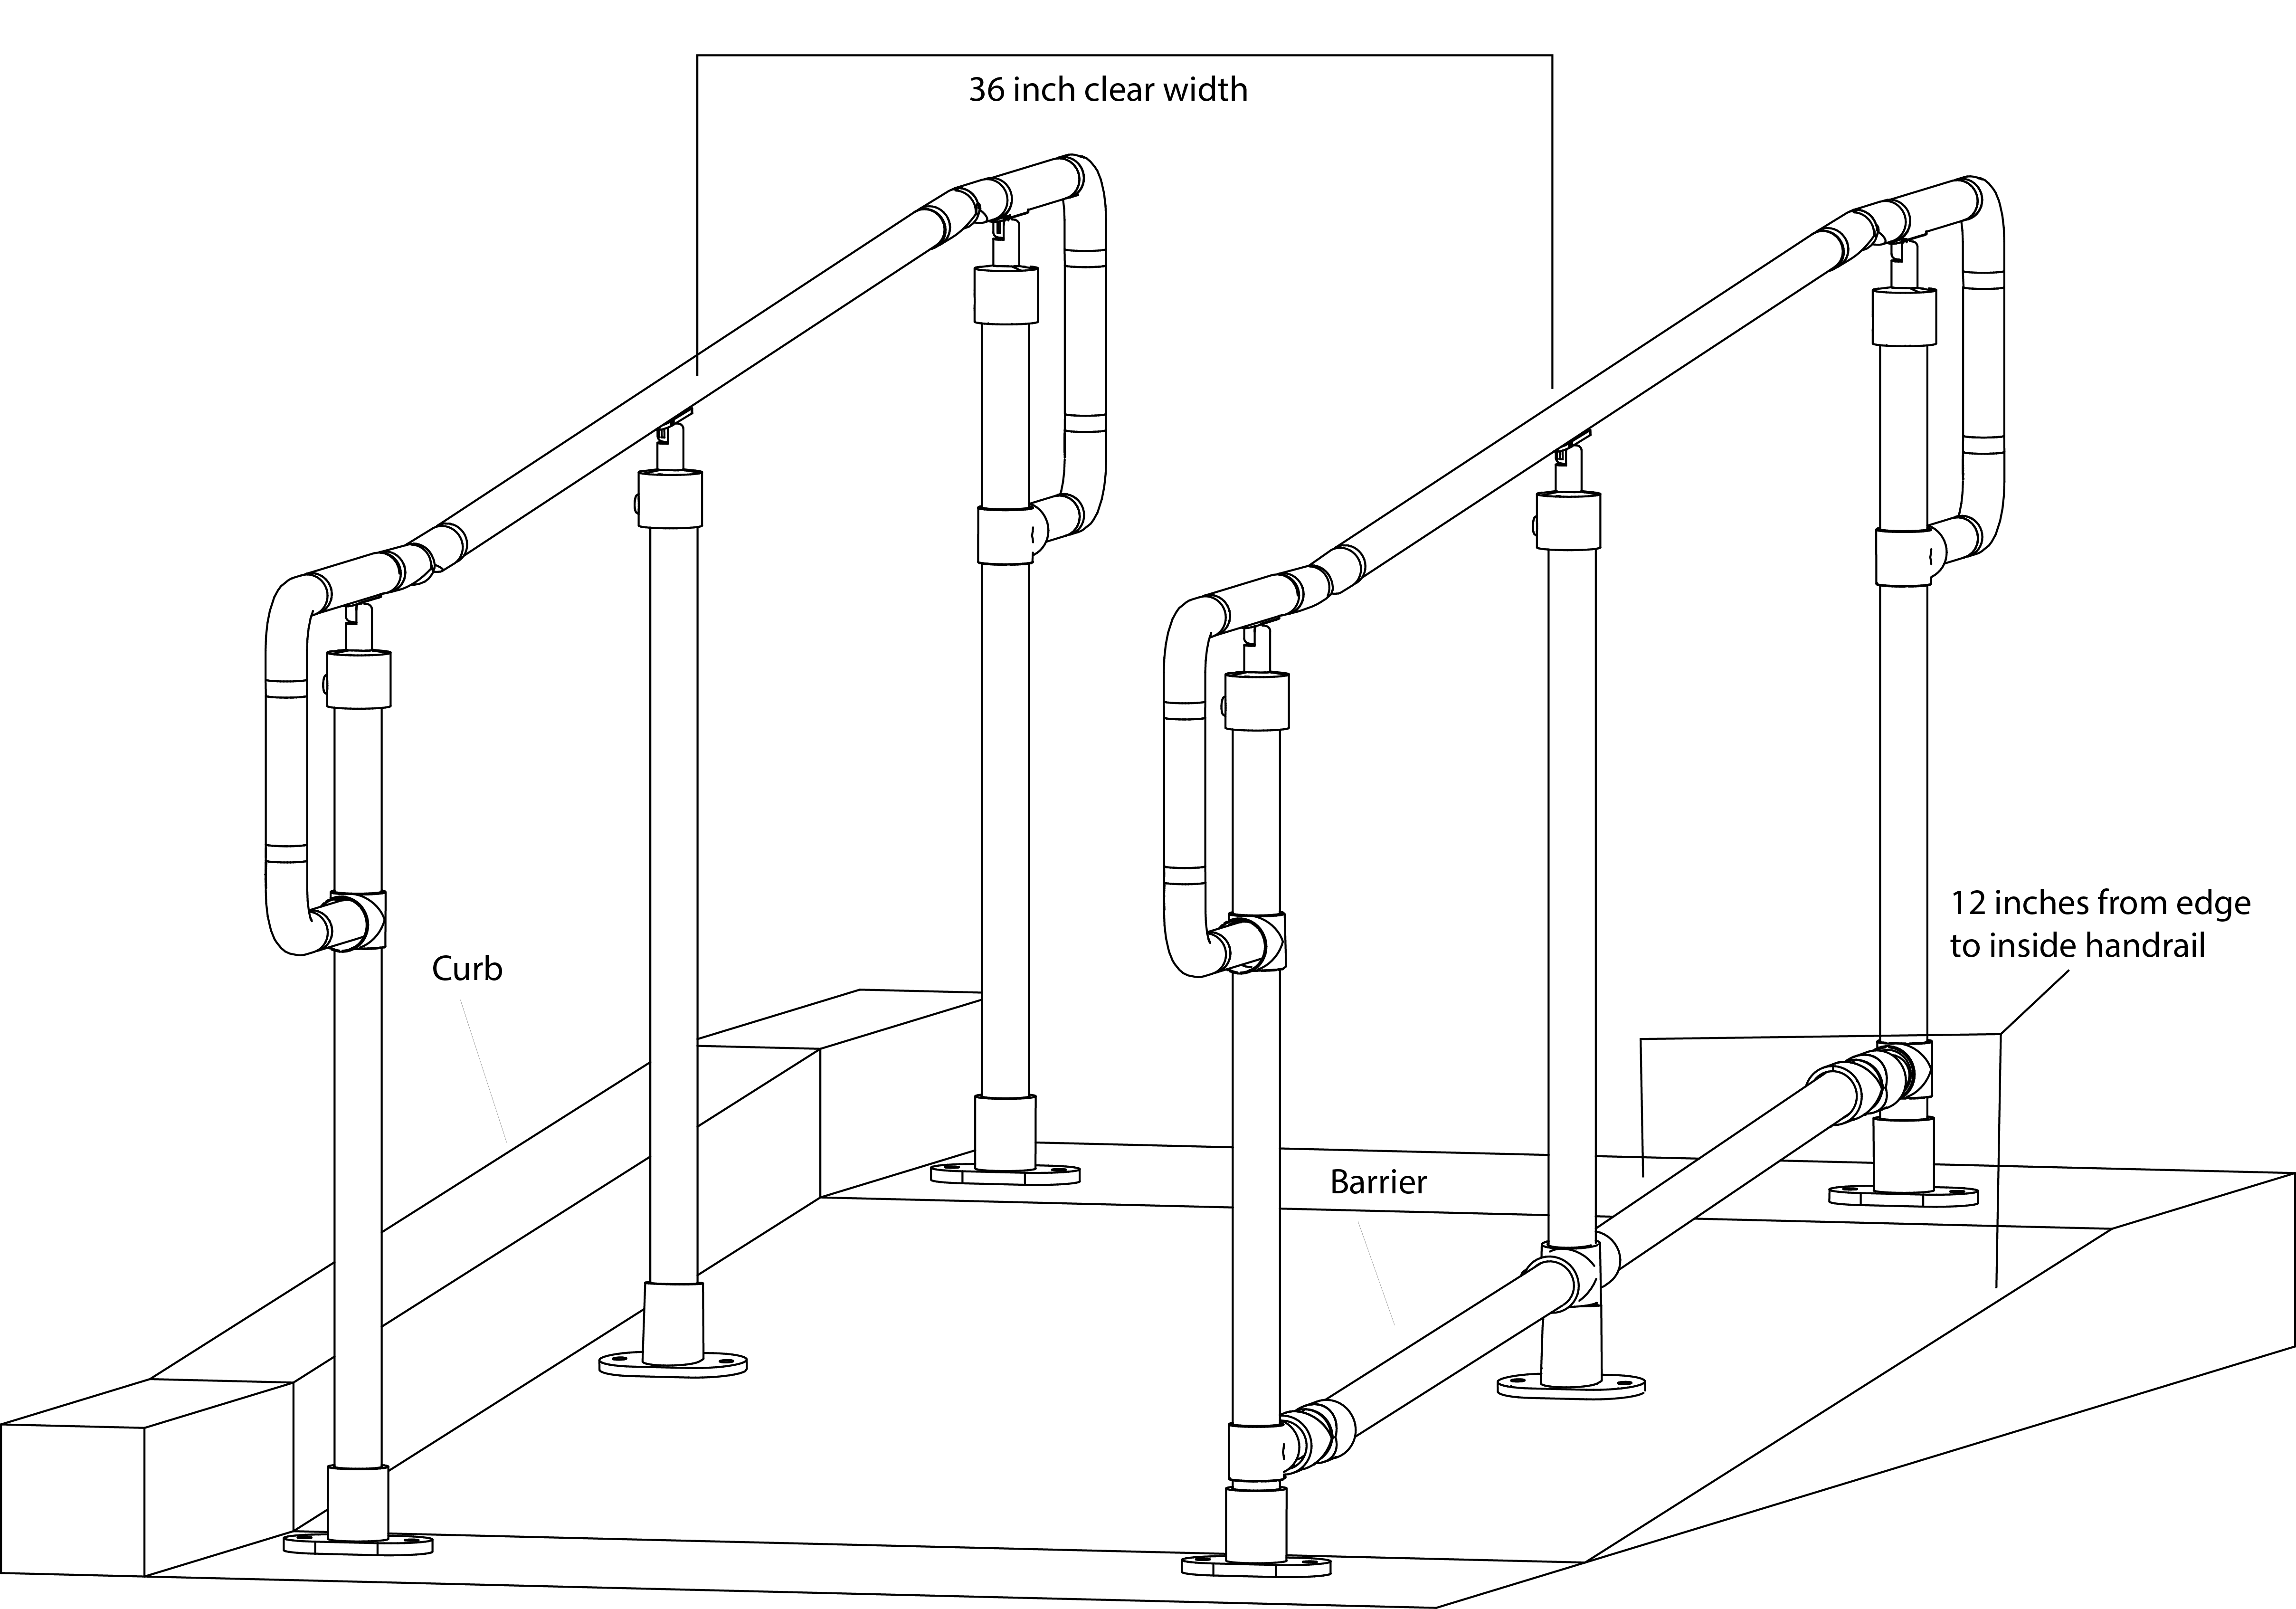
Clear Width. The clear width of a ramp run and, where handrails are provided, the clear width between handrails shall be 36 inches (915 mm) minimum.
Handrail Extensions. Handrail gripping surfaces shall extend beyond and in the same direction of stair flights and ramp runs in accordance with 505.10.
ADA Chapter 5 Section 505.10.1
Top and Bottom Extension at Ramps. Ramp handrails shall extend horizontally above the landing for 12 inches (305 mm) minimum beyond the top and bottom of ramp runs. Extensions shall return to a wall, guard, or the landing surface, or shall be continuous to the handrail of an adjacent ramp run.
A ramp is anything with a slope greater than or equal to 1:20. Handrails are required if the rise is greater than 6 inches.
ADA wheelchair ramps require that you extend the railing for 12 inches beyond the top and bottom of the ramp. Remember that the handrail height should be continuous throughout the length of the rail, so this will need to level out on both ends.
The handrail should extend in the same direction as the ramp, unless it’s a switchback, the gap is designed to gain access to a sitting area, or the extension would be hazardous.
All extensions should end into a wall, guard, or the landing surface. You may also connect it to another handrail on an adjacent stair, like with a switchback.
Wheelchair ramps have an additional requirement beyond stairs and that is the need to have edge protection. The purpose of this protection is to prevent wheelchairs and crutch tips from slipping off the surface. There are two ways to accomplish.
- You can install the handrail so that the edge of the ramp is 12 inches from the inside face of the handrail.
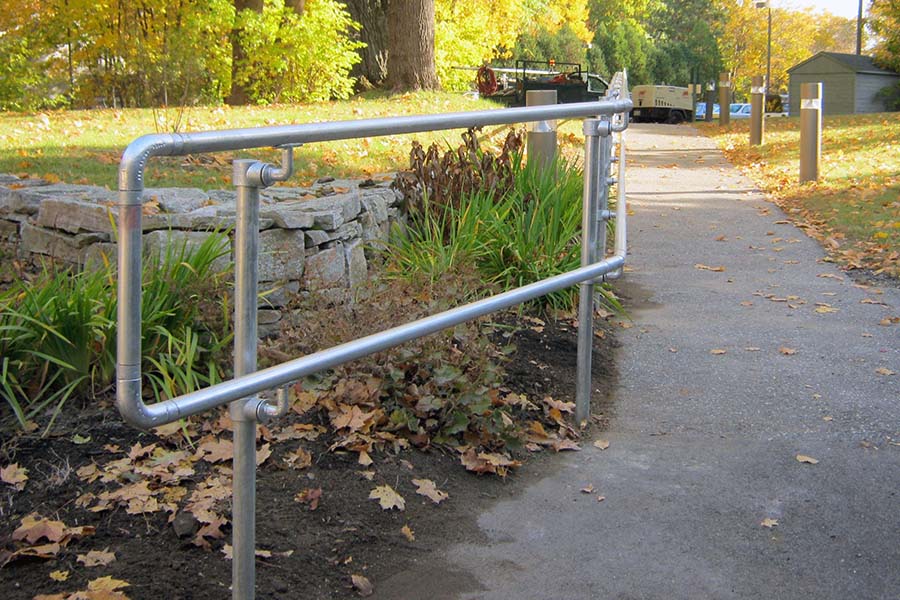
- You can provide a curb or a barrier that prevents a sphere of 4 inches from passing through anywhere the sphere can touch within 4 inches of the ramp surface. This can often look like adding a bottom rail to the handrail system or building a 4 inch concrete curb.
When designing your ADA wheelchair ramp, there are few extra things to be aware of. First, the slope should not exceed 1:12. There are exceptions if you are dealing with existing conditions, but it should never be more than 1:8. You should have a landing for every 30 inches in rise on your ramp. There is more to know and the ADA details these ramp requirements here.
Need Help with Your ADA Railing?
We've helped thousands of customers secure their stairs and ramps with ADA-compliant railing systems.
What about ADA handrails on stairs?
Handrail Extensions. Handrail gripping surfaces shall extend beyond and in the same direction of stair flights and ramp runs in accordance with 505.10.
ADA Chapter 5 Section 505.10.2
Top Extension at Stairs. At the top of a stair flight, handrails shall extend horizontally above the landing for 12 inches (305 mm) minimum beginning directly above the first riser nosing. Extensions shall return to a wall, guard, or the landing surface, or shall be continuous to the handrail of an adjacent stair flight.
ADA Chapter 5 Section 505.10.3
Bottom Extension at Stairs. At the bottom of a stair flight, handrails shall extend at the slope of the stair flight for a horizontal distance at least equal to one tread depth beyond the last riser nosing. Extension shall return to a wall, guard, or the landing surface, or shall be continuous to the handrail of an adjacent stair flight.
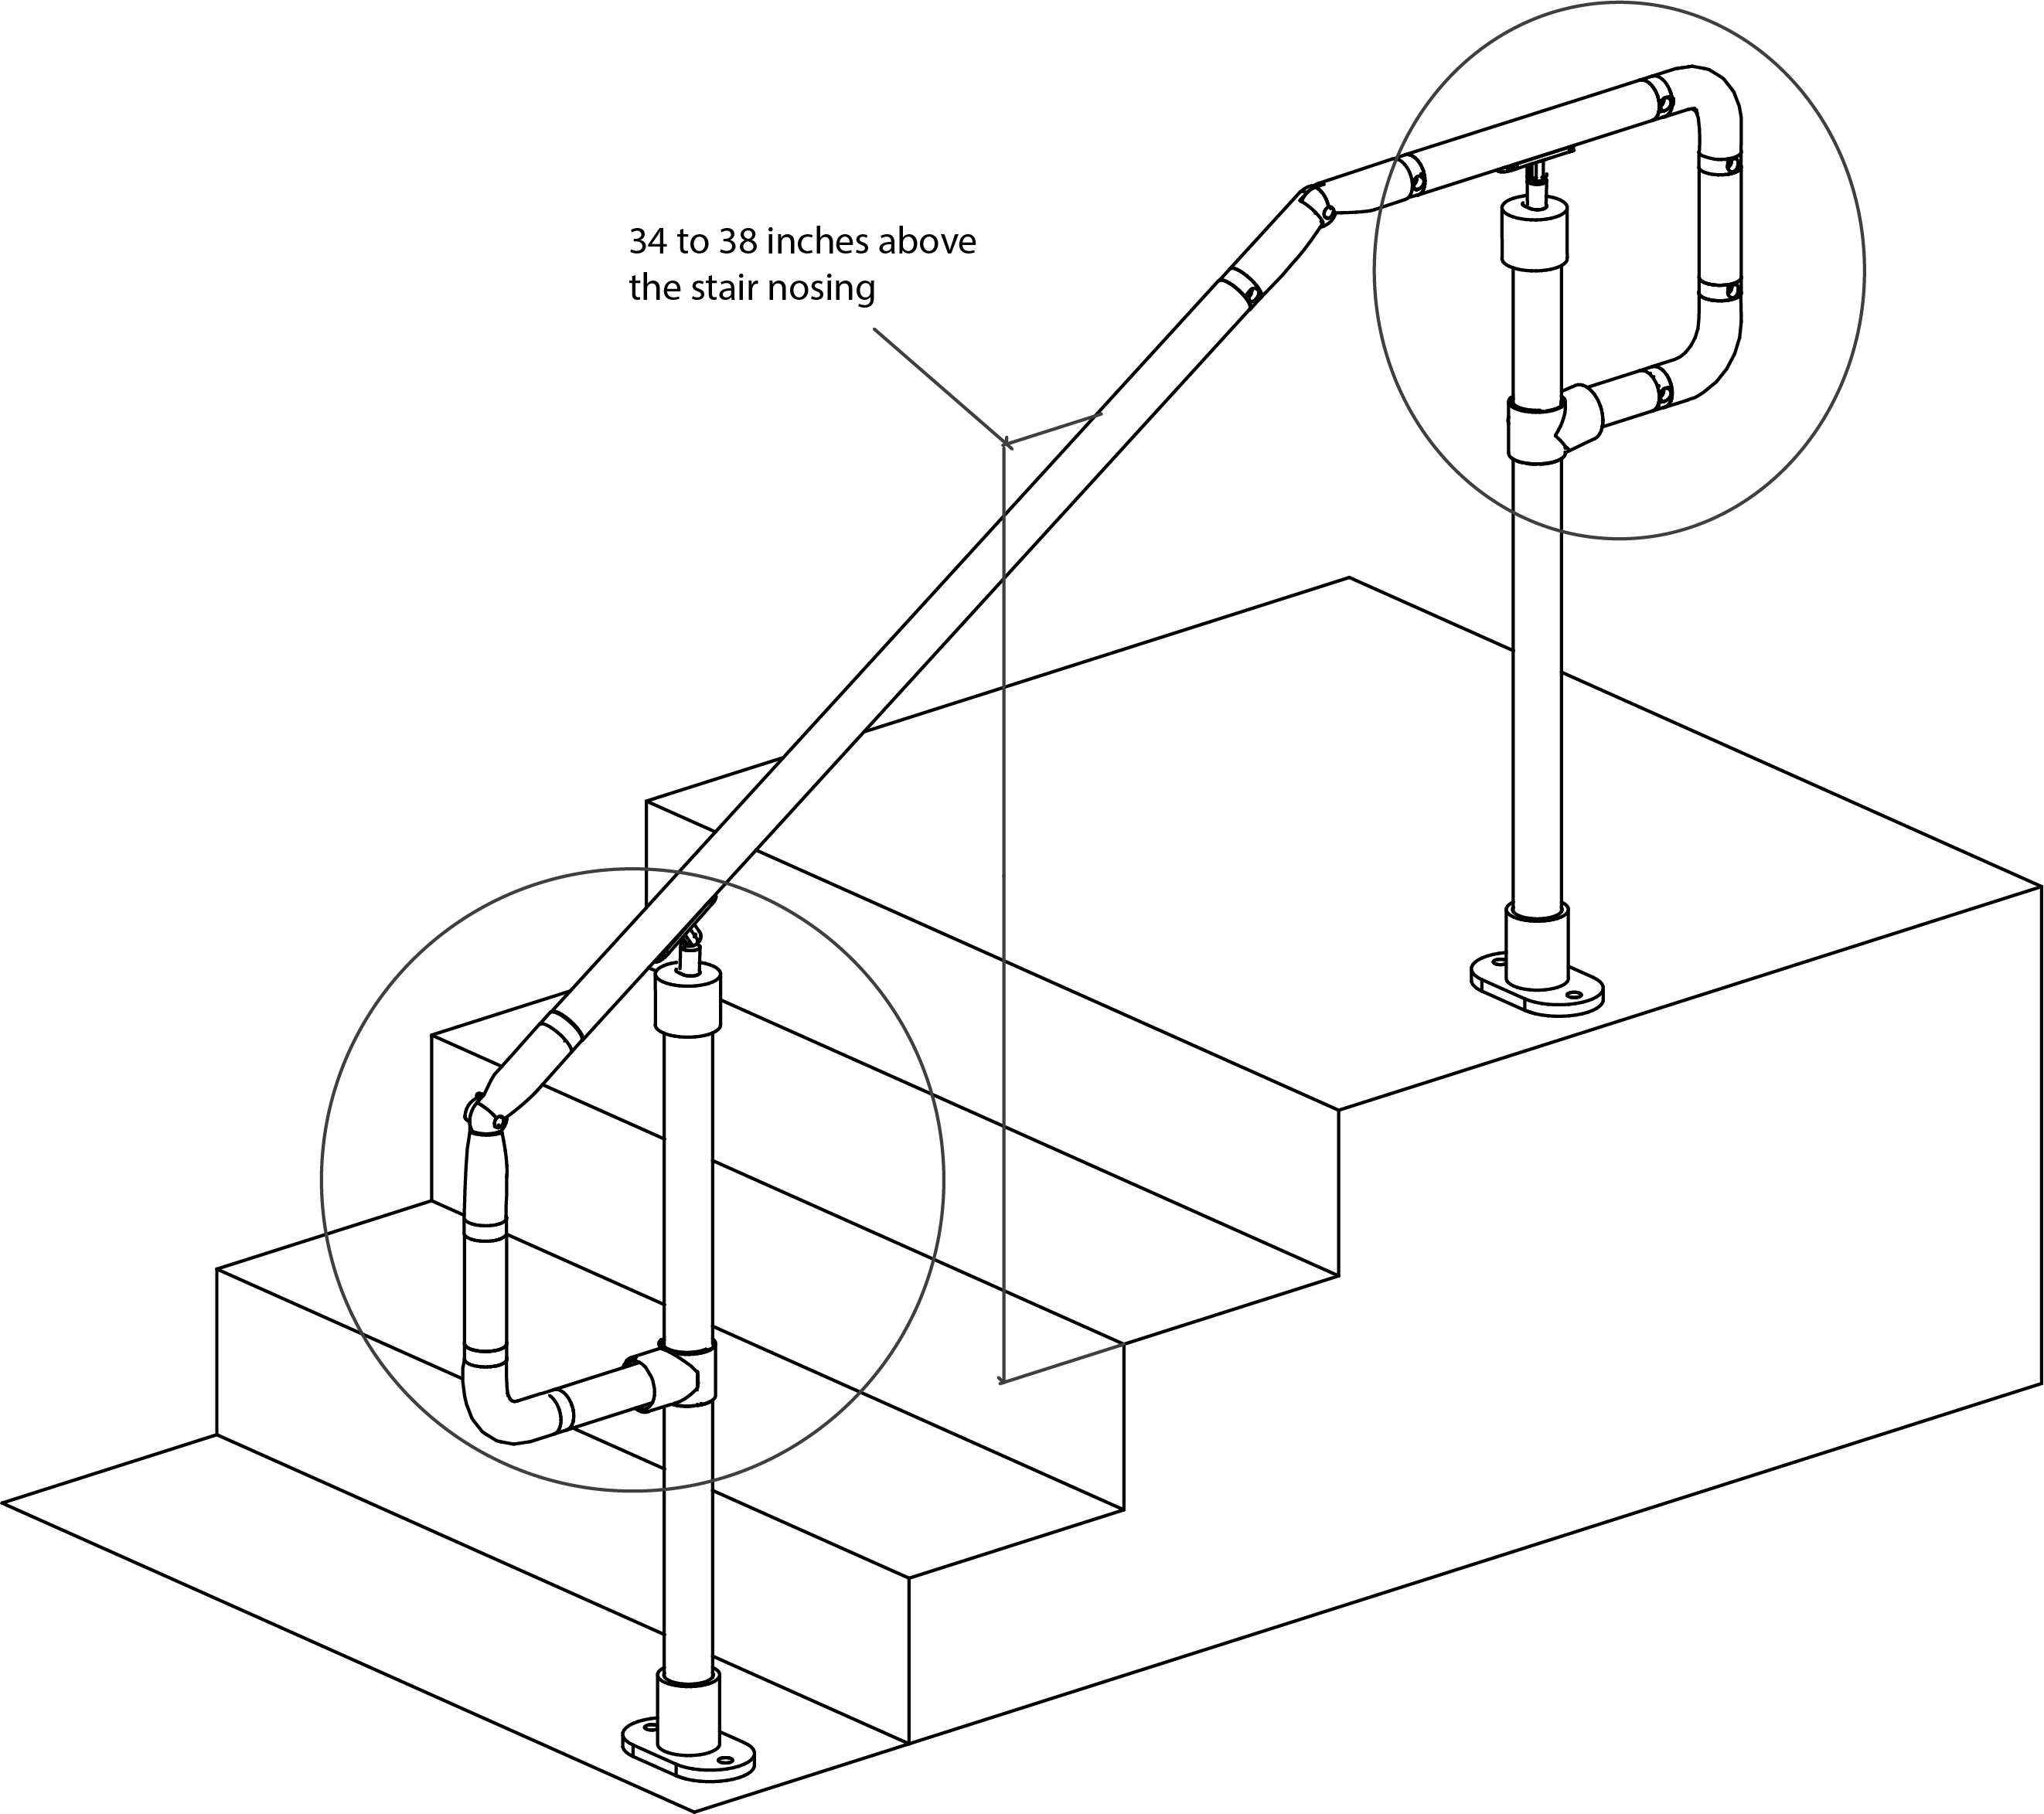
The railing on a stair should continue for 12 inches beyond the start of the top riser, which is nose of the top stair tread.
The bottom of the railing should extend horizontally the depth of one tread beyond the final stair.
As with ramps, the handrail should extend in the same direction as the stair, unless it’s a switchback or dogleg stair. This exception also applies if the gap is designed to gain access to a sitting area or if the extension would be hazardous.
All extensions should end into a wall, guard, or the landing surface. You may also connect it to another handrail on an adjacent stair, like with a switchback.
A switchback is when the stair or the ramp make a 180 degree turn at a landing. A dogleg is when a 90 degree turn is made at a landing.
Other Codes You Need to Know
At times, other codes will be applicable to your ADA railing project. They may not be required by the ADA, but they will still apply to your project. Here are the organizations that we will be referencing.
- Occupational Safety and Health Administration:
OSHA is the part of the Department of Labor responsible for setting and
ensuring compliance to standards to have a safe and healthy work
environment.
- 1910.28: This code describes when fall protection is needed, which can apply depending on the height of your landings and the access that you employ, like stairs.
- International Building Code: IBC is governed by the International Code Council (ICC) and set the standards that most local building codes adopt. This tells more about when guardrails are needed apart from the handrails required by ADA.
Need Help with Your ADA Railing?
We've helped thousands of customers secure their stairs and ramps with ADA-compliant railing systems.