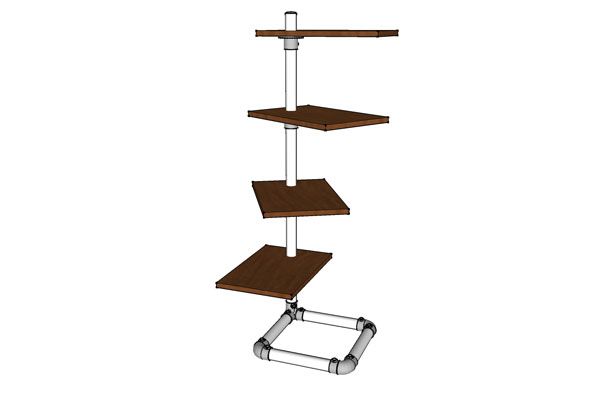
Free Standing Bookshelf: Plans to Build Your Own
If you're looking to build a free standing shelf, but aren't very experienced in woodworking, or just want a unique look, then this shelf is for you. One of our customers, Bill, sent us this latest project, which he built for the side of his bed in his bedroom. The shelf is built using a combination of Kee Lite fittings and wood. It also uses a threaded fitting at the top of the shelf. Here's what Bill had to say about it:
"I needed a small vertical shelf by my side of the bed for books and magazines and this seemed a good way to do it instead of just using wood alone. I've built other items with plumbing pipe and found Kee Klamp online during my various searches. They're far easier to use than threaded pipe and are also more flexible for design options. Once I had the pipes cut and painted and the shelves cut and finished; assembly only took about 20 minutes or so."
To show how to build this shelf, we have included diagrams and the steps below, needed to create one just like it for your home. Best of all, since our design uses Kee Lite fittings, you don't need to have much, if any, building any experience to put it together. So follow along and learn how to build your own, free standing shelf:
What You'll Need:
For this project, you will need to use Kee Lite fittings. Reason being, is that the Kee Lite Flange (L61) allows pipe to slide completely through the fitting, while the Kee Klamp Flange (61), does not allow pipe to slide through. Here are the fittings you will need:
Parts you'll need


Assembling the Shelf:
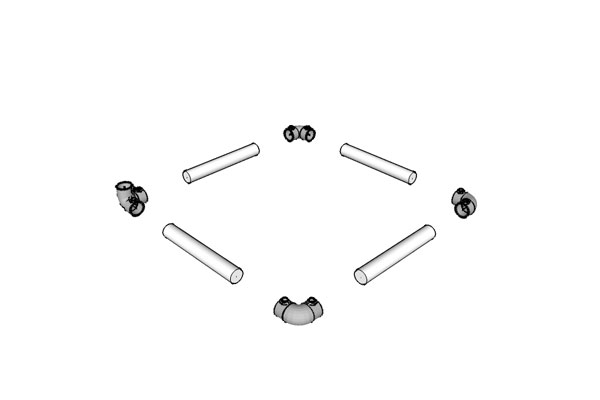
Figure 1
To build the shelf, you will start by assembling the base. The base requires three 90 Degree Elbow fittings and one Side Outlet Elbow fitting.
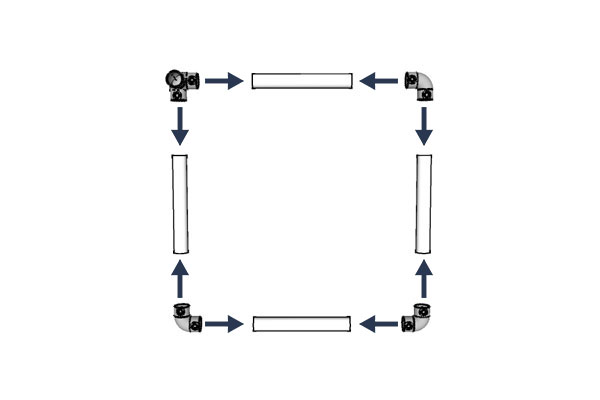
Figure 2
The exact order in which you connect the fittings does not matter, but they should come together as shown in the image above (Figure 2). The fittings will connect to the sections of pipe by tightening down the set screw, on each of the fittings, once the pipe is in place. To do this, all you will need is an Allen Wrench to tighten down the set screw and solidify the connection.
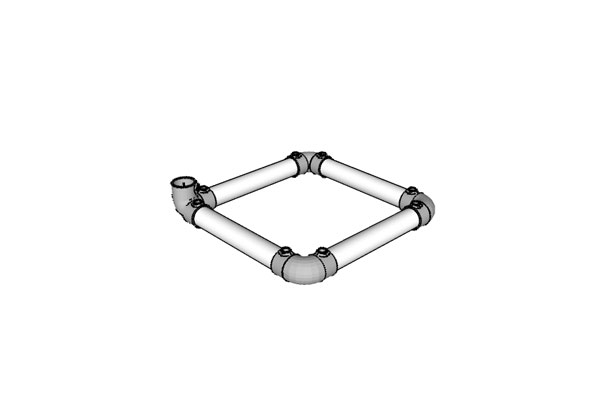
Figure 3
With the base assembled, it should look like the image above (Figure 3).
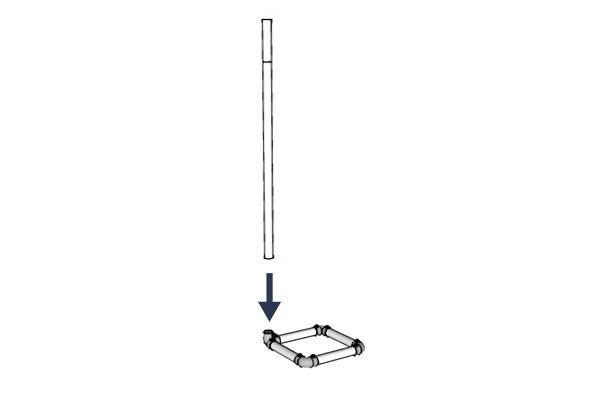
Figure 4
From there, you can slide the large length of pipe, used for the vertical support, into the base. The pipe will slide into the open socket on the Side Outlet Elbow. Once it's in all the way, tighten the set screw, using an Allen Wrench, to secure it to the base.
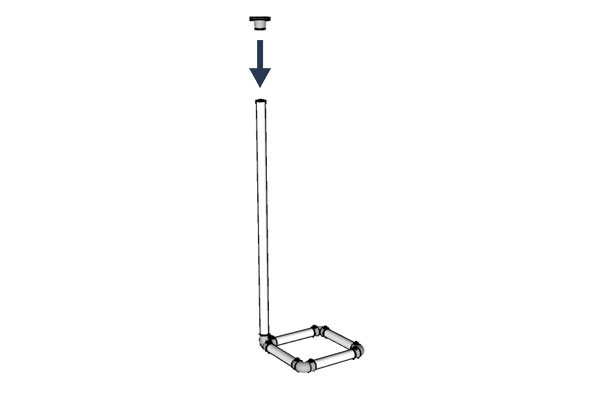
Figure 5
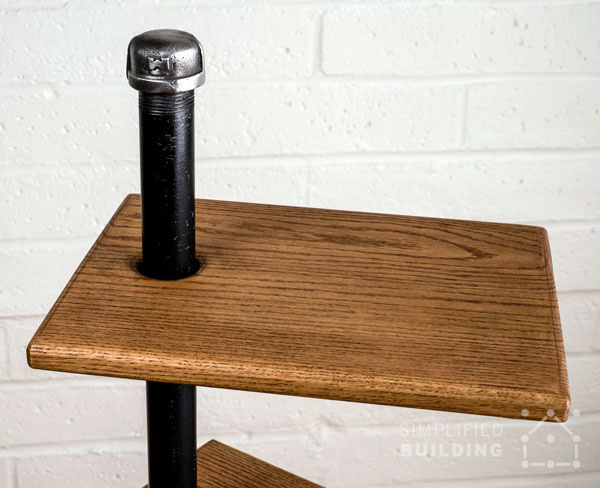
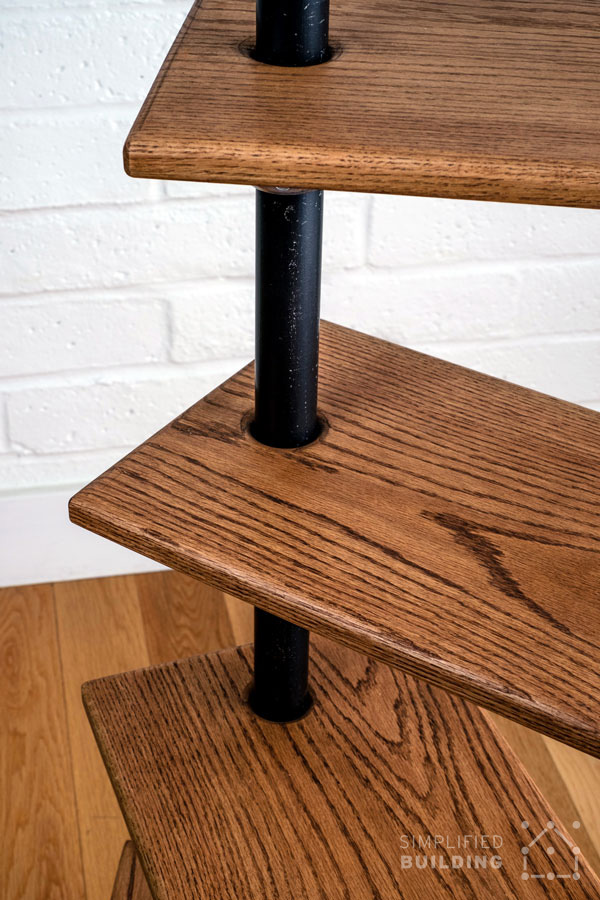
Now, slide the first flange fitting onto the vertical support. You can position the fitting at whatever height you like. The same goes for the rest of the flange fittings. But keep in mind, each shelf will be mounted to one of these flange fittings. You can use equal spacing for a uniform look or uneven spacing for a more unique look.
Note, that since the fittings are secured using a set screw, they can be adjusted in the future. Meaning, you don't have to stick with the same spacing forever. Or in other words, you can adjust the spacing of the shelves in the future, should you ever desire to do so.
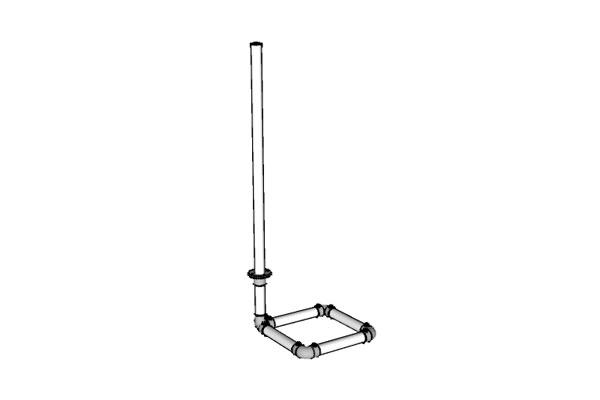
Figure 6
Your shelf so far should look like the image above (Figure 6).
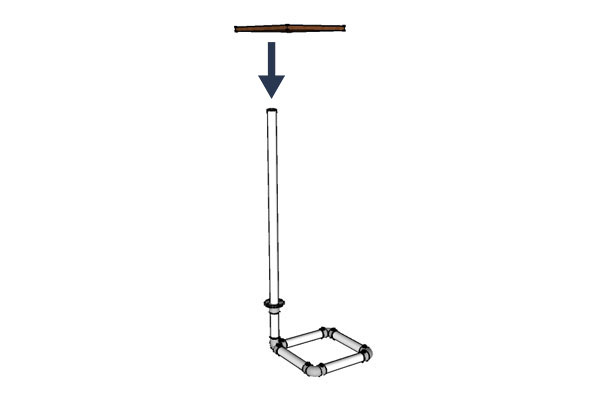
Figure 7
With the first flange fitting positioned and secured, you can now slide the first shelf onto the vertical support. You will need to drill holes in the shelves, large enough to fit around the pipe, prior to doing this. If you are unsure of how to do this, here's a good article on how to properly use a hole saw to create large holes in wood: "How to Properly Use a Hole Saw"
Once the shelf is up against the flange, you can secure the shelf to the fitting. The flange fitting has four holes in it for mounting. If you are using wood for the shelves, you can use wood screws to mount the shelves to the fitting.
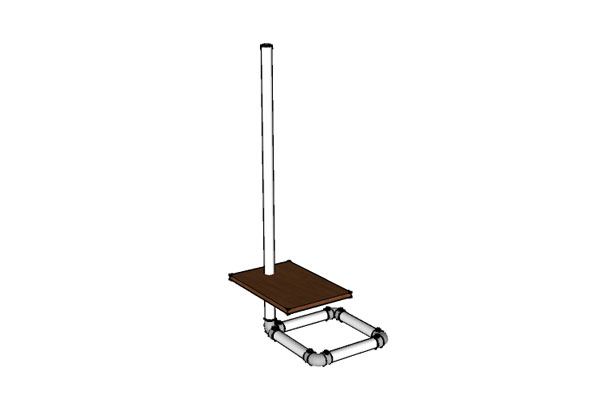
Figure 8
At this point, your shelf should look like the image above (Figure 8).
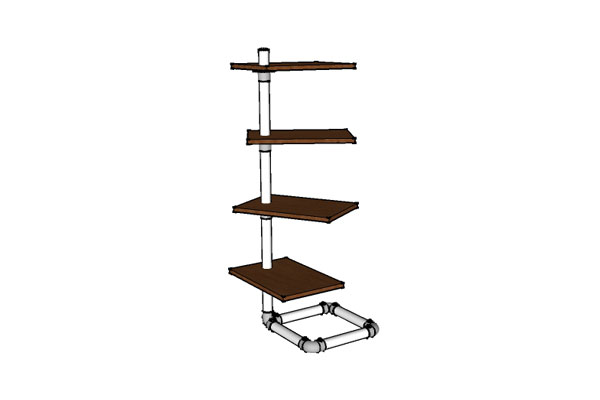
Figure 9
Now, just repeat the steps used for the first shelf, to attached the rest of the shelves.
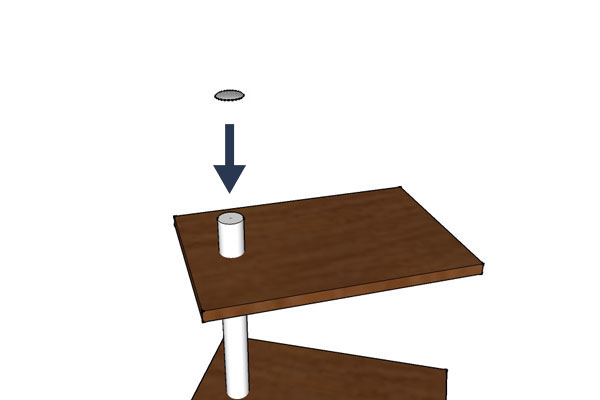
Figure 10
Finally, you can cap off the exposed end of pipe, on the vertical support, using the Malleable Plug. Place the plug into the open end on the pipe and hammer it in using a soft mallet. You could also use a hammer, with a piece of cardboard over the plug, in order to keep from damaging or scratching the plug.

Figure 11
Specs:
- Width: 1'
- Depth: 1'
- Height: Configurable (Standard 5')
Assembly:
- One Lunch Time
- Allen Key, Hardware to Attach Shelves to Frame
What's included:
What's not:
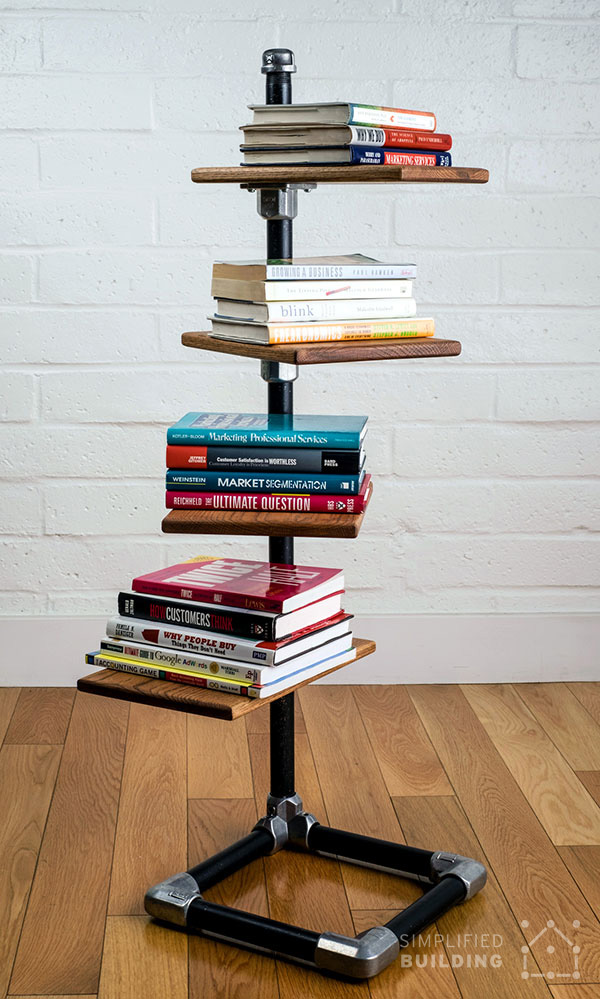
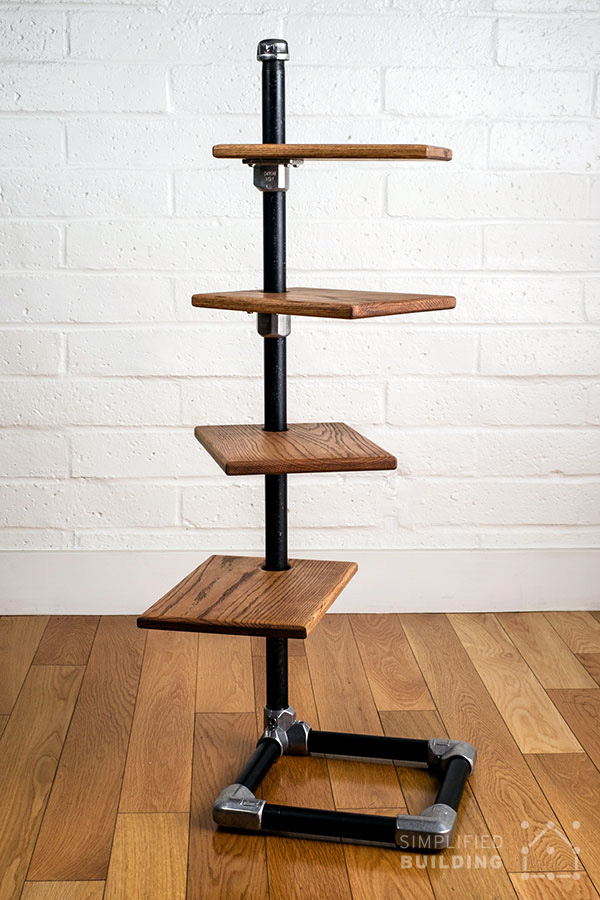
And there you have it, you should now have a complete, free standing shelf, like the image pictured above (Figure 11).


If for any reason you need any help, or would like some assistance with a similar design, feel free to reach out to our projects team for free design assistance. Also, to get updates on more projects like this, be sure to sign up to our newsletter below.


