5 Popular Pipe Shelves & How To Build Them
One of the most popular projects that many of customers like to build are industrial pipe shelves. Kee Klamp makes for a great material for building these shelves because of its strength, adjustability, and ease of use. Being able to set and adjust the height as well as the spacing of each shelf is a huge bonus.
To help get you started creating your own pipe shelf, here are 5 of the more popular pipe shelf designs we have seen over the years and how you can build each of them:
Wall & Base Mounted Pipe Shelf
Description:
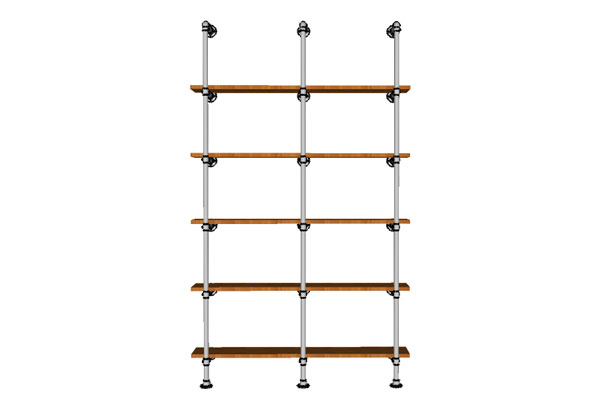
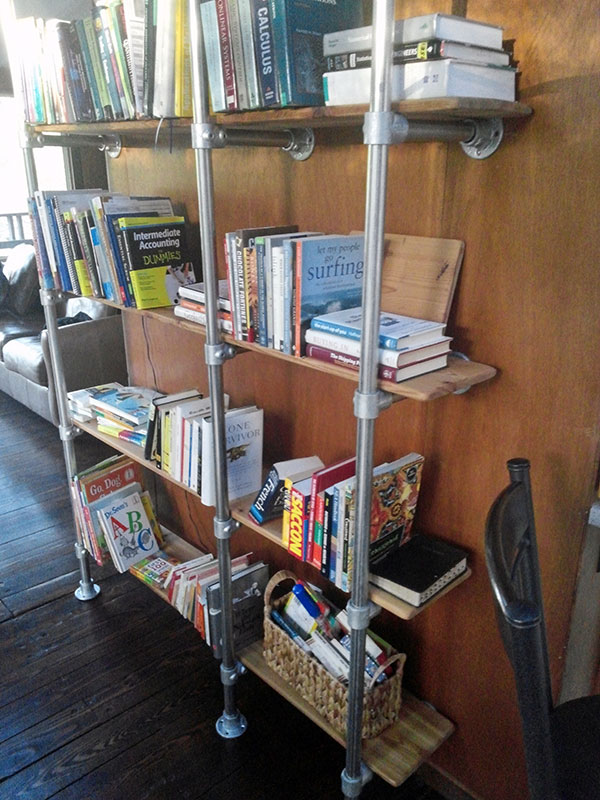
This shelf is mounted to both the ground and the wall using a series of Flange fittings. It requires at least two vertical supports, however in this example, three are shown. Each vertical support features horizontal supports for the shelves to rest on. Often, customers choose to use wood planks for the shelves that then rest on the horizontal pipe supports.
Parts you'll need


Wall & Base Mounted Pipe Shelf
- Sleek, Modern Design
- Easy to Assemble
- Super Strong and Resistant to Rust
How To Assemble
Figure 1.1
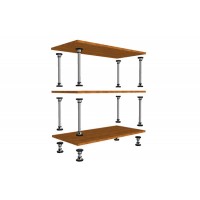
As with any project, there are often multiple ways to build it. The simplest approach with this shelf will be to completely construct each vertical support (as pictured above) and then slide each wood plank over the supports to create the shelves. Plus, doing it this way ensures you assemble the support correctly before drilling into the wall.
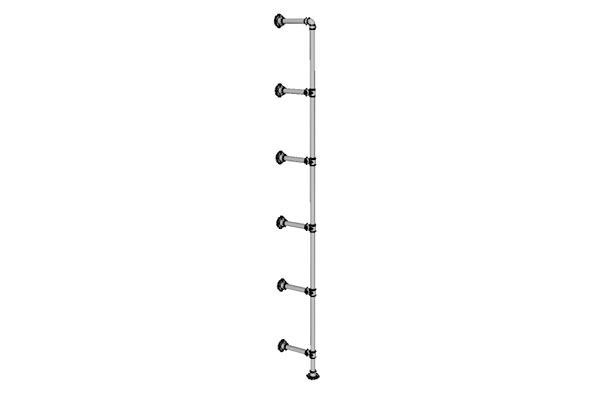
Start by sliding the longer length of pipe into the Flange fitting, and tighten down the set screw, to create the base. Now slide the Single Socket Tee fittings onto the pipe, set the desired spacing using a measuring tape, and tighten down the set screws. The space in between these fittings will represent the amount of spacing for your shelves. Slide the 90 Degree Elbow on to the top of the pipe and tighten down to cap off the vertical support.
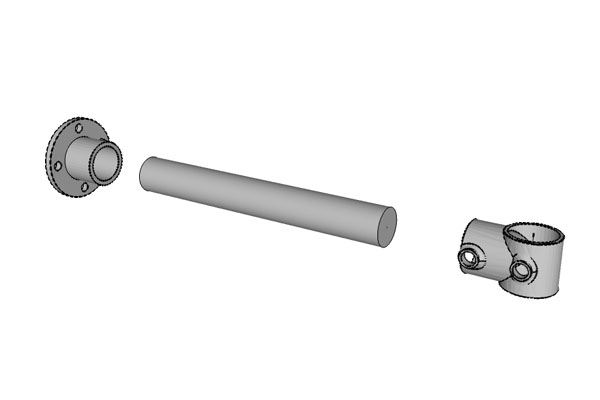
Figure 1.2
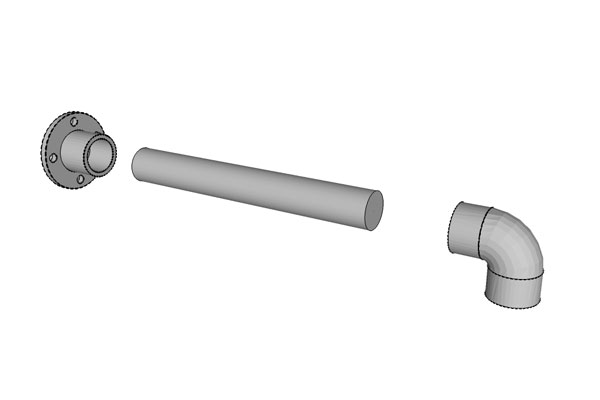
Figure 1.3
Now slide the shorter lengths of pipe into each of the socket ends on the Single Socket Tee fittings and the 90 Degree Elbow. Then tighten down the set screw to create the connection. Now you can slide the Flange fittings onto each of these pipes and tighten down (Figures 1.2 & 1.3). You should now have a support that looks like the first picture above (Figure 1.1). Repeat this process for all of the vertical supports to be used in the shelf (See Figure 1.4 picture below)
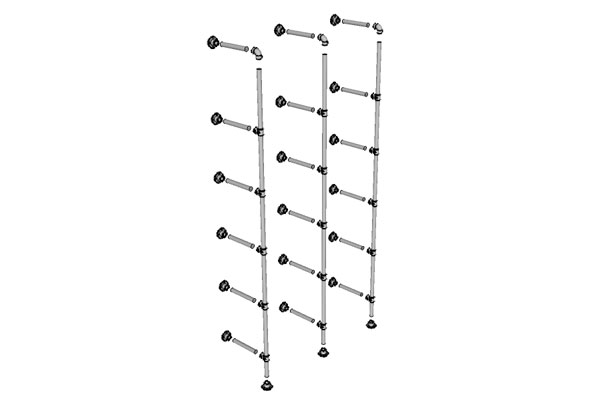
Figure 1.4
From here you can line the vertical support up to the wall and mark holes where the Flange fittings will attach. It might be worth using a Plumb Line to help make sure you line up the support perfectly straight. Also, you may consider using a stud finder to help find a stud to screw into, or if you can not attach to a stud, make sure you use the proper dry wall anchor to provide enough support for the shelf. Once you have the holes marked, drill into the wall and attach the Flange fittings using your desired hardware. Once all the vertical supports are in place, you can now slide the wood planks over the horizontal supports to create the shelf.
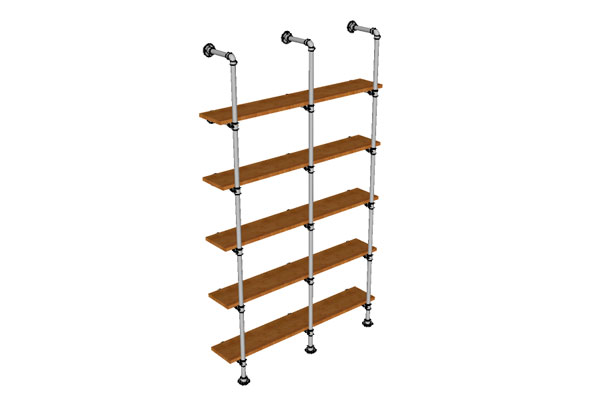
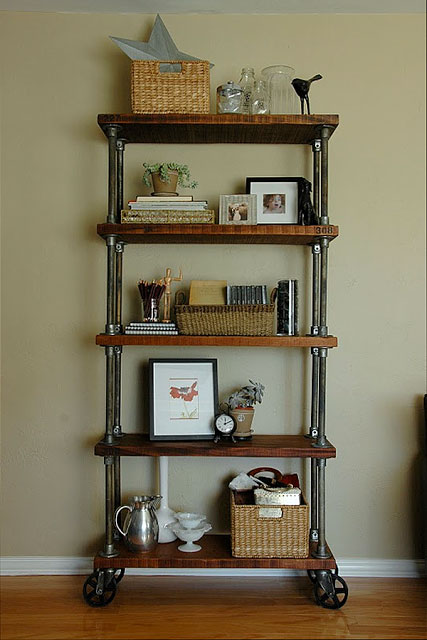
Figure 1.5
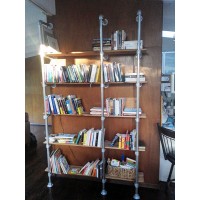
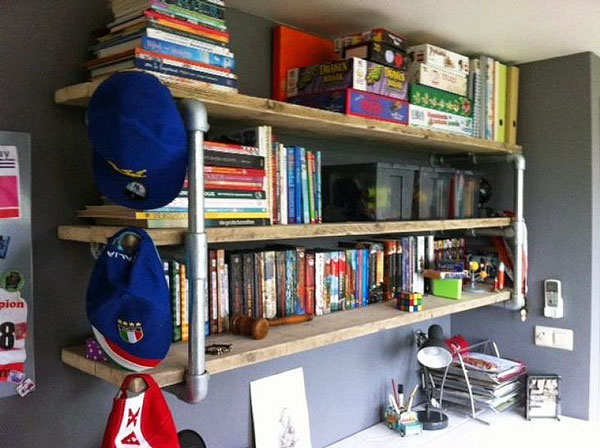
Examples

Infill Box Pipe Shelf
Description:
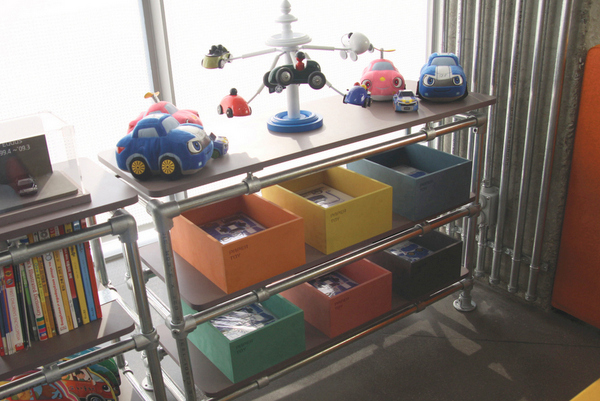
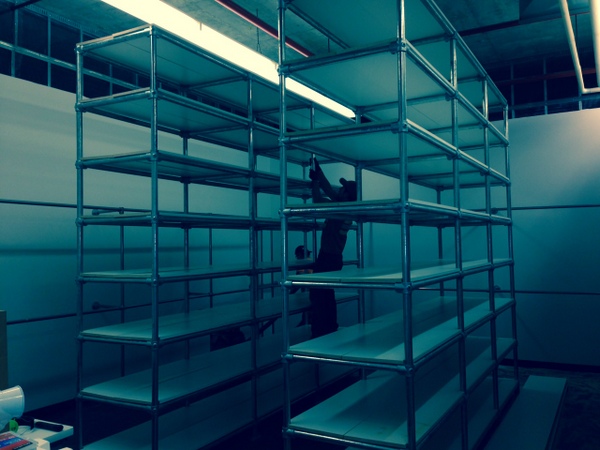
The Infill Box Pipe Shelf utilizes a design that surrounds the shelves and features notches in the corner of each shelf to allow the pipe to slide through. The shelf is typically free-standing with variations that can allow the structure to be mounted to the floor or ceiling to provide additional stability.
Parts you'll need


Infill Box Pipe Shelf
- Sleek, Modern Design
- Easy to assemble
- Super strong and resistant to rust
How To Assemble:

Figure 2.1
The best approach will be to build each of the side supports (as pictured in Figure 2.3 below) and then connect them using the horizontal pipes (as pictured in Figure 2.1 above).
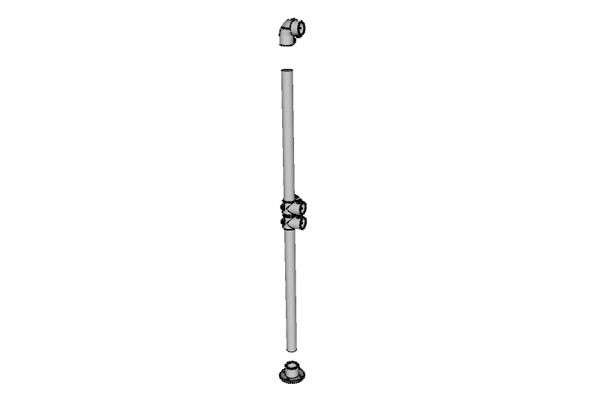
Figure 2.2
Start by sliding one length of pipe into the Flange fitting and tighten down the set screw. Then slide the 90 Degree Side Outlet Tee fittings onto the pipe, set the desired spacing using a measuring tape, and tighten down. You can then cap off the support by sliding the Side Outlet Elbow onto the top of the pipe (See Figure 2.2 pictured above). Repeat this step for the four corner supports.
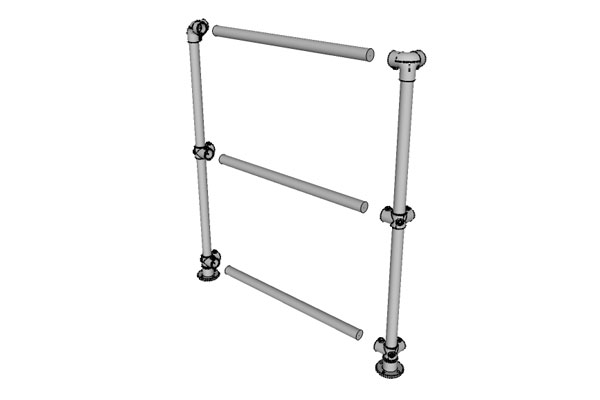
Figure 2.3
From here you can assemble the side supports by connecting two of the corner supports together by sliding pipe into each of the sockets and tightening down (See Figure 2.3 pictured above).
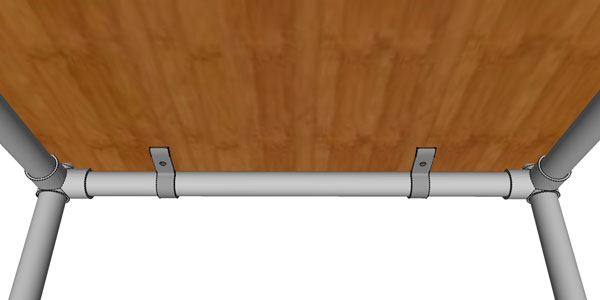
Figure 2.4
With the side supports assembled you can connect them using the horizontal pipes (see Figure 2.1 pictured above). This may be a good time to insert the wood shelves when you do this. Each of these shelves should have a notch in the corner to fit into place (other than the top shelf). The shelves can be attached to the pipe frame using the Sheeting Clip. Slide the Sheeting Clip under the pipe so that it lines up with the wood shelf (see Figure 2.4 pictured above). Then drill into the wood planks and secure it using your desired hardware. The tension creating by the Sheeting Clip will hold the shelves into place. Repeat this process for all of the wood planks to create the shelf
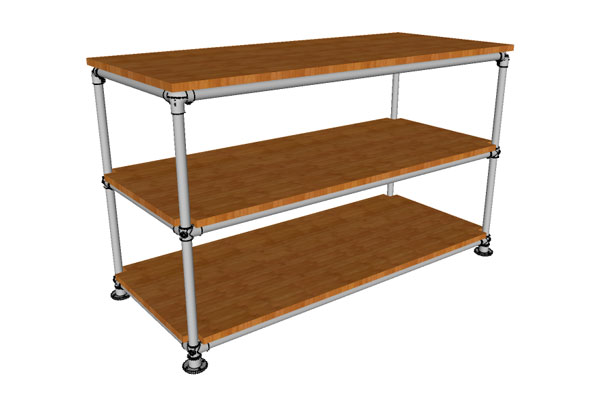
Figure 2.5
Examples
Floating Box Pipe Shelf
Description:
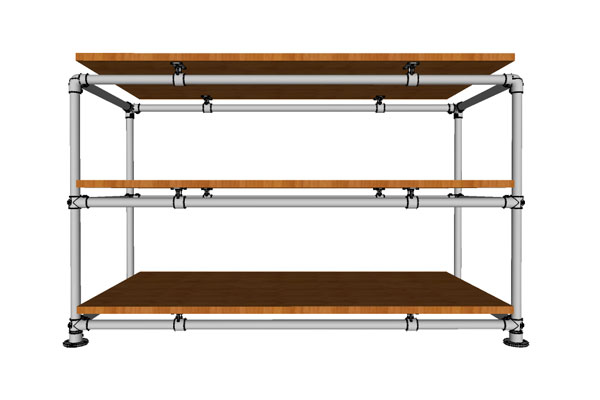
The Floating Box Pipe Shelf utilizes a design that surrounds the shelves just like the Infill Box Pipe Shelf. However, instead of the shelves fitting into place using a notch in each corner, the shelves are attached using the Rail Support fitting. The shelf is typically free-standing with variations that can allow the structures to be mounted to the floor or ceiling to provide additional stability.
Parts you'll need

Floating Box Pipe Shelf
- Sleek, Modern Design
- Easy to assemble
- Super strong and resistant to rust
How To Assemble
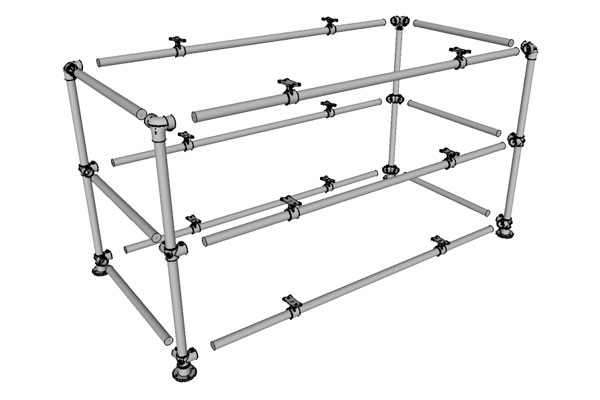
Figure 3.1
The process of assembling the Floating Box Pipe Shelf is very similar to the Infill Box Pipe Shelf above instead using Rail Support fittings to attach the shelves rather than the shelves resting on the pipe. You will follow the same instructions for the most part.
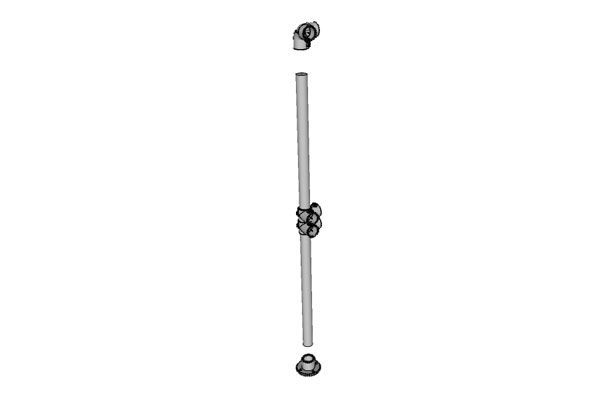
Figure 3.2
Start by sliding one length of pipe into the Flange fitting and tighten down the set screw. Then slide the 90 Degree Side Outlet Tee fittings onto the pipe, set the desired spacing using a measuring tape, and tighten down. You can then cap off the support by sliding the Side Outlet Elbow onto the top of the pipe (See Figure 3.2). Repeat this step for the four corner supports.
Figure 3.3
From here you can assemble the side supports by connecting two of the corner supports together by sliding pipe into each of the sockets and tightening down (See Figure 3.3 above).
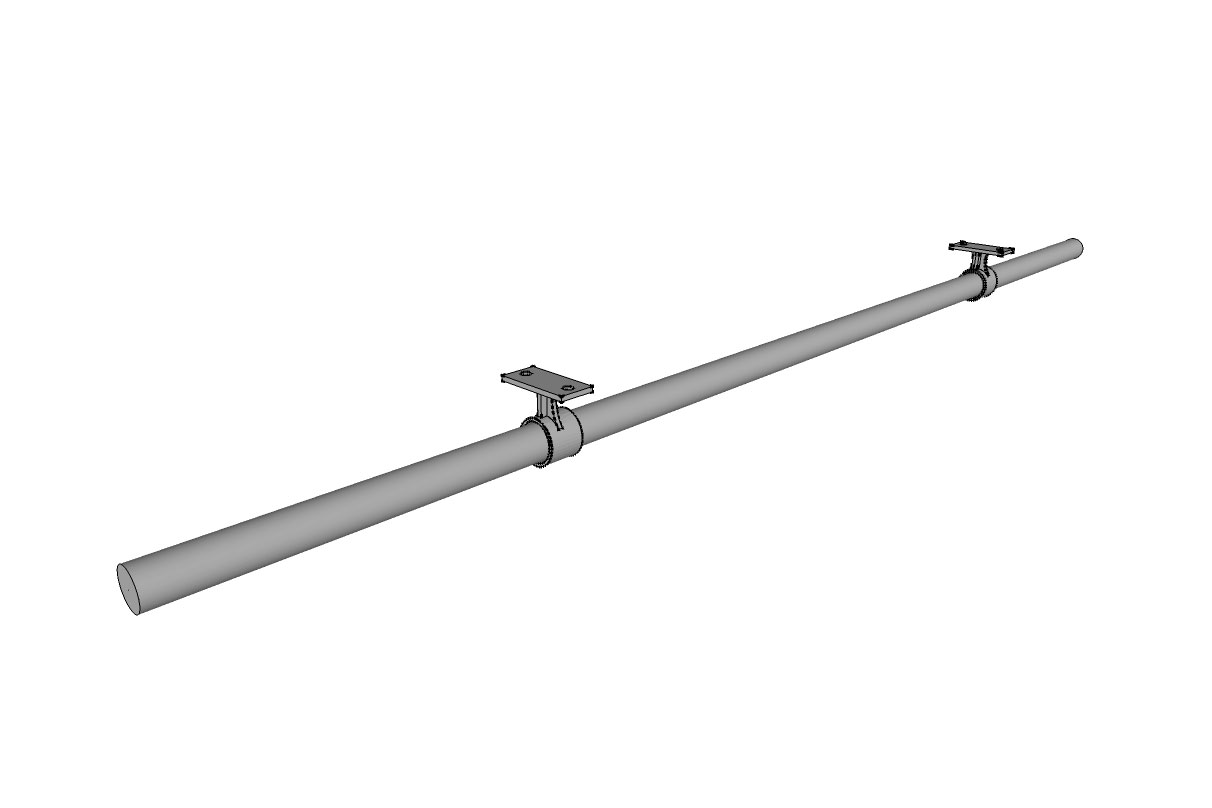
Figure 3.4
Now before you connect the side supports together, you will want to slide the Rail Support fittings onto the horizontal pipes that will be used to connect the side support. Slide two Rail Support fittings on to each of these pipe and tighten down (see Figure 3.4 pictured above).
Now you can connect the side supports using the horizontal pipes. Now the shelf frame should be assembled. From here you can slide the wood shelves into place and mark holes where the Rail Supports will attach. Drill into the wood and attach the wood to the Rail Support fittings to complete the shelf.
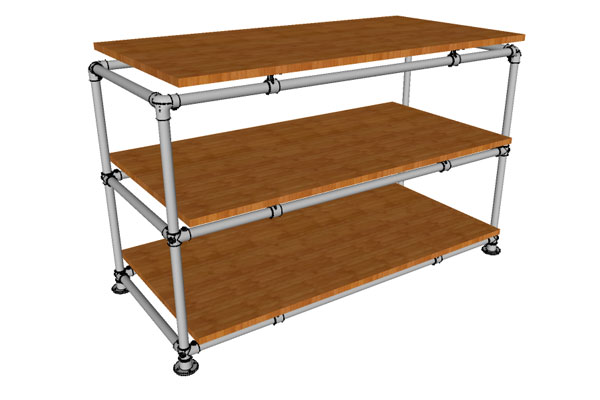
Figure 3.5
Examples
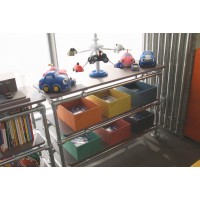
Stacker Shelf
Description:
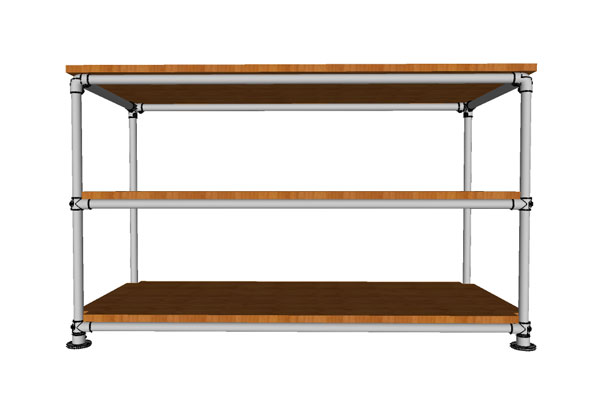
The Stacker Shelf is the simplest shelf on this list requiring the use of just one type of fitting to assemble it. The shelves appear to stack atop one another separating by pipe in between. This shelf is typically free-standing.
Parts you'll need
How To Assemble
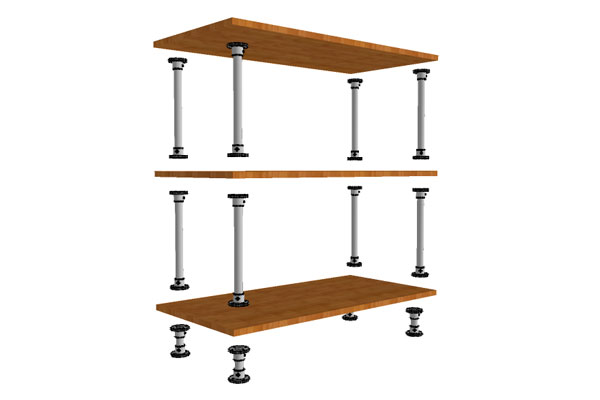
Figure 4.1
The simplest approach will be to start from the bottom of the shelf and work your way up. Place the flange fitting down, slide the pipe into the socket, and tighten down the set screw. Then do the same thing for the opposite side. You should now have a length of pipe with Flange fittings on both sides (See Figure 4.2 pictured below). Do this for the four supports.

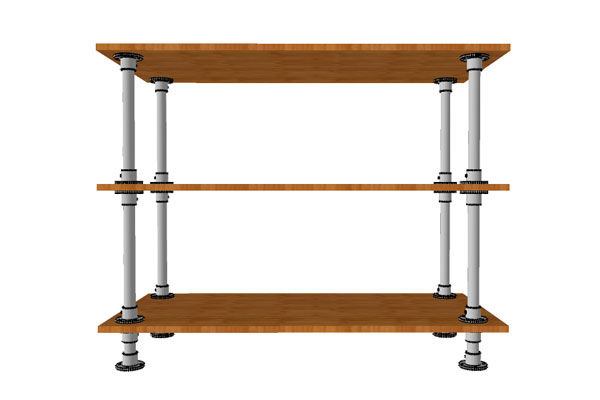
Figure 4.2
Now you can place the shelf over the Flange fittings, and secure then by attaching the fittings to the shelf. You can repeat this process, stacking the shelves on top of another, until you have the desired number of shelves.

Figure 4.3
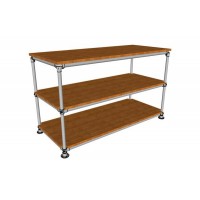
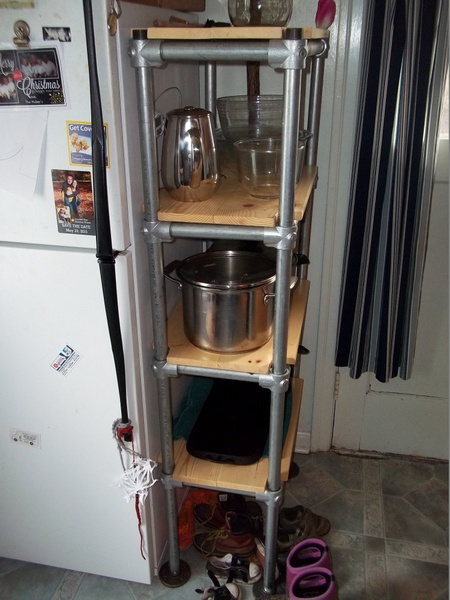
Examples
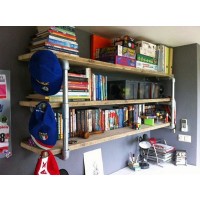
Wall Mounted Pipe Shelf
Description:
The Wall Mounted Pipe Shelf is secured to the wall and appears to float in the air. In this design, wood planks are placed over the horizontal supports to create the shelves.
Parts you'll need

Wall Mounted Pipe Shelf
- Sleek, Modern Design
- Easy to assemble
- Super strong and resistant to rust
How To Assemble
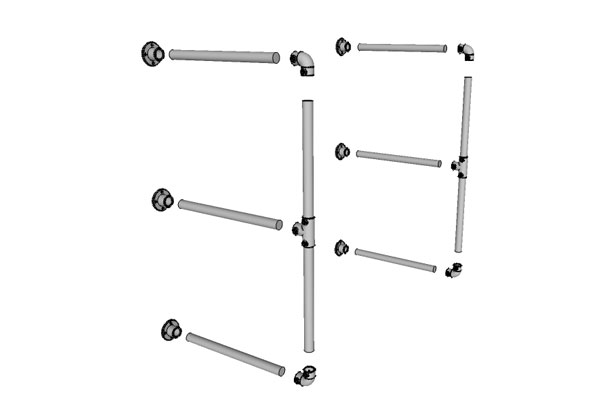
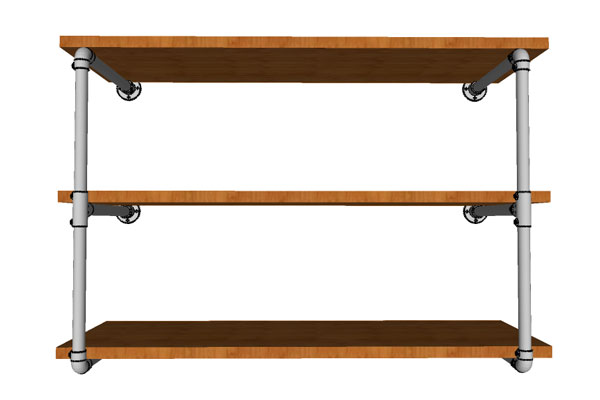
Figure 5.1
The best approach will be to assemble each of the side supports and then mount each to the wall. This will allow you to dry fit the fittings and ensure the shelf frame is exactly how you want it before drilling into the wall.
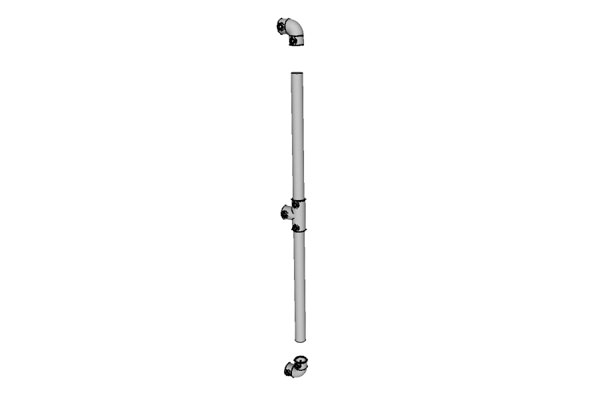
Figure 5.2
Start by forming the vertical section of the supports. Slide one length of pipe in the 90 Degree Elbow and tighten down the set screw. Then slide the Three Socket Tee onto the other side and tighten down. From there you can slide the other length of pipe into the open socket end on the Three Socket Tee and tighten down. Cap it off by adding the 90 Degree Elbow (See Figure 5.2 pictured above for a mock assembly).
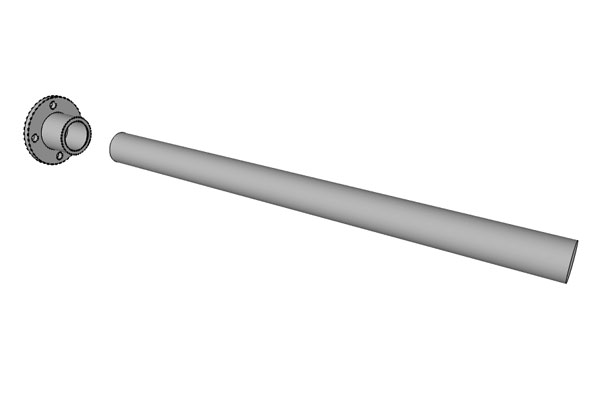
Figure 5.3
Now slide each length of pipe into its respective Flange and tighten down. Then you can slide this piece into their respective sockets on the vertical supports you just assembled. You should now have one of the supports completely assembled. You will repeat this process to create the other support.
Once complete, line it up to the wall and mark holes where the Flange fittings will attach. You will want to make sure that you either drill into a stud or that you use the proper dry wall anchor to ensure there will be enough support for the shelf. With the holes marked, drill into the wall and attached the supports using your desired hardware. Once the supports are up, you can add the shelves by placing them over the horizontal supports.
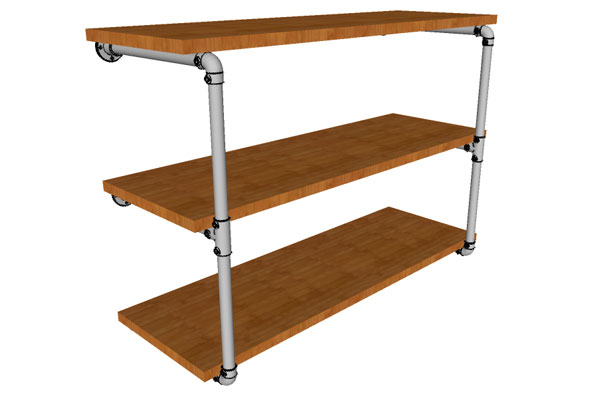
Figure 5.4
Examples
If you are still having trouble assembling your shelf or need design assistance, contact our Projects Team and they will be happy to help. For more inspiration, try browsing the shelving section of our Projects area to come up with your own personal design.


