DIY Reclaimed Bowling Alley Table (Built with Pipe & Fittings)
Being a writer for the Simplified Building blog, I get to see a ton of unique projects that customers build and cover them in full detail. I get to see the joy they get out of creating something truly one-of-a-kind and the reward of building something themselves.
That's something that I try to embrace in my own life as I too, enjoy going the DIY route. So when it came time to move to a new place and add new some new furniture, rather than go with a store-bought solution that would either be inexpensive but cheap in build quality or solid in build quality but extremely expensive, I decided to build my own.
In this post, I'm going to cover the details of my reclaimed bowling alley table (including the start and finish of the table top) and cover what you'll need to build it.
So check it out:
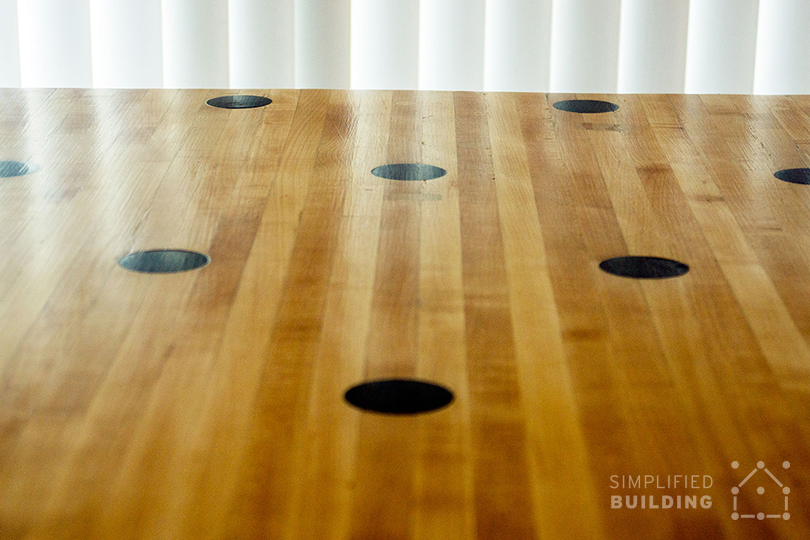
Bowling Alley Table Finshed Shots & Inspiration
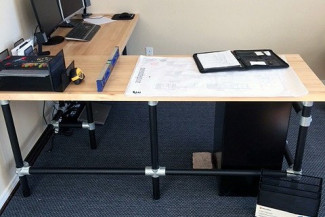
Honestly, I'm not really sure what got me on the kick of building a bowling alley table. I'm not into bowling itself whatsoever. But, I think it's that it creates a reclaimed, industrial look that I like a lot. I've built with reclaimed materials before (I built my own office desk with a reclaimed barn door and Kee Klamp fittings), and when I saw the bowling alley section after browsing Craigslist, I decided it'd make a unique table top. I looked at some ideas on Pinterest and decided to go with it (at that point not knowing the exact type of table I'd make or what I would use for the table legs).
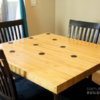
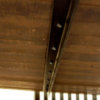
I got the section of reclaimed bowling alley off Craiglist for either $60 or $80 (it was one of the two, I can't remember exactly which). But, for that size, that is a fairly decent price. The block is 2.5" thick and 100% hardwood maple.
Then when I found out I would be moving to a new place in Raleigh, NC (from Rochester, NY) I decided to create a kitchen table with the section and the creation process started.


Building the Bowling Alley Table Top
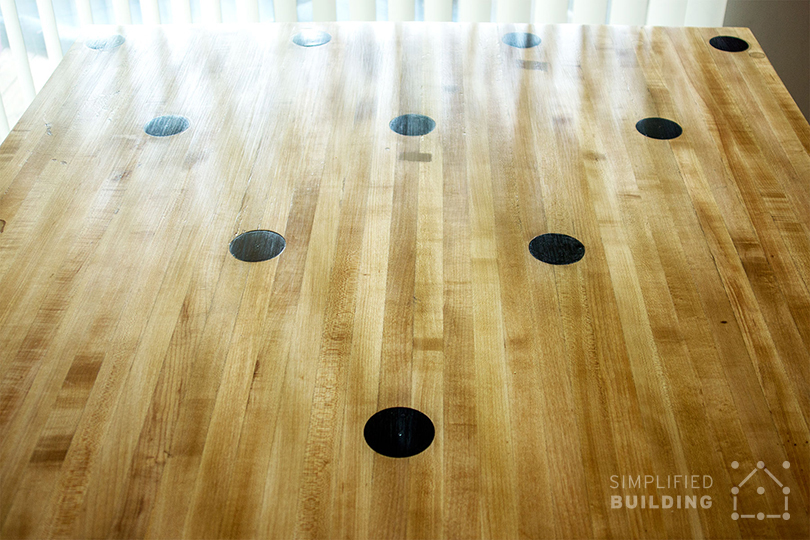
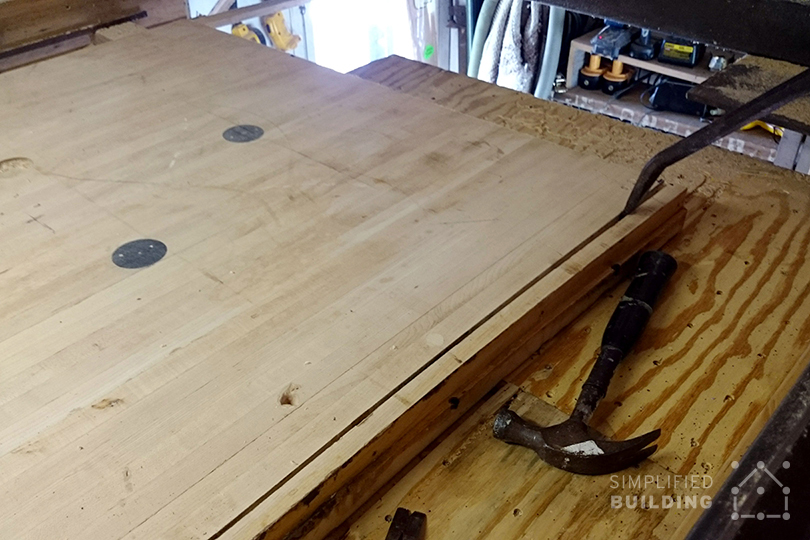
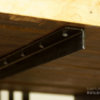
The bowling alley block needed some work before it could be used as the table top. There was a section at the end I wanted to pry off. I also wanted to cut the block down slightly (mainly due to a few large gouges). Finally, it was also missing two off the pinhole pieces.
First, I pried off the end piece using a prybar, hammer, and flat head screwdriver working my way down the block:
Next, was cutting the block down to size. This part was a bit tricky and I had to enlist the help of my father to get it done. In his garage, he has a table saw but we felt this likely wouldn't be the best option. First, my dad didn't want to destroy his blades cutting into the thick maple block (which had nails in it running the entire length to hold it together). The piece is also really heavy (at least a few hundred pounds) so controlling it would have been difficult.
He also had a circular saw we could have used but we decided against that for the same reasons. We likely could have cut the block using one of the tools, and the right blade, but my dad also has a CNC machine in his garage that he built himself. So we went with that to cut the block:
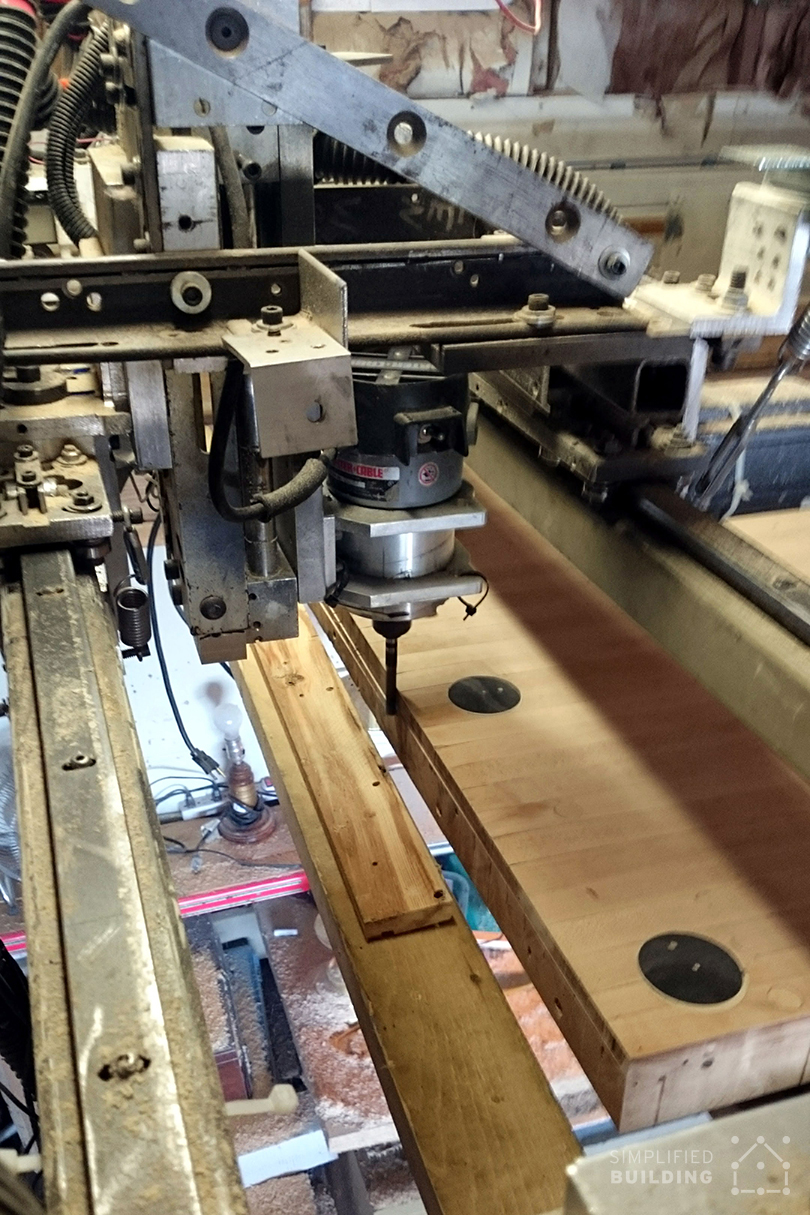
We cut each side one at a time, running back and forth along the side, going a bit deeper with each cut (to ensure an even cut and that the drill bit wouldn't break). To keep the block from moving, we drilled through a board the block was placed on and into the bottom of the bowling alley block.
Next up, was some initial sanding. I wanted to get the top fairly smoothed out before cutting out the pieces to fill in the two missing pinholes.
To do this, I used an orbital sander starting with an 80 grit sandpaper:
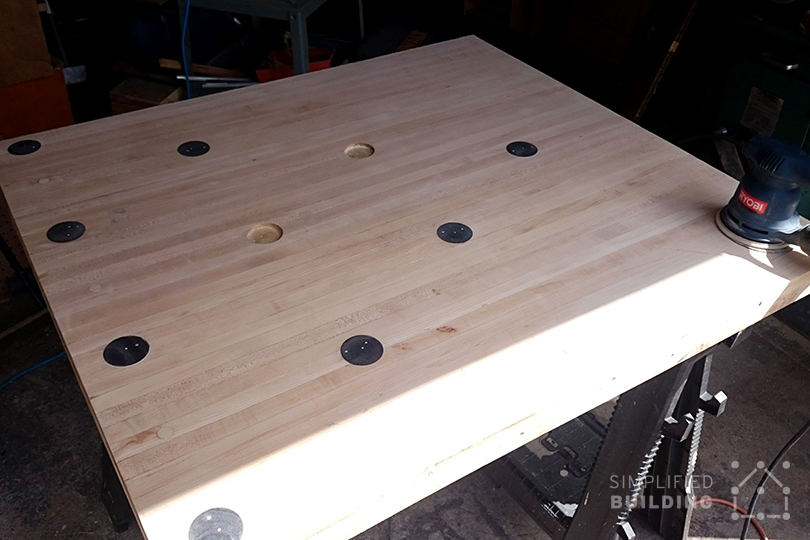
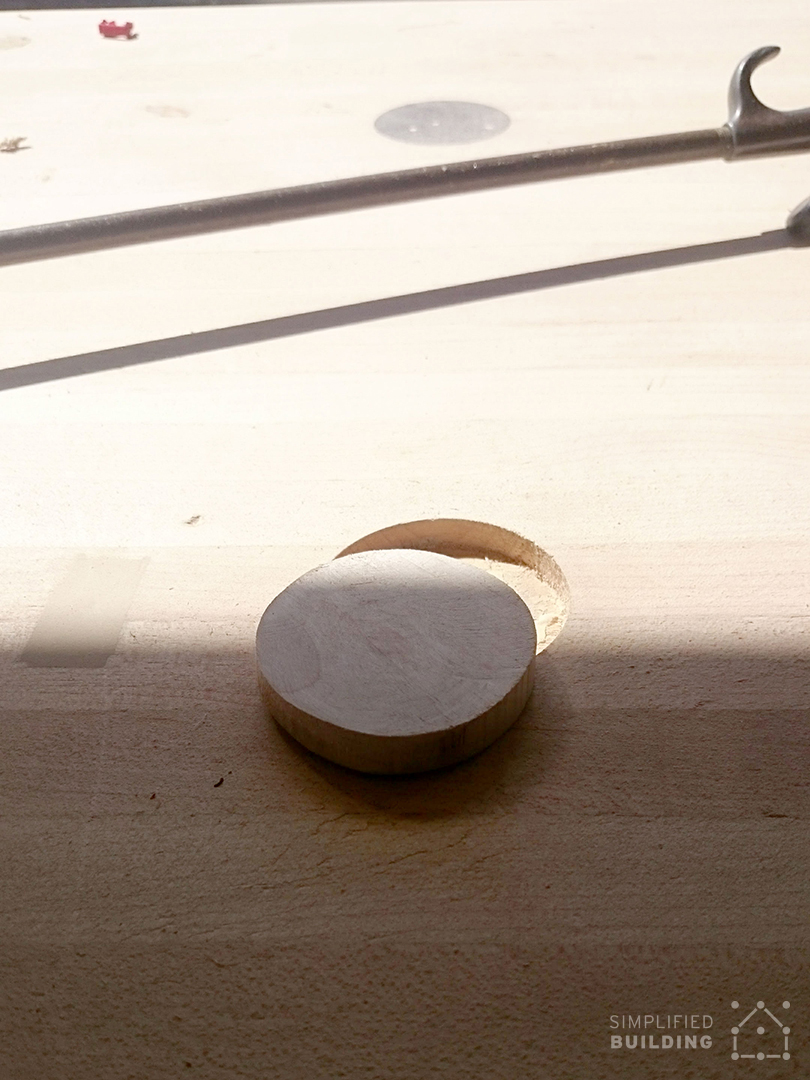
With the top fairly smoothed down, I moved onto creating the circular pieces to fill the pinholes. To create these, I again got a bit of help from my father. He was able to program his CNC machine to cut out a circle to fit in each of these two holes. We were able to use some of the scrap maple wood that I pried off earlier for these circles.
With the circles cut out and to size, I grinded them down just slightly with an angled die grinder to ensure a tight fit in the holes (they were just slightly too big when initially cut out):
I then filled any cracks with wood filler.
Then, I wanted to sand the pieces level with the rest of bowling alley top and do some final sanding before applying a finish. I again used an orbital sander to sand the top, starting with 80 grit sandpaper and moving to 120 grit, 180 grit, and then 240 grit. When I got to 240, I hand sanded the top:
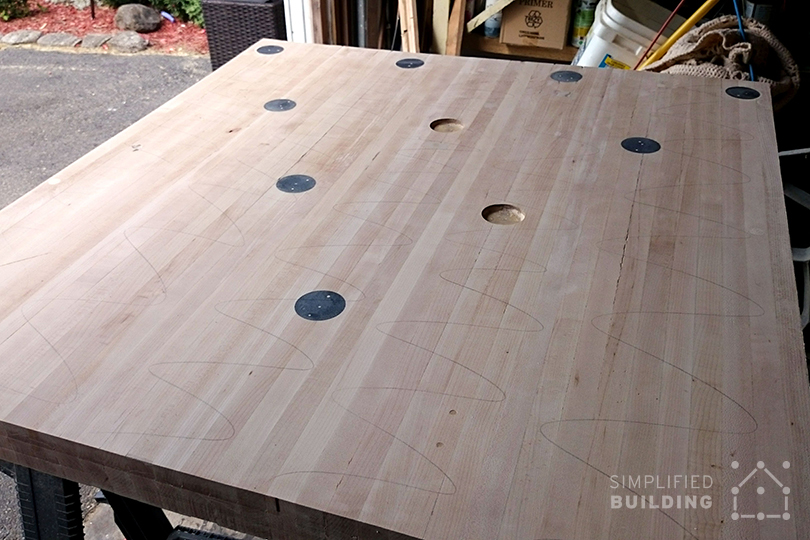
I made pencil lines on the top between each sanding to ensure I hit the top completely and evenly (an idea I stole from Dan in his bowling alley desk build).
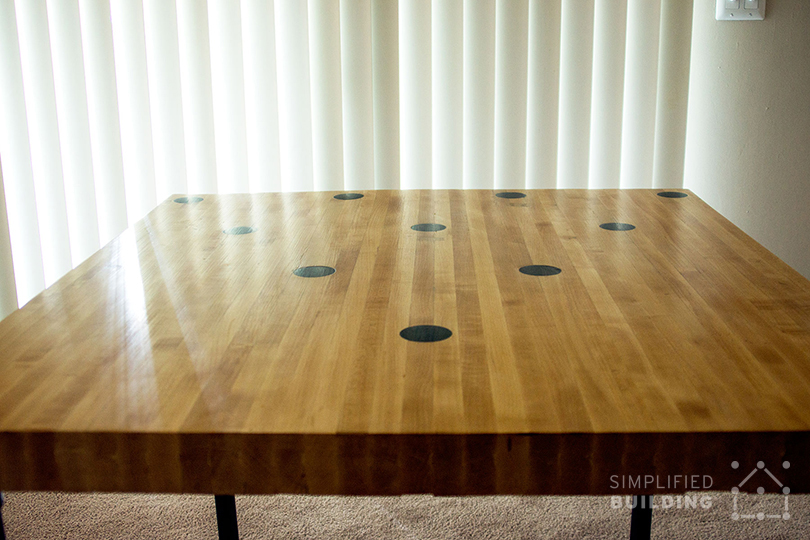
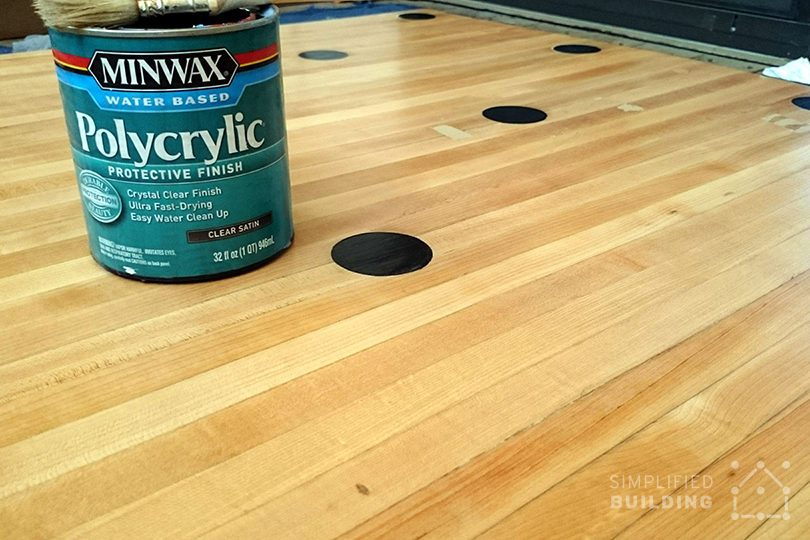
Finally, it was time to move onto applying the finish to the bowling alley top. I started first by applying Minwax Pre-Stain to avoid any blotchiness:
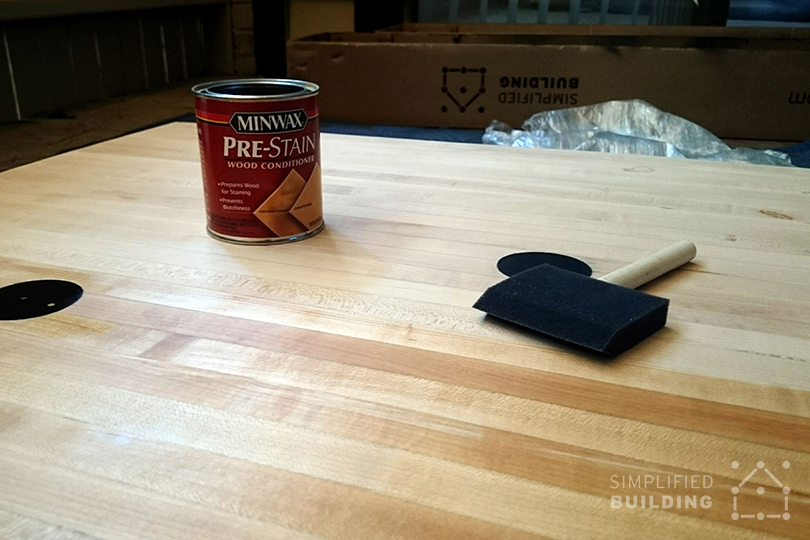
With that completely dried, I stained it with two coats of Minwax Natural Wood Stain and allowed the stain to dry completely:
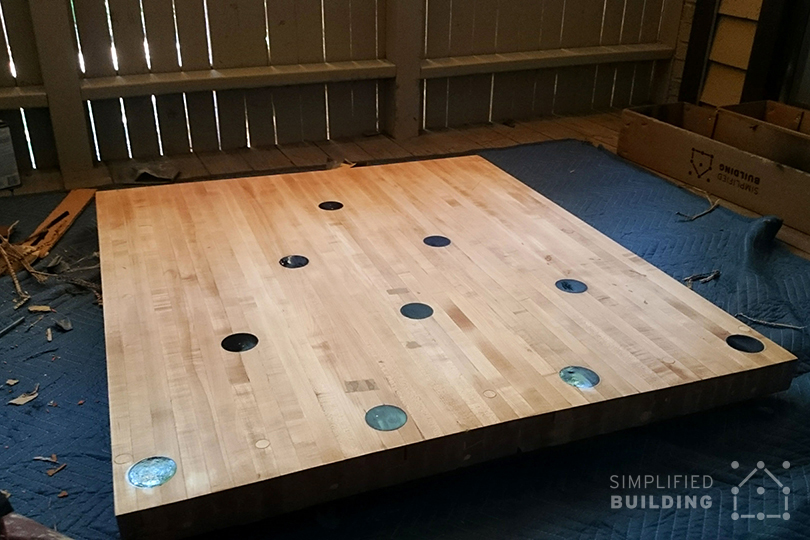
From there, I applied four coats of Minwax Water-Based Polycrylic:
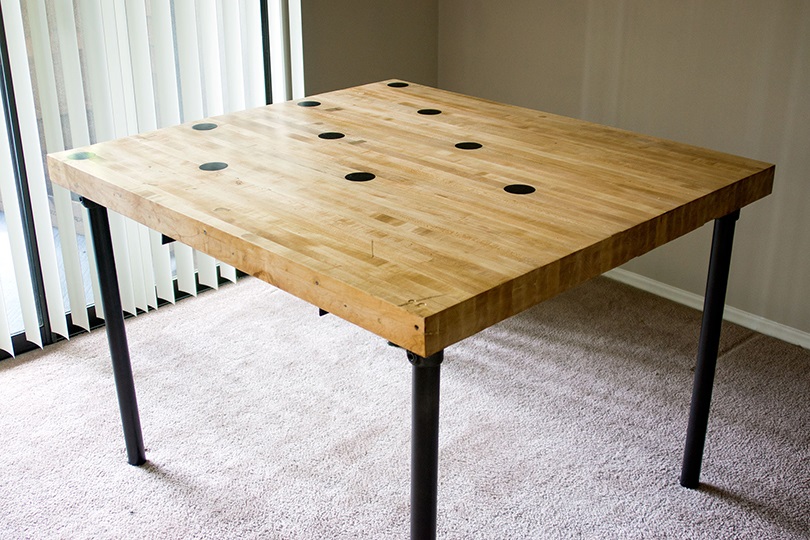
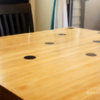
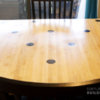
With the bowling alley table top finally finished, it was time to move onto adding the table legs...
Adding the Table Legs (and the Fittings Needed)
Now, it was time to add the table legs. I wanted to create an industrial look like some of the examples I had seen on Pinterest in my research. Many of those ideas used angle iron to create the legs in one form or another.
I thought about doing something similar, possibly with even wrapping the sides of the bowling alley table with angle iron. But, I eventually decided against this. For one, I thought the finish on the sides of the bowling table top turned out really nice and I didn't want to cover that up. Two, working with angle iron would be much harder. It would more than likely involve quite a bit of cutting and welding, possibly even some bending. All of which would have been rather difficult for me not really having the experience or tools to do so.
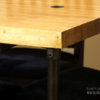
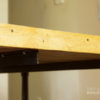
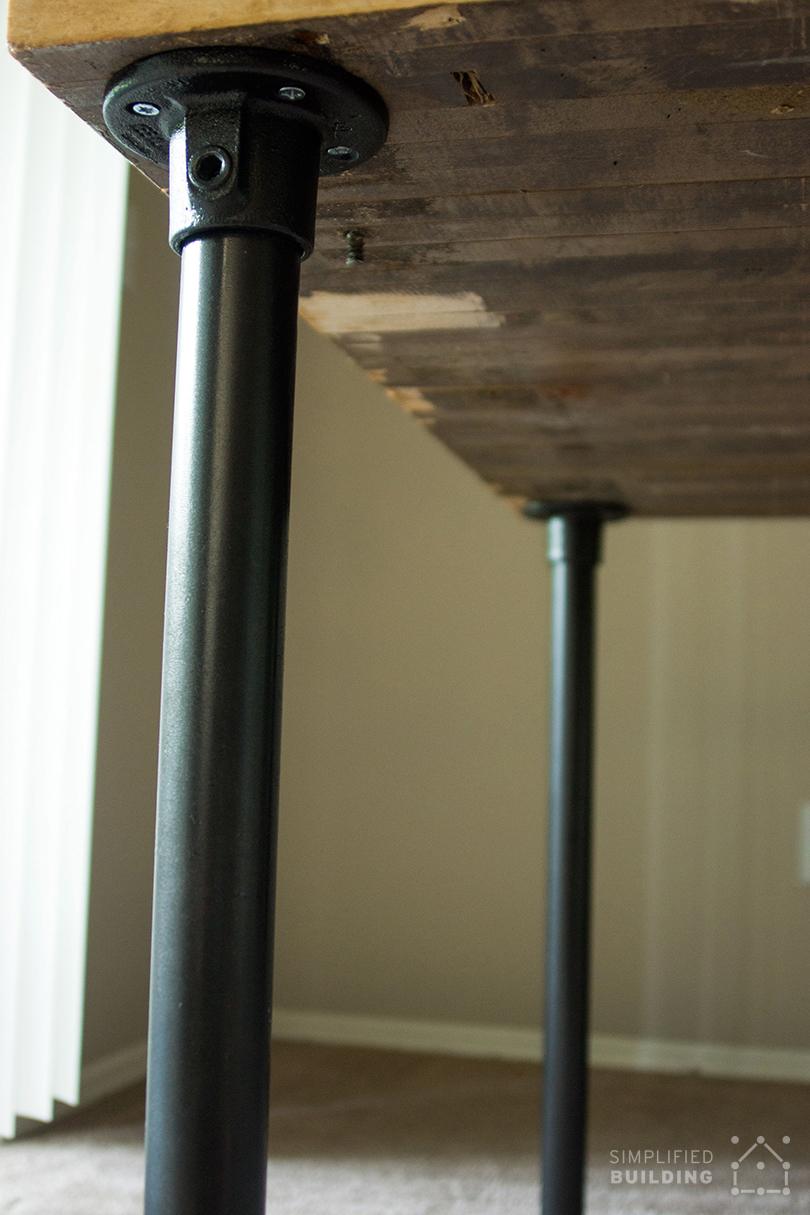
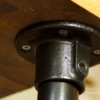
Ultimately, I decide to use pipe and Kee Klamp fittings for the table legs. Being a writer for this blog, and having built with the fittings before, I knew these would be extremely simple to use. I decided to use a very simple design, using just four lengths of pipe, Flange fittings, and Plastic Plugs (to cap off the exposed ends of pipe at the bottom of the table legs). With this setup, all I would have to do is assemble the legs and attach the Flange fittings to the bottom of the bowling alley table top with a few wood screws.
Again, if you want to use a similar design, here's what you'll need:


Pipe can be ordered on this page. You'll need four legs. You can enter your desired height and quantity on the product page.
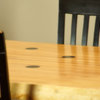
To mimic the aesthetic of angle iron, and achieve the industrial look I was going for, I spray painted the fittings and pipe using Rustoleum Carbon Mist spray paint.
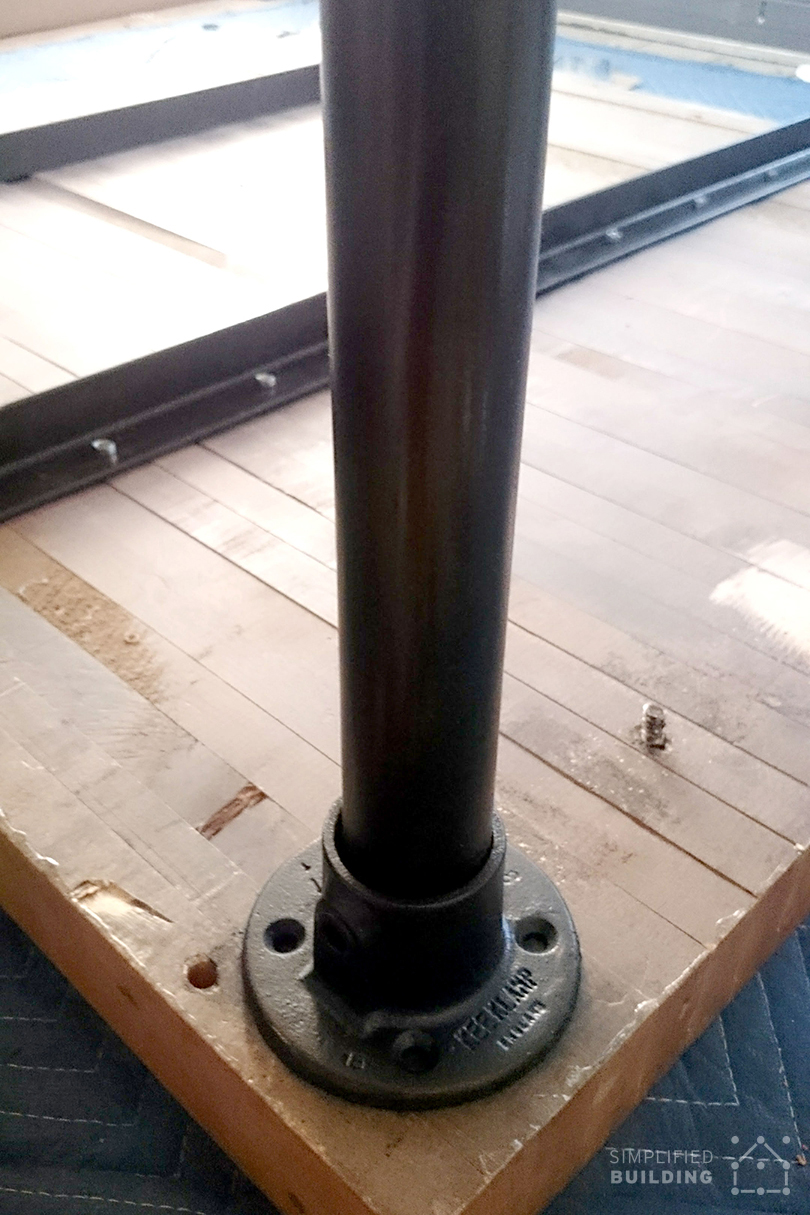
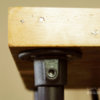
Then, I attached the Flange fittings to the bottom of the bowling alley table top using wood screws (each fitting has four holes in it for mounting). I set these about 1" from the edge at each corner:
From there, I capped off what would be the exposed end of pipe using the Plastic Plugs:
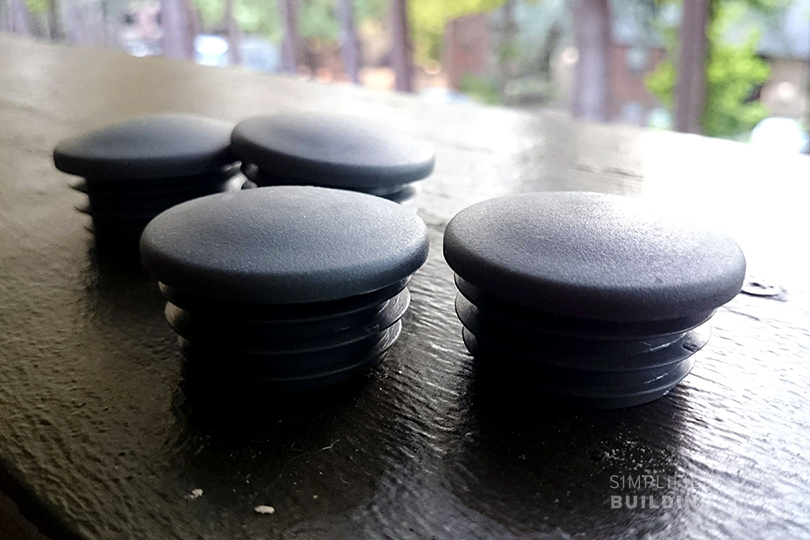
I used a soft-edge mallet to hammer these in:
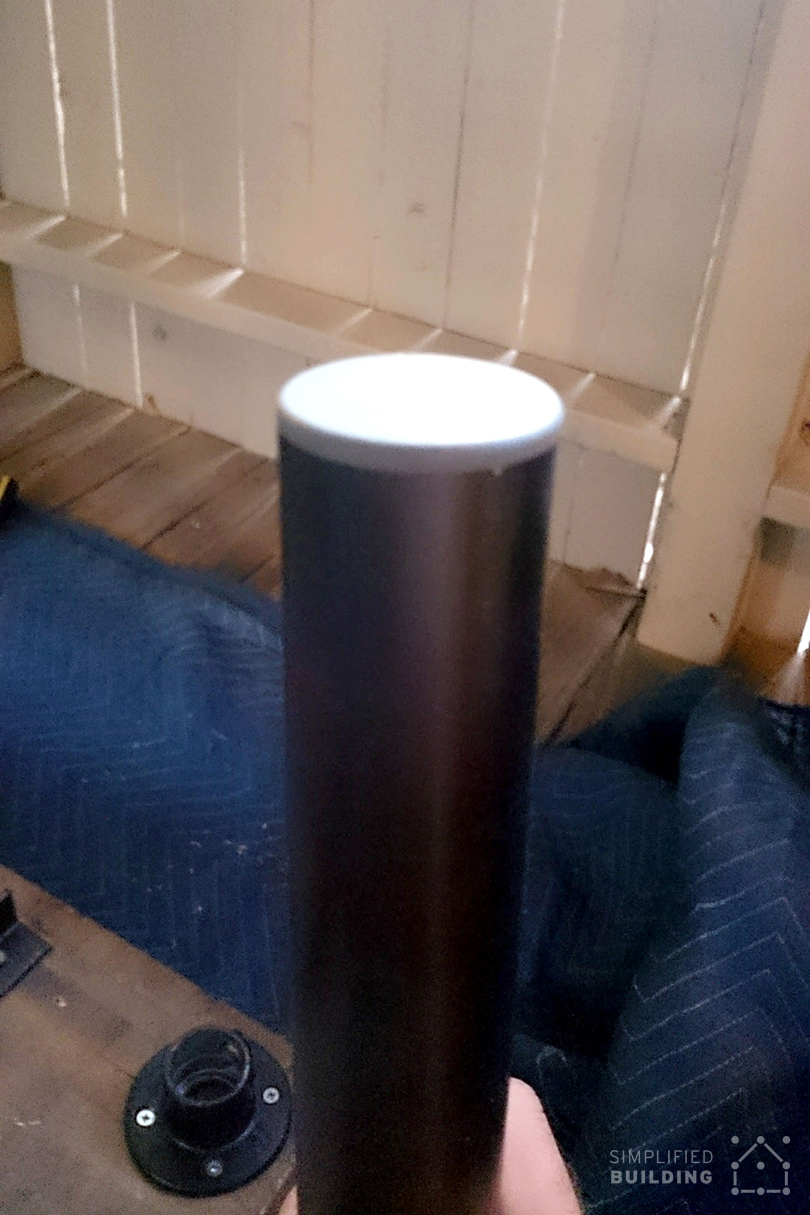
Finally, all I had left to do was attach the pipe to the Flange fittings. The pipe slides into the open socket on the Flange and is secured to the fitting by tightening down a set screw (using an Allen Wrench).
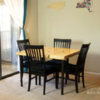
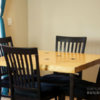
With the legs attached, the table was done. My girlfriend and I flipped it over, being careful not to place too much pressure on the legs to cause the legs to bend out of place, and positioned the table upright.
So that's it! That's my complete reclaimed bowling alley table build. I hope you enjoyed it and if you want to build a table like it, head over to the Kee Klamp fittings page to order the fittings you'll need (again, you'll need four Flange fittings, four Plastic Plugs, and four sections of pipe). I'd also recommend checking out the table and desk frame kit page to see if there is an option there that will work for you. Finally, if you want to go the custom route, feel free to reach out to our projects team (projects@simplifiedbuilding.com) or head over to the free design assistance page for help.