DIY Wall Mounted Desk Plans (with Step-by-Step Instructions)
Are you thinking about building a wall-mounted desk? You can easily DIY a wall mounted desk in under an hour with zero prior building experience. The wall-mounted desk plans in this post give you step by step instructions. Traditional pipe fittings use a threaded connection, but Kee Klamp fittings slide over the pipe and are secured by tightening down a set screw (using just an Allen Wrench).
This makes them much easier to use. It also allows for easier teardown and reassembly if needed. The Swivel Flange, one of over 80 varieties of KeeKlamp, is vital in building this wall-mounted desk. The swivel fitting is not available as a traditional threaded fitting that you won't find at your local hardware store.
This post takes you through the details of building your very own DIY wall mounted desk, from the fittings you'll need to the steps to put it all together (with detailed diagrams). Follow along:
Matt's Wall-Mounted Desk Project Details:
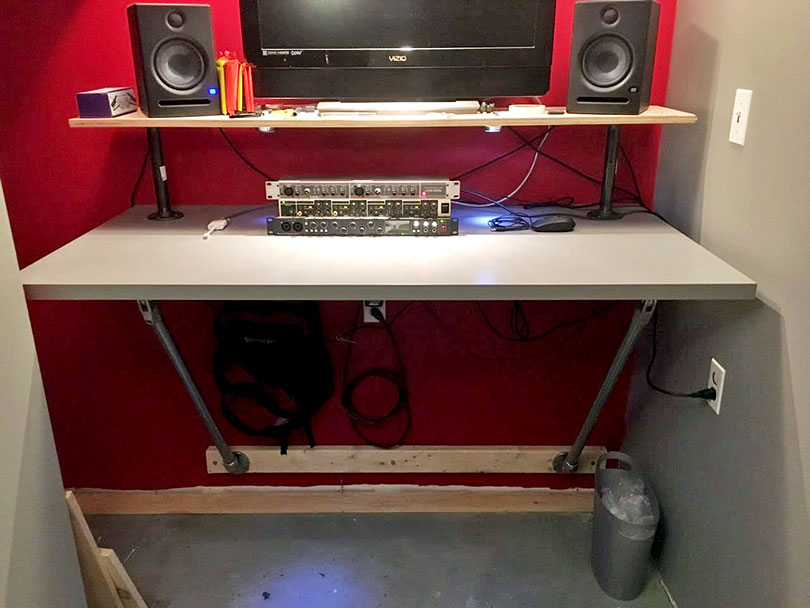
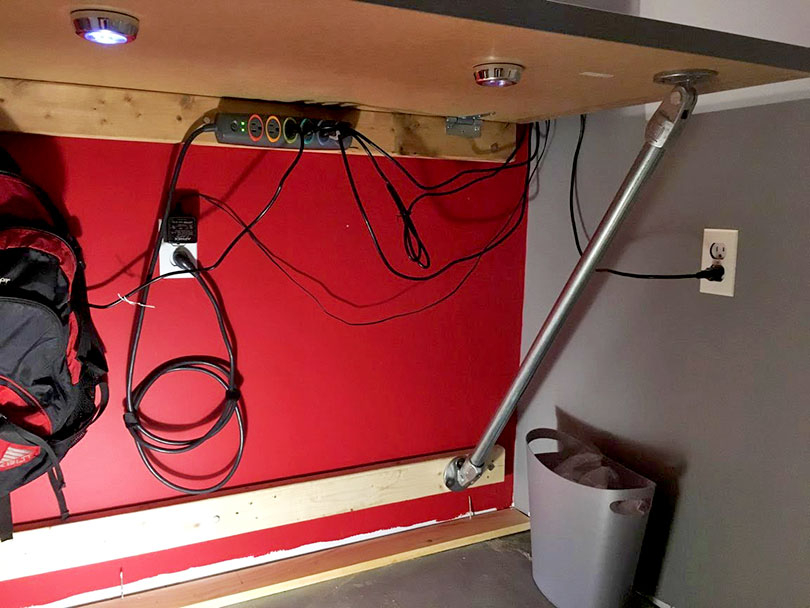
The desk featured in this post was built by Matt for his home recording studio in Boston, Massachusetts. The studio doubles as a band rehearsal space, so he needed a desk that would fit nicely in the corner of his studio but also provide a clean look and take up as little floor space as possible.
A local office was getting rid of their furniture. One of their surplus Ikea tabletops would make for a perfect desktop. We've seen Ikea tops like this one used in many Kee Klamp built desks before. The most often used Ikea top is the Gerton table top.
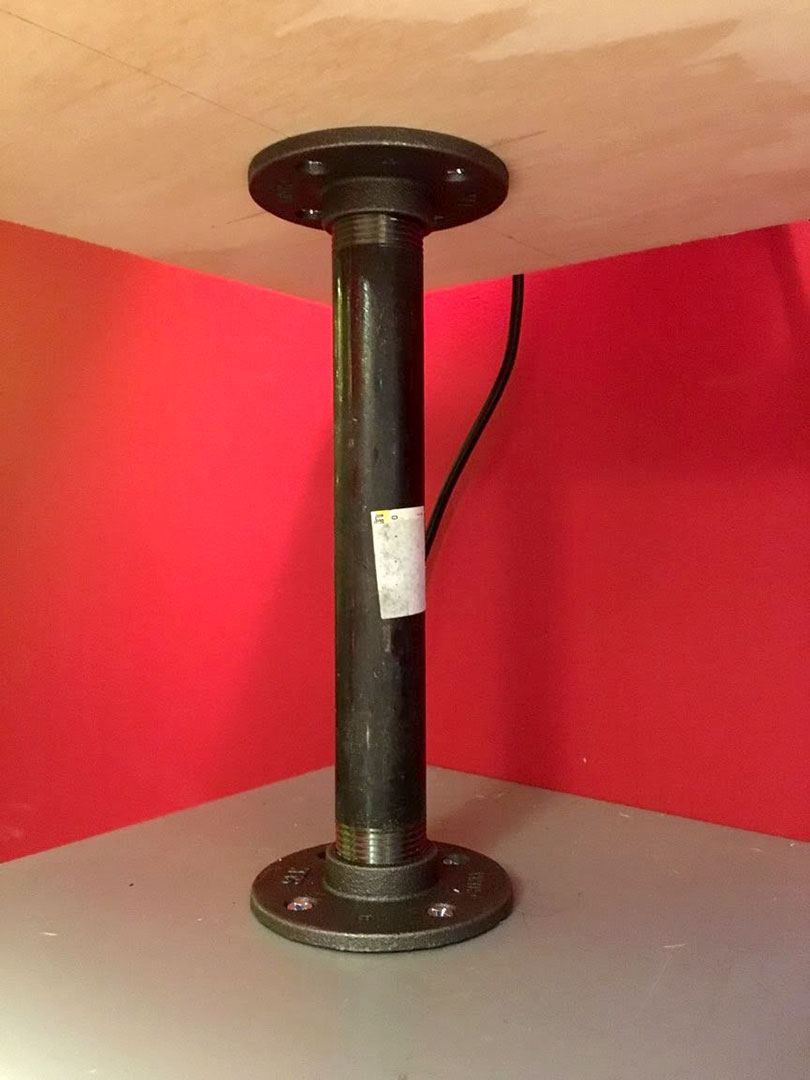
For the top shelf, Matt used 3/4" birch plywood from and a 1.25" pipe and flange purchased at Home Depot. Matt used traditional threaded pipe fittings for the top shelf to save a bit of money on this section of the desk. A Kee Klamp Flange could have been used instead to ensure that the shelf is level. This fitting is generally better to use in this application because there's no "fiddling" around with the threaded connection on both supports to ensure they are level.
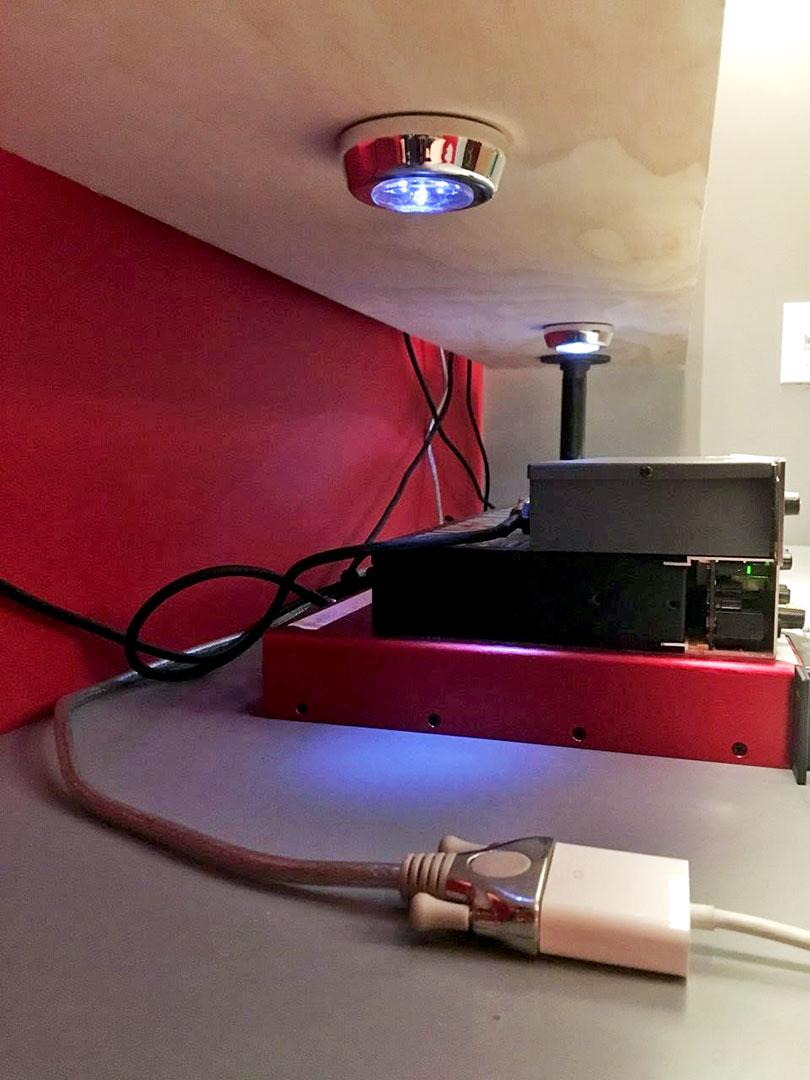
The lights used underneath the top shelf were purchased from Ikea.
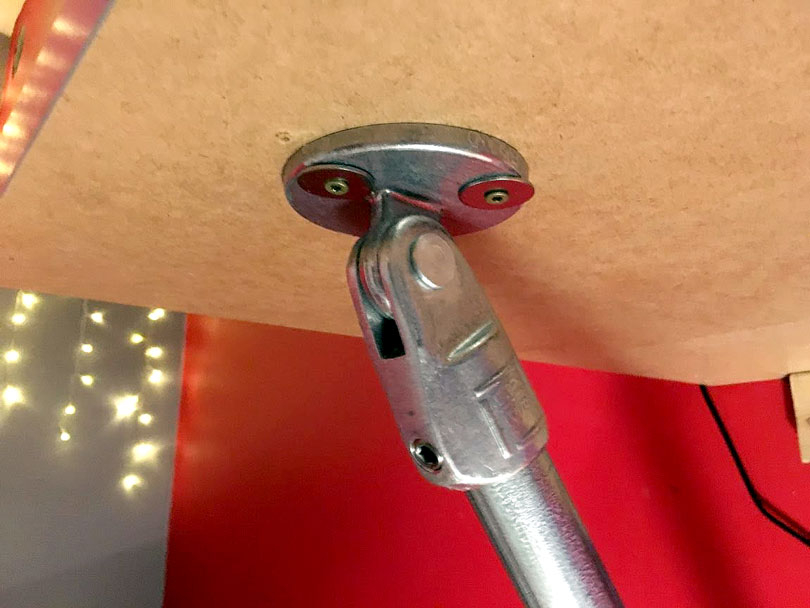
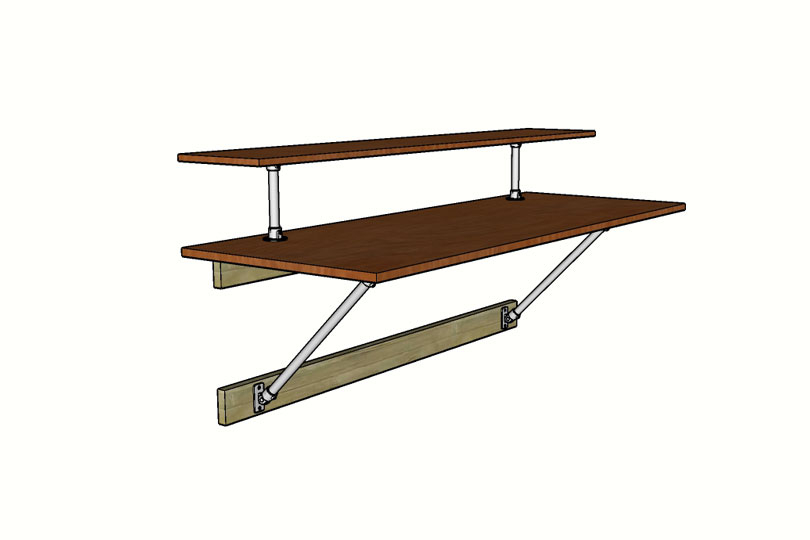
To mount the desk to the wall and give it the appearance of "floating," a Swivel Flange is used. This fitting has a mounting plate on one side of the fitting with a socket (that accepts pipe) on the other. A bolted connection joins the two pieces and allows for free movement. This gives the fitting a range of motion of 170 degrees enabling you to create almost any angle using the fitting.
Matt chose to use the Kee Lite Swivel Flange for his desk. The Kee Lite Swivel Flange has a round mounting plate while the Kee Klamp Swivel Flange has a rectangular mounting plate. Both function the same. So it is a matter of preference as to which you'd like to use for your project.
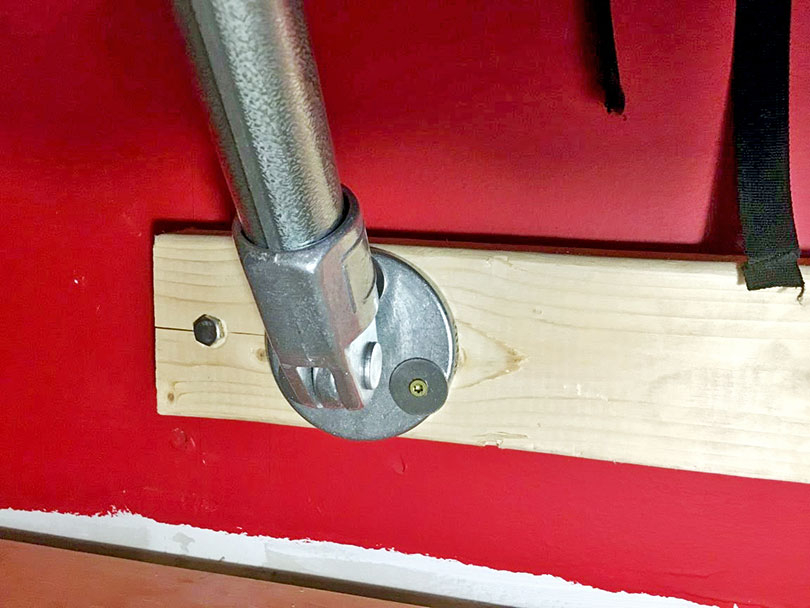
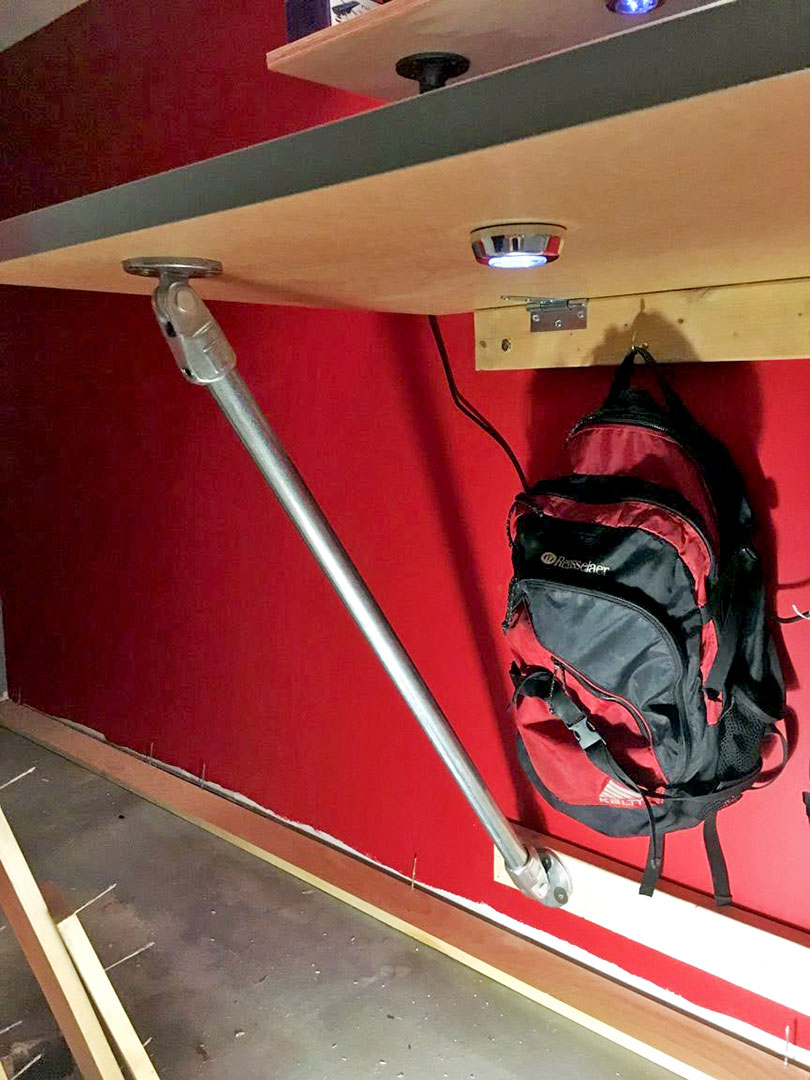
The Swivel Flange at the bottom of the frame is attached to a 2x4 that is mounted on the wall. The Swivel Flange on the opposite end is then mounted to the bottom of the desk.
The 2x4s are used to provide stability to the frame. Each 2x4 is mounted to the wall and bolted into the wall studs. The desk frame is then attached to the 2x4s. This provides better support as opposed to attaching the frame directly to the wall where it might only be connected to the drywall and not a stud.
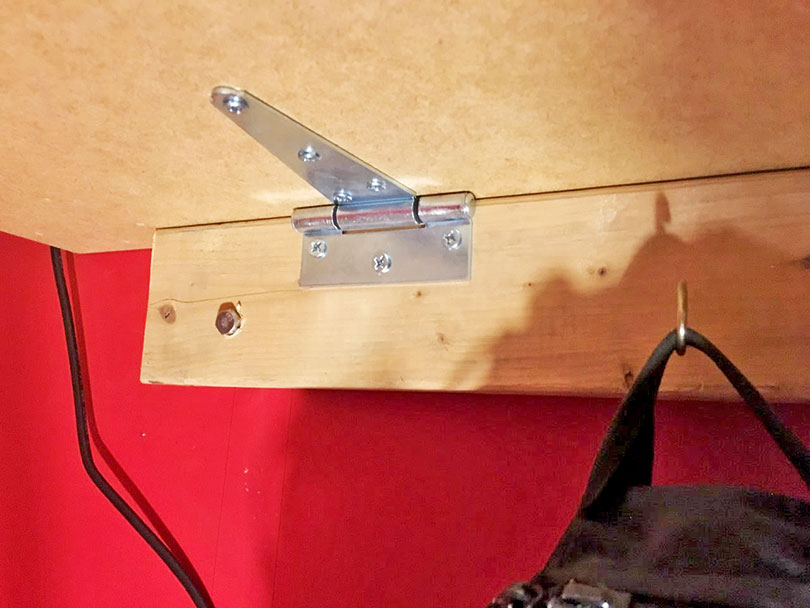
At the top of the frame, the desk table top rests on a 2x4 to provide support and to provide a flush intersection to the wall.
Lastly, metal hinges are used to connect the 2x4 and the underside of the table. This again provides additional support and keeps the table top from moving.
Fittings Needed to Build the Wall Mounted Desk:
Now, let's talk about the fittings you will need to build a wall mounted desk just like the one Matt built. Below, we've listed all of the fittings you will need. However, if you don't want a top shelf like the one on Matt's desk, simply exclude the Flange fittings.


How to Assemble the Wall Mounted Desk:
As with most Kee Klamp built projects, the exact order in which you assemble your project is entirely up to you. There is really no right or wrong way to do it. With that said, we've listed the steps below for what we feel to be the best approach to build this wall mounted desk.
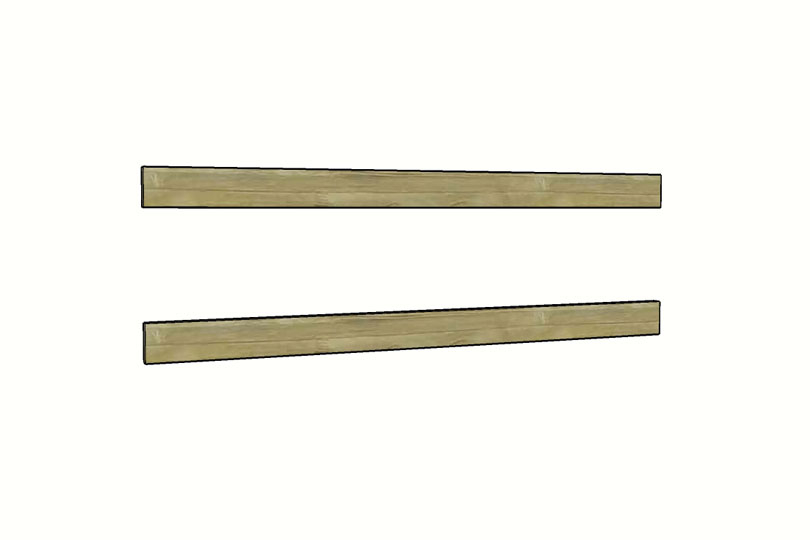
First, you will need to mount the 2x4s to the wall. When doing this, take into consideration the angle of the supports and where they will attach to the 2x4s. Also, make sure that you mount the 2x4s to the studs in your wall and not just the drywall. This will ensure that desk frame is sturdy.
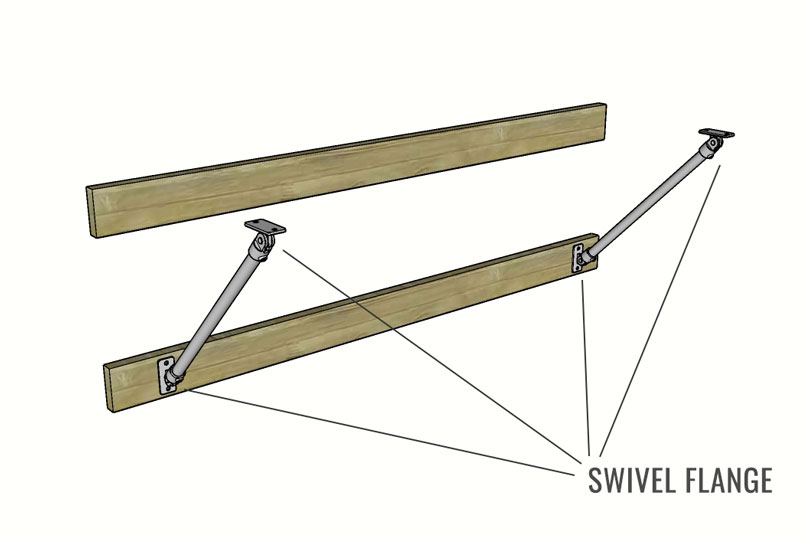
From there, you can attach the desk supports. Each support will utilize two Swivel Flange fittings, one attached to each end of the pipe. Mount the bottom Swivel Flange to the bottom 2x4. So far, your project should look like the image above.
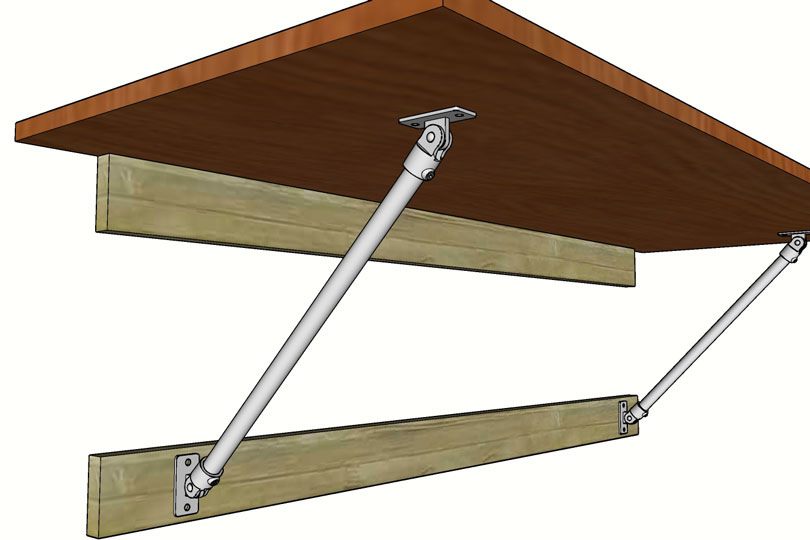
Now, you can attach the table top. We'd recommend that you have a friend help you while doing this. This way, they can hold the tabletop while you mount the fittings underneath. Note, that the table top will rest on top of the 2x4 at the top of the frame. The Swivel Flange fittings can then be attached the bottom of the tabletop.
Optionally, you can use metal hinges like the ones Matt picked up from Home Depot to provide additional stability and to prevent the top from moving.
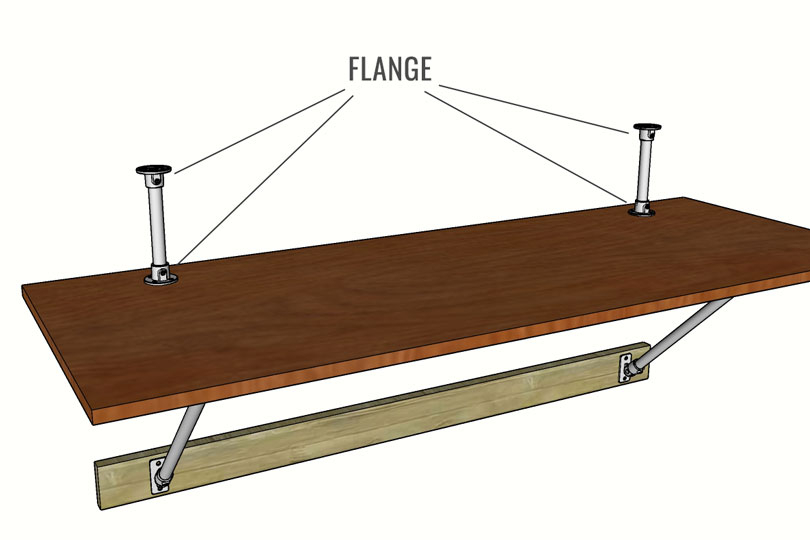
Now, you can add the top shelf. The top shelf is added by using two Flange fittings in combination with a length of pipe. Slide the Flange fittings onto each end of the pipe and secure them in place by tightening down the set screw on each fitting. Then, mount the bottom Flange to the top of the tabletop. Make sure both of the sections are inline with each other to ensure the top shelf is straight.
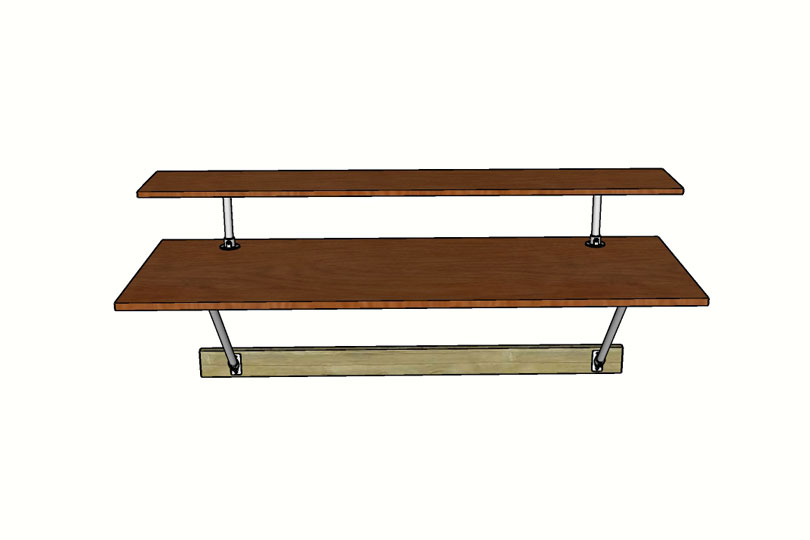
Lastly, place the top shelf on top of the Flange fittings and mount it in place. You should now have a complete wall mounted desk with a top shelf just like the one Matt built for his home studio.
If you need any help designing or building your own Kee Klamp or Kee Lite built desk, don't hesitate to reach out to our team for help. We offer free design assistance and will work with you to come up with a design that fits your needs perfectly.


