DIY Heavy Duty Double Clothing Racks (with Step-by-Step Plans)
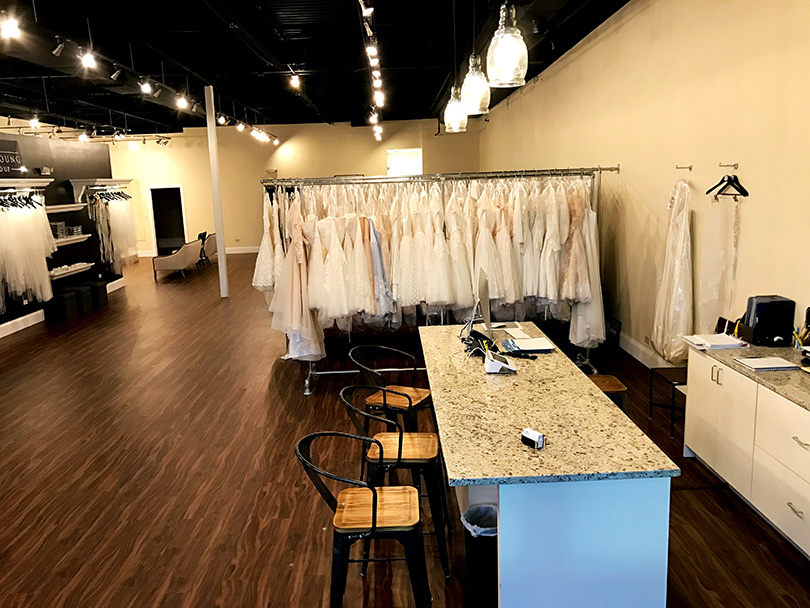
These DIY clothing racks were built by William in Chicago, Illinois for his bridal gown store, Brides by Young. The store features two different types of clothing racks.
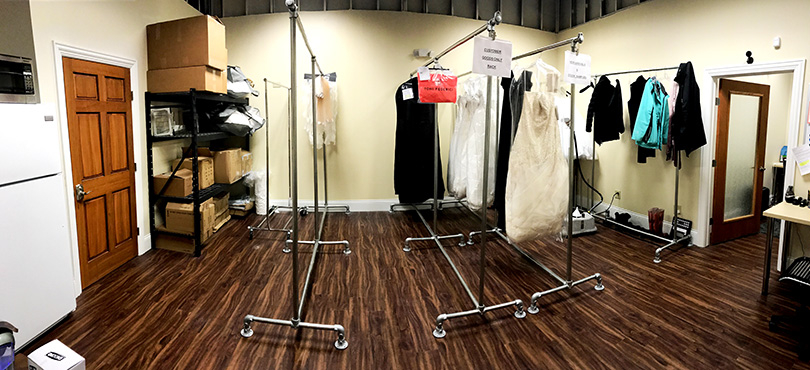
One rack features one straight bar that is primarily used in back storage room and the other rack has two bars to showcase dresses on the store's open retail area. Both racks are custom solutions that Simplified Building helped William come up with (via our free design assistance service) and they are built entirely using Kee Klamp fittings and pipe.
Unlike traditional threaded pipe fittings, Kee Klamp fittings slide over pipe and secure to the pipe using a set screw. This set screw can be tightened down using an Allen Wrench. This allows the clothing racks to be adjusted or dissembled and reassembled if needed. The fittings can also be repurposed for other structures in the future should William ever want to change things up a bit.
With that said, in this project, we're going to cover the details of William's clothing racks and show you exactly how to build your own with step-by-step instructions and diagrams. Follow along:
Brides By Young Clothing Rack Project Details
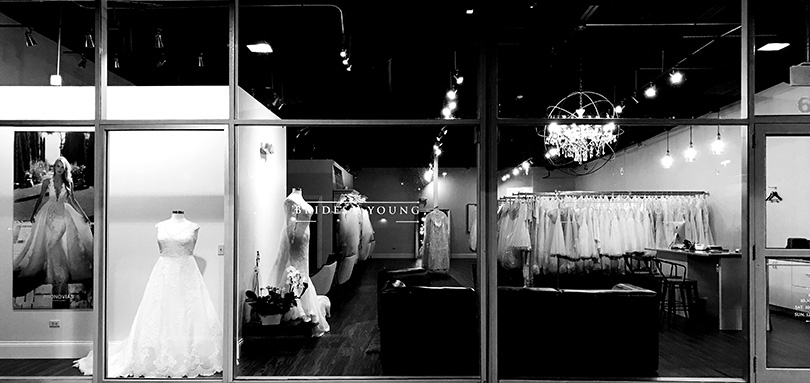
As mentioned above, the clothing racks featured here are used by Brides by Young in Chicago, Illinois. The small family owned and operated boutique sells wedding dresses of all sorts.
While you may not suspect it, many wedding dress can actually be quite heavy depending on the type and amount of material used. Thus, when you have many wedding dresses on a single clothing rack, it can put quite a bit of stress on the rack.
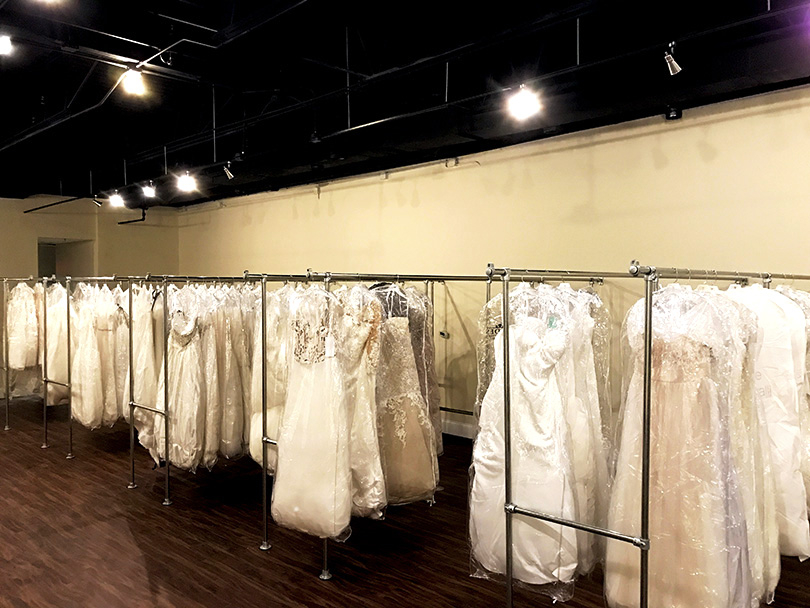
To make the most of the store space, and ensure the racks would be able to support a large number of dresses on one rack, William went with Kee Klamp fittings and pipe to build the clothing racks.
Kee Klamp built racks are super sturdy and can support a good deal of weight without bending or breaking (they are made out of thick galvanized steel after all). Therefore, the store could hold a large number of wedding dresses on a single rack to showcase their wide range of options.
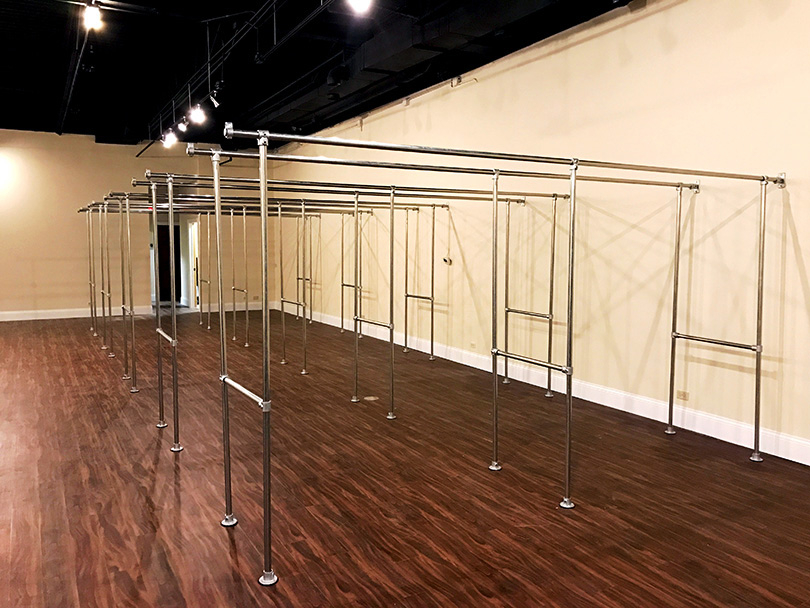
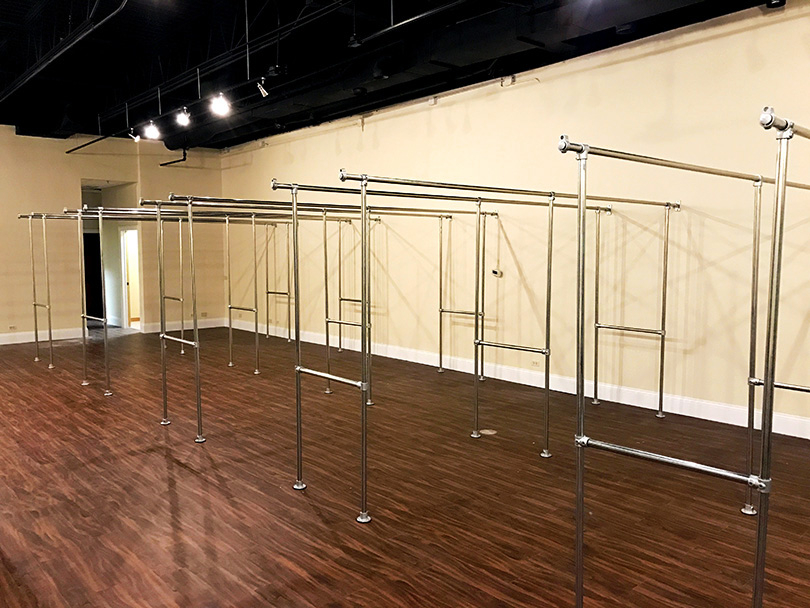
There are five single bar clothing racks in the store that measure 14 ft. long by 2 ft. wide. These racks are used primarily in the store's back room. Although, there are a few out on the store retail area as well.
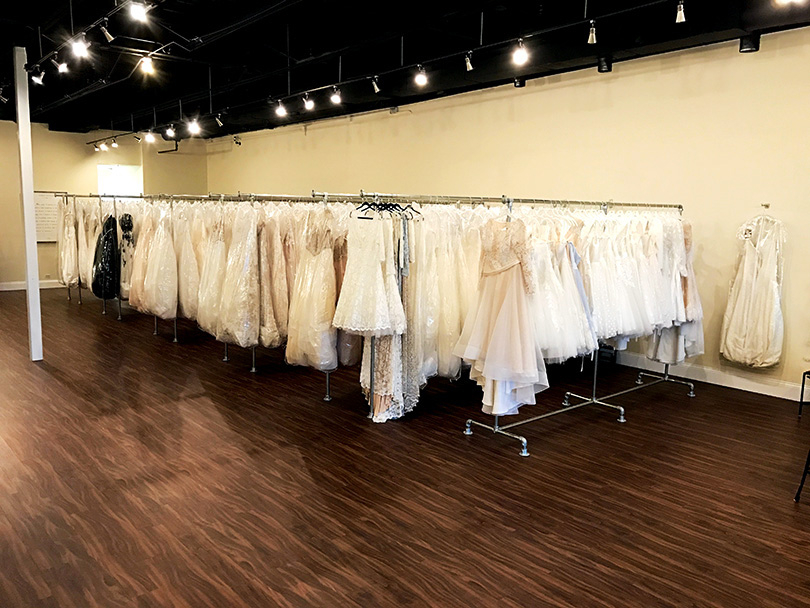
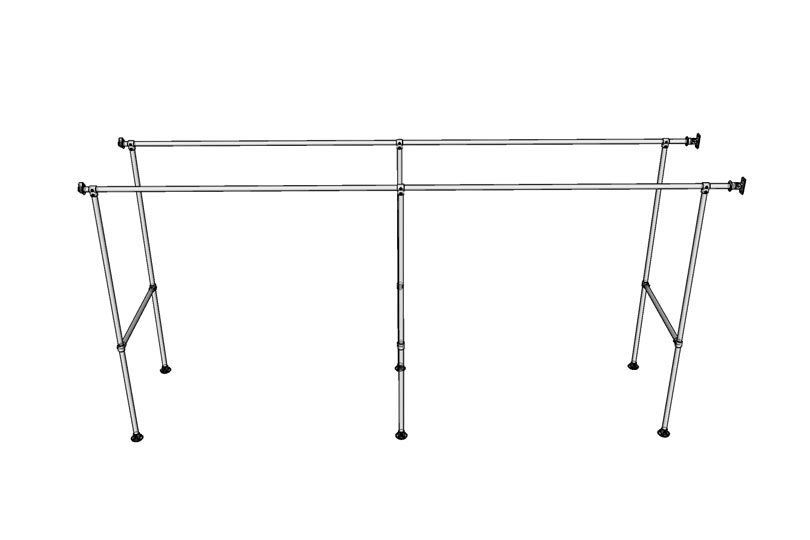
Out on the shop floor, there are 5 double bar clothing racks that measure just over 10 ft. long and are 7 ft. tall (this keeps the dresses from touching the floor).
Now, let's take a look at how you can actually build one of these clothing racks. For the rest of this article, we're going to cover how to build the double bar clothing rack specifically. This clothing rack features two bars for hanging garments on both sides of the rack.
First up, is covering the fittings you'll need to build one...
Fittings Needed for the Double Bar Clothing Rack
Below, you will find the number and type of fittings needed to build a double bar clothing rack exactly like the ones featured in the Brides by Young retail store. However, we do offer a few clothing rack kits that you may want to check out before going the custom route. These kits are configurable by height, width, and length. There are also options for casters if needed.
For the double bar clothing rack, you will need the following fittings:


How to Assemble the Double Clothing Rack:
While the exact order in which you assemble the clothing rack is entirely up to you, we've outlined what we believe to be the simplest approach to assembling the double bar clothing rack.
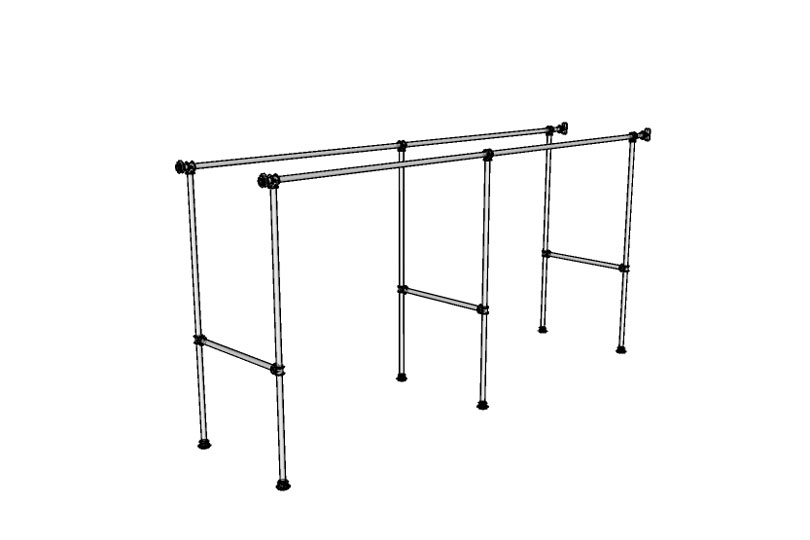
The double clothing rack consists of three main upright sections connected by two complete horizontal lengths of pipe.
Assembly of the clothing rack itself only requires an Allen Wrench. However, a level and measuring may be helpful for making sure everything is straight and the fittings are placed at the correct height (specifically when setting the height of the middle braces).
You may also need a drill to mount the clothing rack to the wall.
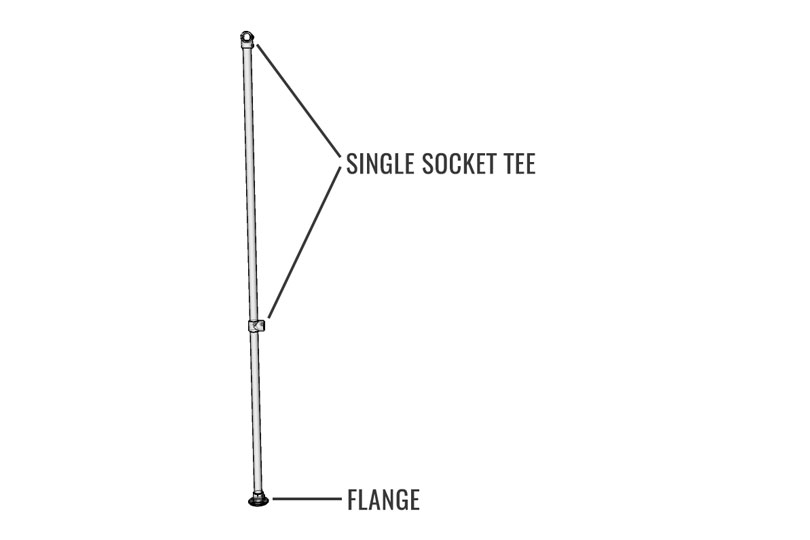
To assemble the clothing rack, first start by assembling each of the vertical upright sections. These sections are comprised of two vertical lengths of pipe. Each will require two Single Socket Tee fittings and one Flange fitting. Follow the diagram below to assemble the upright.
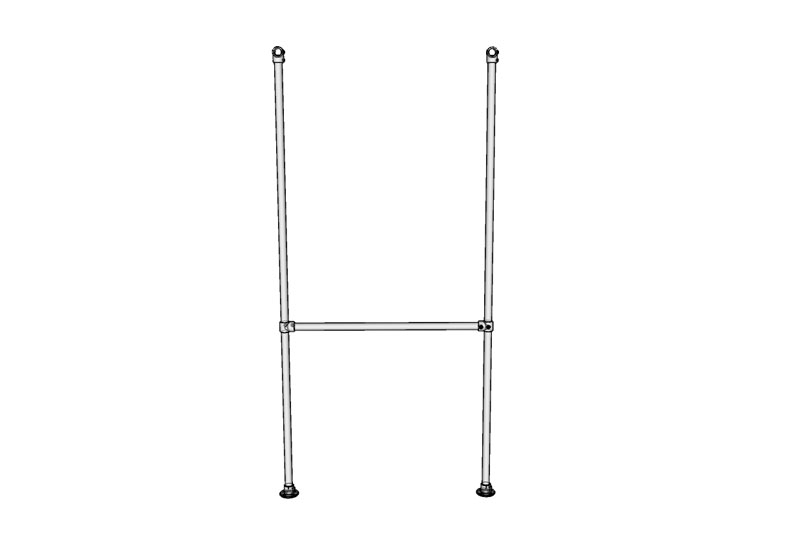
You will repeat the exact same step for the opposite vertical support. These can then be connected:
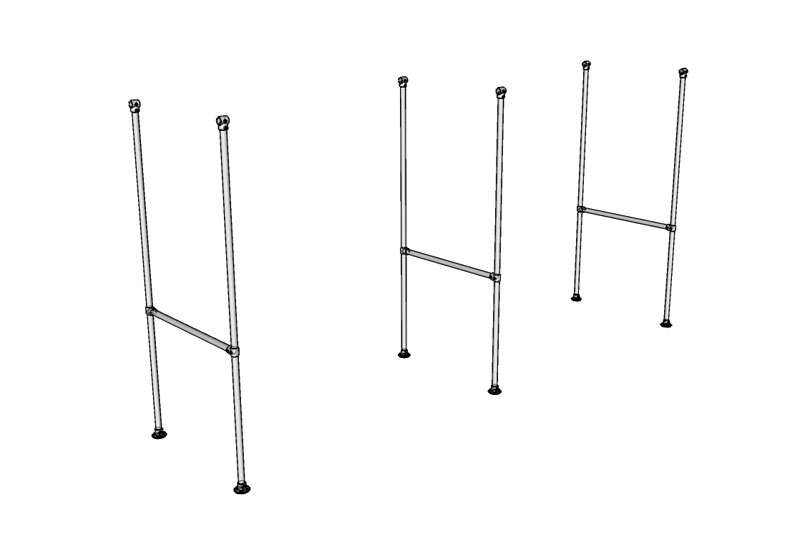
Repeat this process until you have three upright sections assembled just like the diagram below:
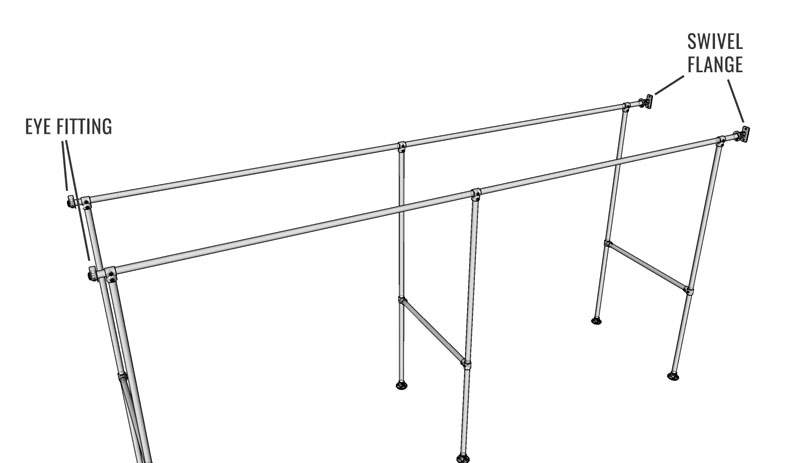
These sections can then be joined together. The sections are connected by two lengths of pipe. The pipe will slide through the open socket on Single Socket Tee at the top of each section. When in position, you can secure the pipe in place by tightening the set screw down on each fitting.
When doing this, you will likely want another person to help you out in order to hold each section while you slide the pipe through the fittings. You may also find it easier if you rest the sections on the ground.
At one end of the rack, the Eye fittings are attached to the horizontal lengths of pipe. These fittings simply slide on to the pipe and secure down using a set screw. On the opposite end, the Swivel Flange is used. These fittings slide onto the pipe at the one end and can be mounted to the wall using the other end of the fitting. Each Swivel Flange fitting has a mounting plate with two countersunk holes.
Use this plate to mount the clothing rack to the wall.
That's all there is to it! In just a few steps, and with the use of just a few basic tools, you can build yourself a clothing rack just like this one that is not only super strong, it also looks great! On top of that, unlike some other pre-fabricated clothing racks, Kee Klamp built clothing racks can be dissembled and reassembled if needed or even repurposed for other structures.
Again, to find the fittings you need to build this clothing rack, visit our Kee Klamp fittings page here. Additionally, be sure to check out our clothing rack kits for a simpler solution. Lastly, if you need any help at all, please don't hesitate to reach out to our projects team for help. Our team is experienced in designing and building all sorts of Kee Klamp built structures and will help you come up with a design that fits your needs perfectly.
Our projects team can be reached by emailing projects@simplifiedbuilding.com or by visiting our free design assistance page here.


