DIY Quartz Dining Table Built with Pipe and Kee Klamp
Have you ever thought about building your own quartz dining table?
Well, that's exactly what one of our customers did and the end result is just beautiful.
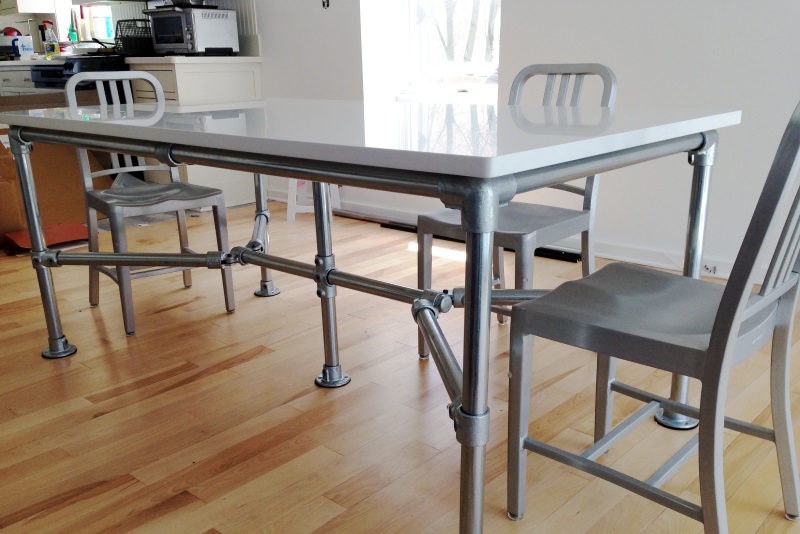
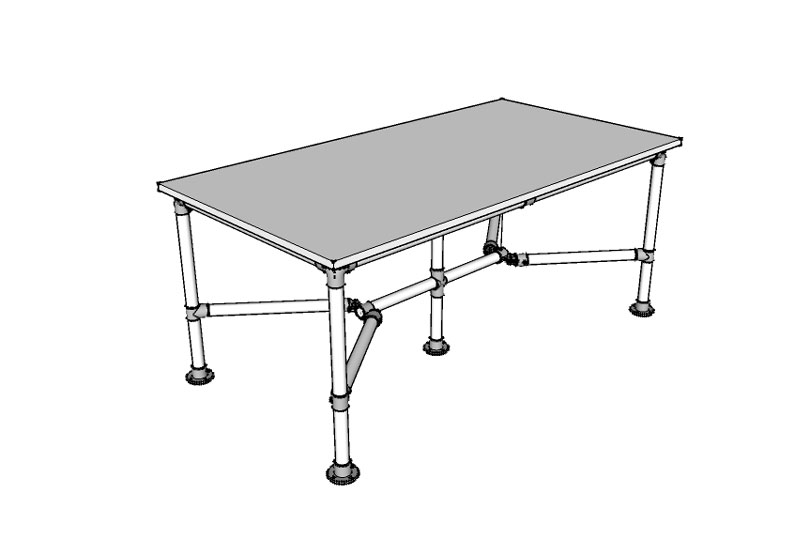
Lia built this table for her daughter Amelia using a custom quartz top combined with a frame built entirely using pipe and Kee Klamp fittings.
In this post, we'll cover the details of Lia's awesome project, the fittings needed to build it, and where to use each.
Follow along:
Lia's Quartz Dining Table Project Details
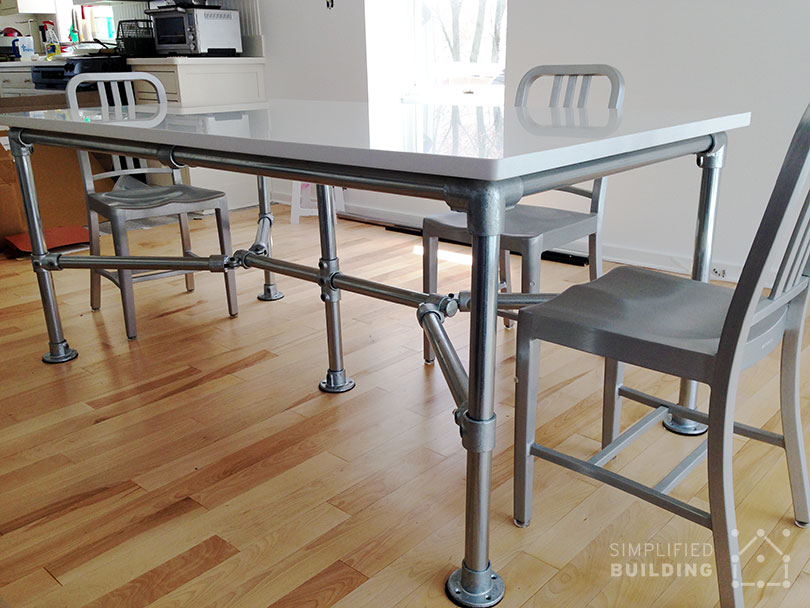
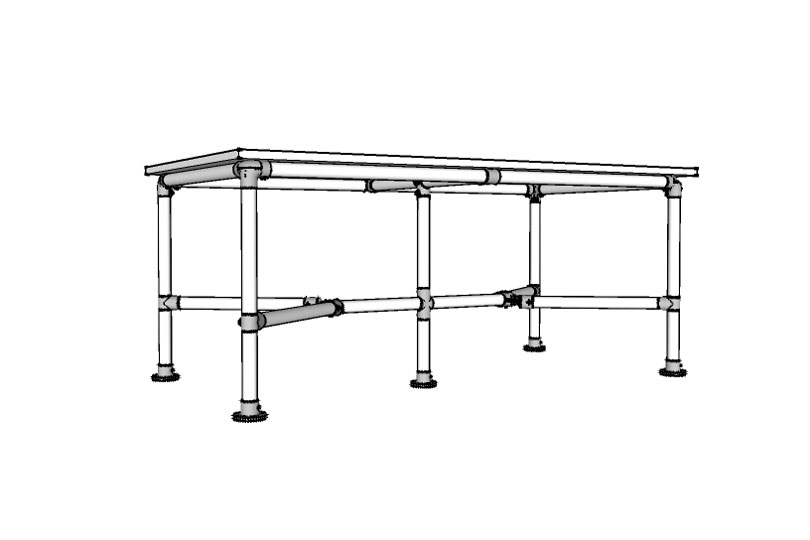
Like I mentioned above, Lia actually built this table for her daughter. She needed something that was stylish but would be sturdy and strong enough to support a heavy quartz or granite top. Lia ultimately went with quartz, which is bit lighter than granite, but it's still heavy enough that the table frame needed a 5th leg to support the weight.
The table is large enough to accommodate 6 people comfortably without guests rubbing up against the pipe frame/legs. Overall, Lia and her family have been very happy with the table. Here's what Lia had to say:
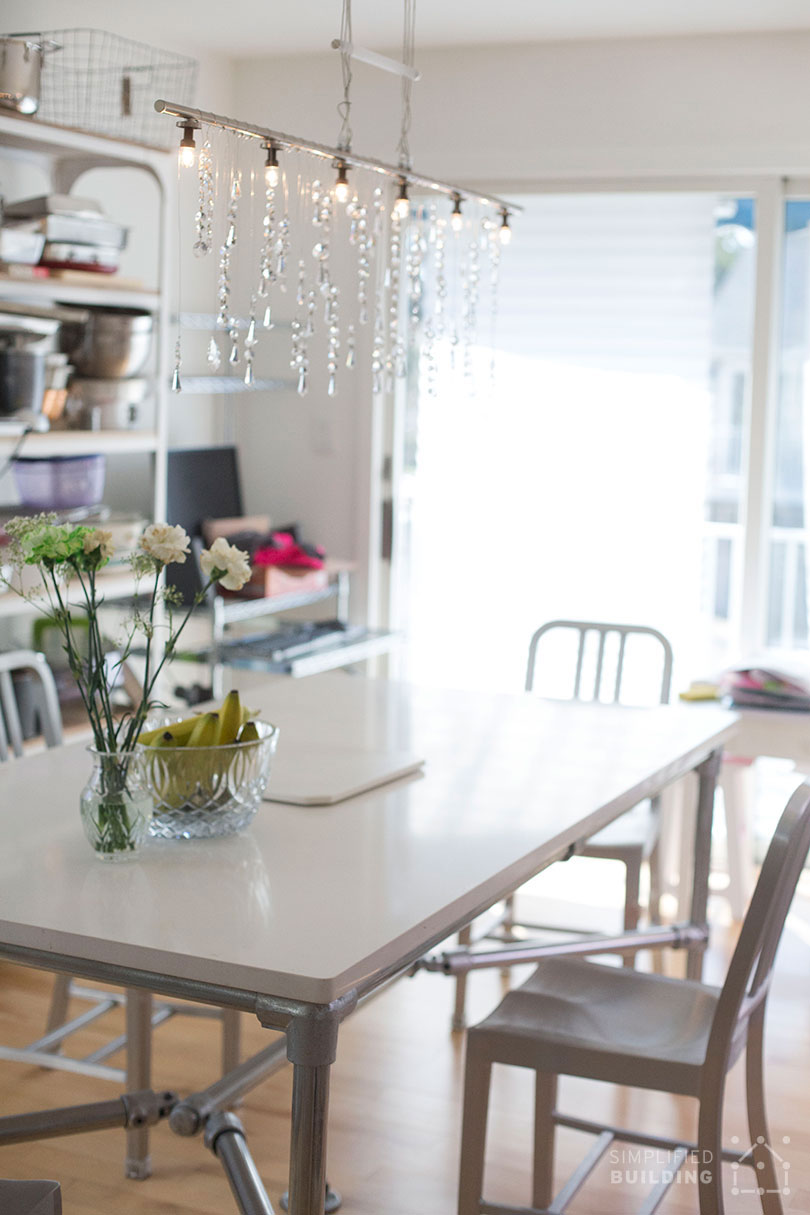
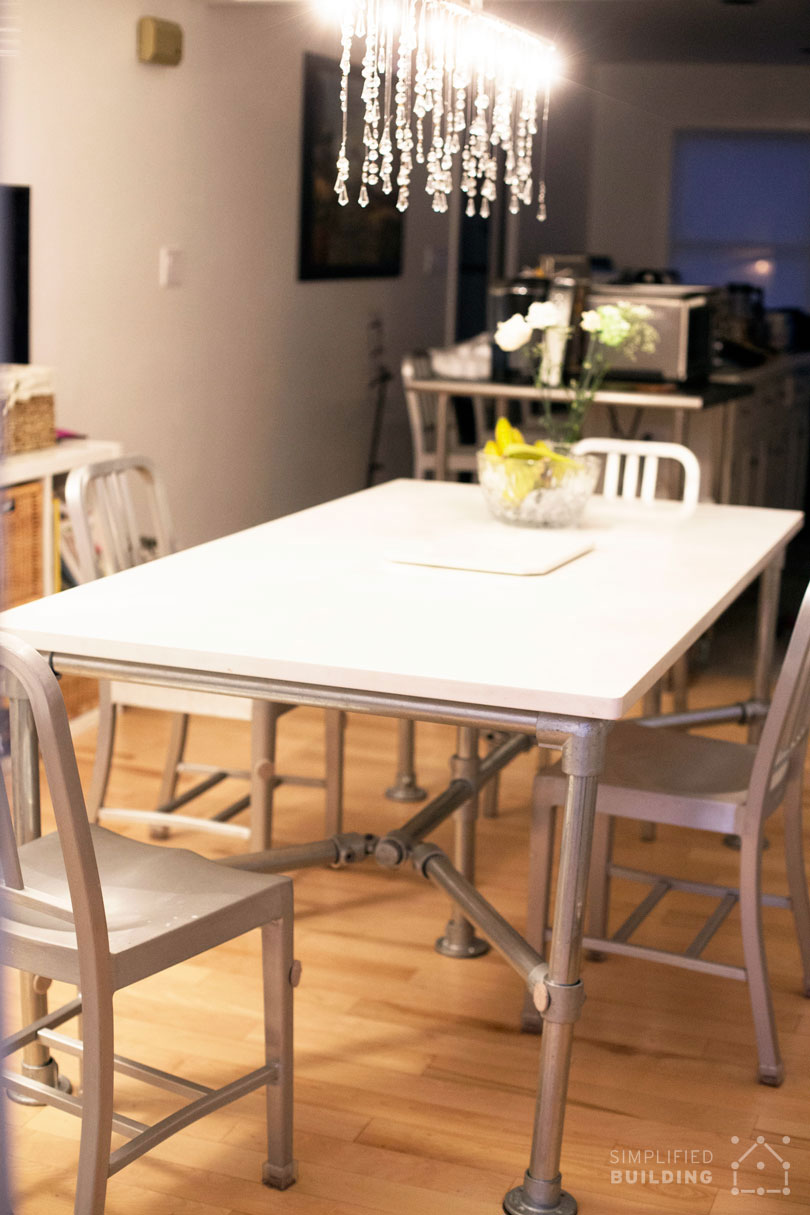
"This table has been a charm. I also designed and made the crystal lamp above it and the table lends a cool, classy element to a modern dining room. Very happy with it. My daughter wanted me to mention that I named the table after her so, if it ever becomes a kit, it should be called the Amelia table!"
The custom quartz table top was provided by Silestone and the chairs from Emeco. The table top is 72" long by 38" wide.
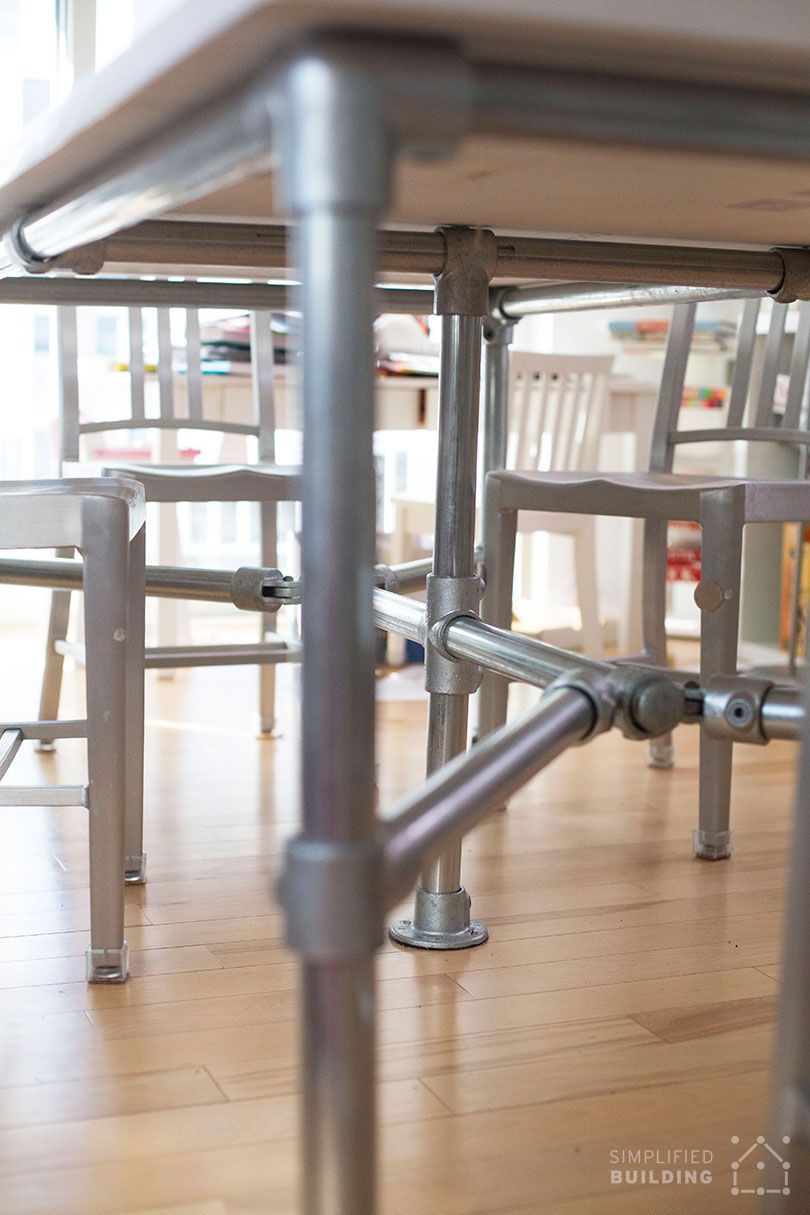

Lia also added felt pads to the bottom of the flange fittings, used for the "feet" on the table frame legs, to keep them from scratching the hardwood floor.
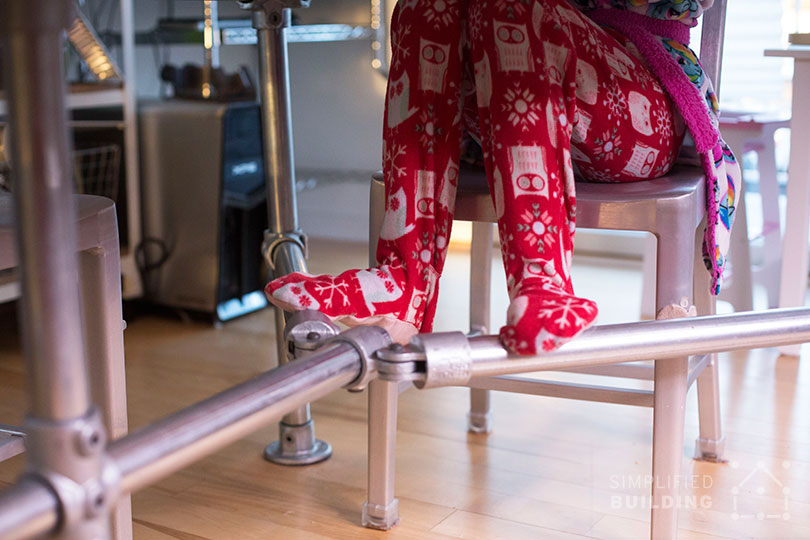
Lia noted that the middle brace also makes a good foot rest for the little ones:
Finally, Lia was kind enough to provide a few details and tips on the assembly process for anyone looking to copy the design:
"To get the table stable, the best way I found was to assemble the top first up-side-down and make sure it sits totally flat. I put the long sides all the way in and then had the short sides butt up against them. Then add the end pieces to the center bar.
Assemble each leg and the center piece with the forked braces (Double Swivel Socket fittings) and 10-7 cuffs (Single Socket Tee fittings) but don't tighten them in place too much. Measure from hole to hole on the table top, then make sure the feet are spaced the same on the floor. Use tape to mark them; the center one should be directly under your light.
Flip the table over with a helper and seat it without moving the legs. Measure the distance from the center flange to the center pipe brace. Using a magnetic level, raise the 10-7 cuff (Single Socket Tee fitting) on each leg to the same height as in the middle and tighten. Making sure the leg is straight with the level on the top and bottom portions.
Once all the braces are on, measure the distance between the legs again and adjust the 10-7 cuffs (Single Socket Tee fittings) on each end of the center bar forward as much as needed to maintain the distance and level legs. Tighten them down. Then tighten the top without pressing down in case it is not perfectly level. I applied Loctite blue thread locker to each screw to make sure they wouldn't back out under the weight."
Now, let's cover the fittings you'll need to assemble this project...
Fittings Needed to Assemble the Table
Below, are all the fittings you will need to assemble the table frame. However, the frame design can always be modified and if you're looking for a simpler approach (and you don't need to support a top as a heavy as granite or quartz), I'd recommend checking out our table frame kits. These are configurable based on height, length, and width based on the dimensions you enter. We also offer free design assistance should you decide to go the custom route.
Here's what you'll need:


Where to Use Each Fitting
Now, let's cover where to use each fitting. To help showcase how and where to use each fitting, we've put together a Sketchup drawing of Lia's dining table and included the diagrams below. A few of the images are even interactive and if you click on or hover over the "plus" signs on the image, the fittings used at that point will be displayed.
The images below are interactive. If you hover over or click on the "+" buttons, a popup box will show with the fitting used at that certain point.
Table Corner
Under the Table
Table Brace
Need Help with Your Dining Table?
We hope this walk-through has provided you enough information to get started with your own dining table. But, if not, feel free to reach out to our projects team for help at projects@simplifiedbuilding.com or head over to our free design assistance page. Also, like I mentioned earlier, we do offer a few kits that you may want to check out before building.
Finally, let us know in the comments below what you thought of Lia's table and be sure to sign up for our email newsletter to receive updates on future projects like this one.


