DIY Pipe Closet System Built with Pipe & Fittings (Plans Included)
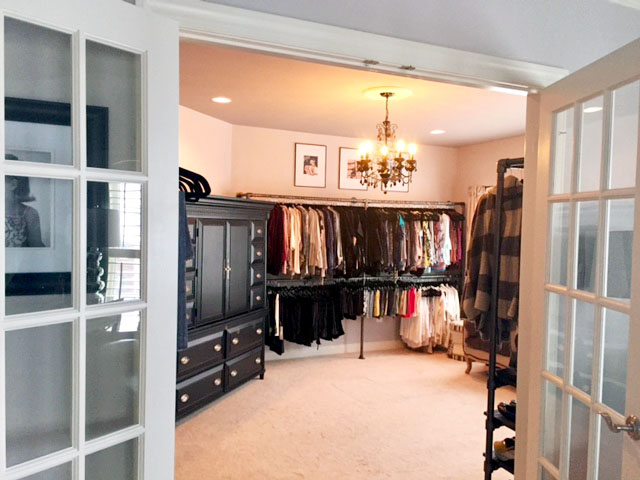
This beautiful DIY Pipe Closet System was built by Angela for the walk-in closet in her master bedroom. In total, there are three different clothing racks in the room, all built using Kee Klamp fittings and pipe to complete the rack frames.
In this post, we're going to cover the details of Angela's clothing racks/closet system, show you what fittings you'll need to build one just like them, and show you how to put it all together (with detailed steps and helpful diagrams).
Let's take a look:
Angela's DIY Pipe Closet System Project Details
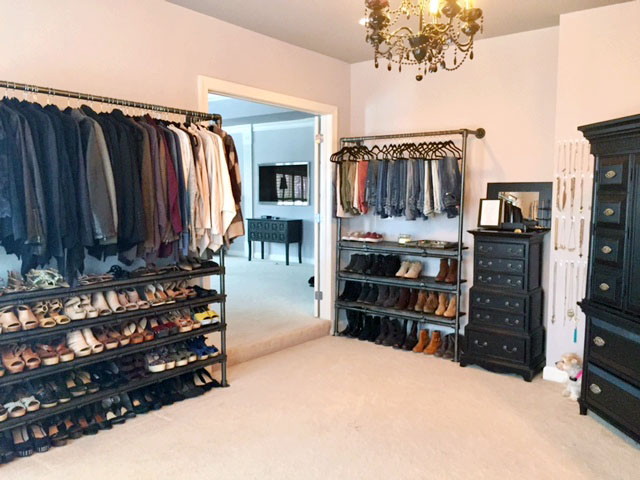
Like I mentioned above, Angela has three different clothing racks in her walk-in closet. The above two each feature a top bar for hanging clothing and three integrated shelves for holding shoes. The shelves are attached to the rack frame using the Rail Support fittings connected to a horizontal bar. Each horizontal bar is connected to the frame upright (vertical supports) using a Single Socket Tee fitting.
Because the clothing rack utilizes this adjustable fitting, the height of each shelf is adjustable (even after assembly). It can always be set to a different height.
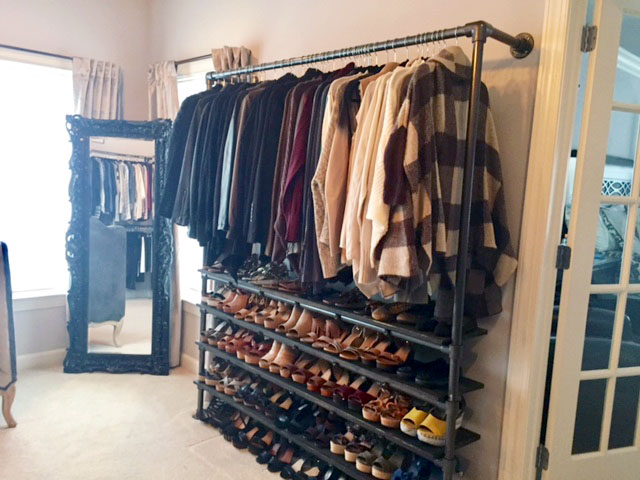
Each of the above two clothing racks is 78" tall and 12" deep. One is 66" long and the other is 50" long.
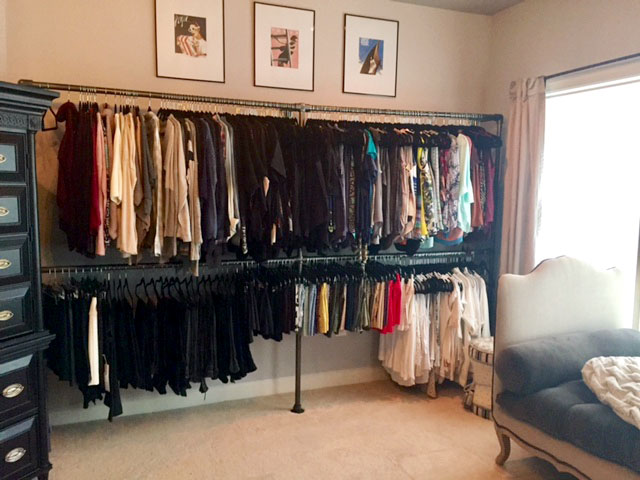
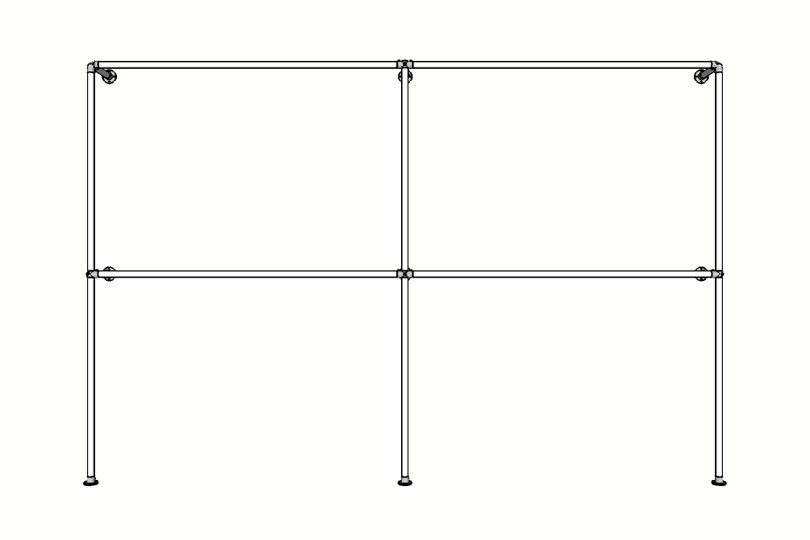
The final clothing rack is 119" long, 78" tall, and 12" deep. It features a top and middle bar and is used solely for hanging clothing.
Each clothing rack is mounted to the wall and floor using Flange fittings.
Fittings Needed for the Clothing Racks
Below, we have listed the fittings to build each of the clothing racks just as Angela did for her walk-in closet. Note, the design can always be modified and configured in height, length, and width. We do offer clothing rack kits, if you're looking for a simpler approach.
Clothing Racks with Integrated Shelving


The Rail Support fittings are used to attach the shelves to the clothing rack frame. Think about how much weight you need to support and the weight of your clothing rack. In Angela's clothing racks, one rack uses five Rail Support fittings for each shelf (for a total of 15) and the other uses just two for each shelf (for a total of 6).


Two-Tiered Clothing Rack


How to Assemble the Closet Clothting Racks
As with any Kee Klamp built project, the exact order you take to assemble your project is entirely up to you. There is no right or wrong way to do it. However, we have listed detailed steps and diagrams below for an easy approach to assembling the clothing racks.
Steps to Assemble the Clothing Racks with Integrated Shelving
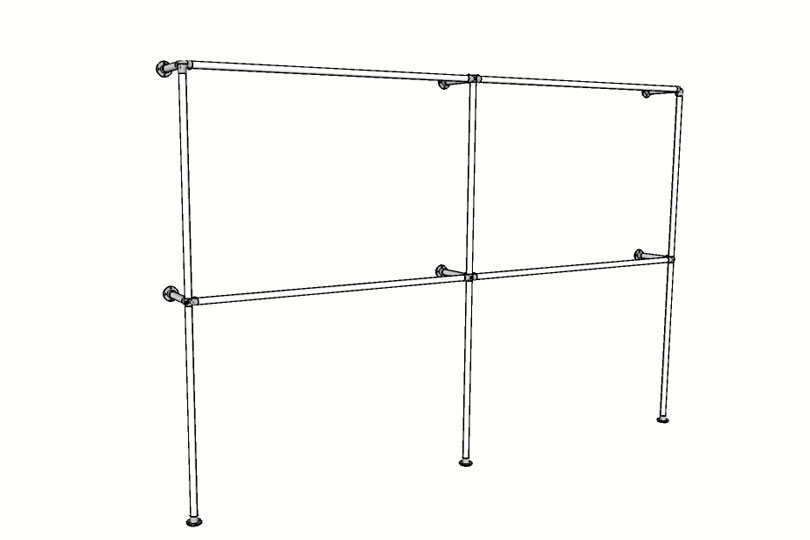
- To build the clothing rack with integrated shelving, you will need to assemble the vertical supports first. Following the diagram in Step 1, assemble the two vertical supports. Each vertical support will utilize one Side Outlet Elbow, two Flange fittings, and four Single Socket Tee fittings. Be sure to mark the height of each Single Socket Tee on the first vertical support you assemble so you can place them at the same height on the other vertical support. When set, tighten down the set screw to each fitting, using an Allen wrench, to secure the fitting in place.
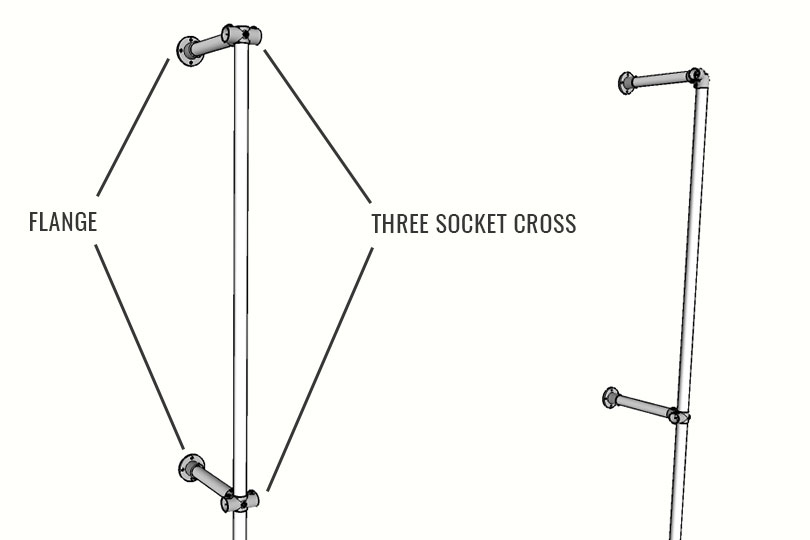
- You should now have two vertical supports as pictured in Step 2.
- From there, you can join them together to create the clothing rack frame.
- Be sure to slide the Rail Support fittings onto the horizontal pipe before connecting them to vertical supports. In this case, there are five for each horizontal pipe (which will, in turn, form each shelf). These Rail Support fittings are used to attach the shelves to the frame.
- Now, you can add the shelves. Place them over the Rail Support fittings.
- Each Rail Support fitting has two holes, in the flange portion of the fitting, to allow for mounting. Attach the shelves using the appropriate hardware (likely wood screws).
- That's it! You should now have a complete clothing rack system as pictured in Step 7.
Steps to Assemble the Two-Tiered Clothing Rack
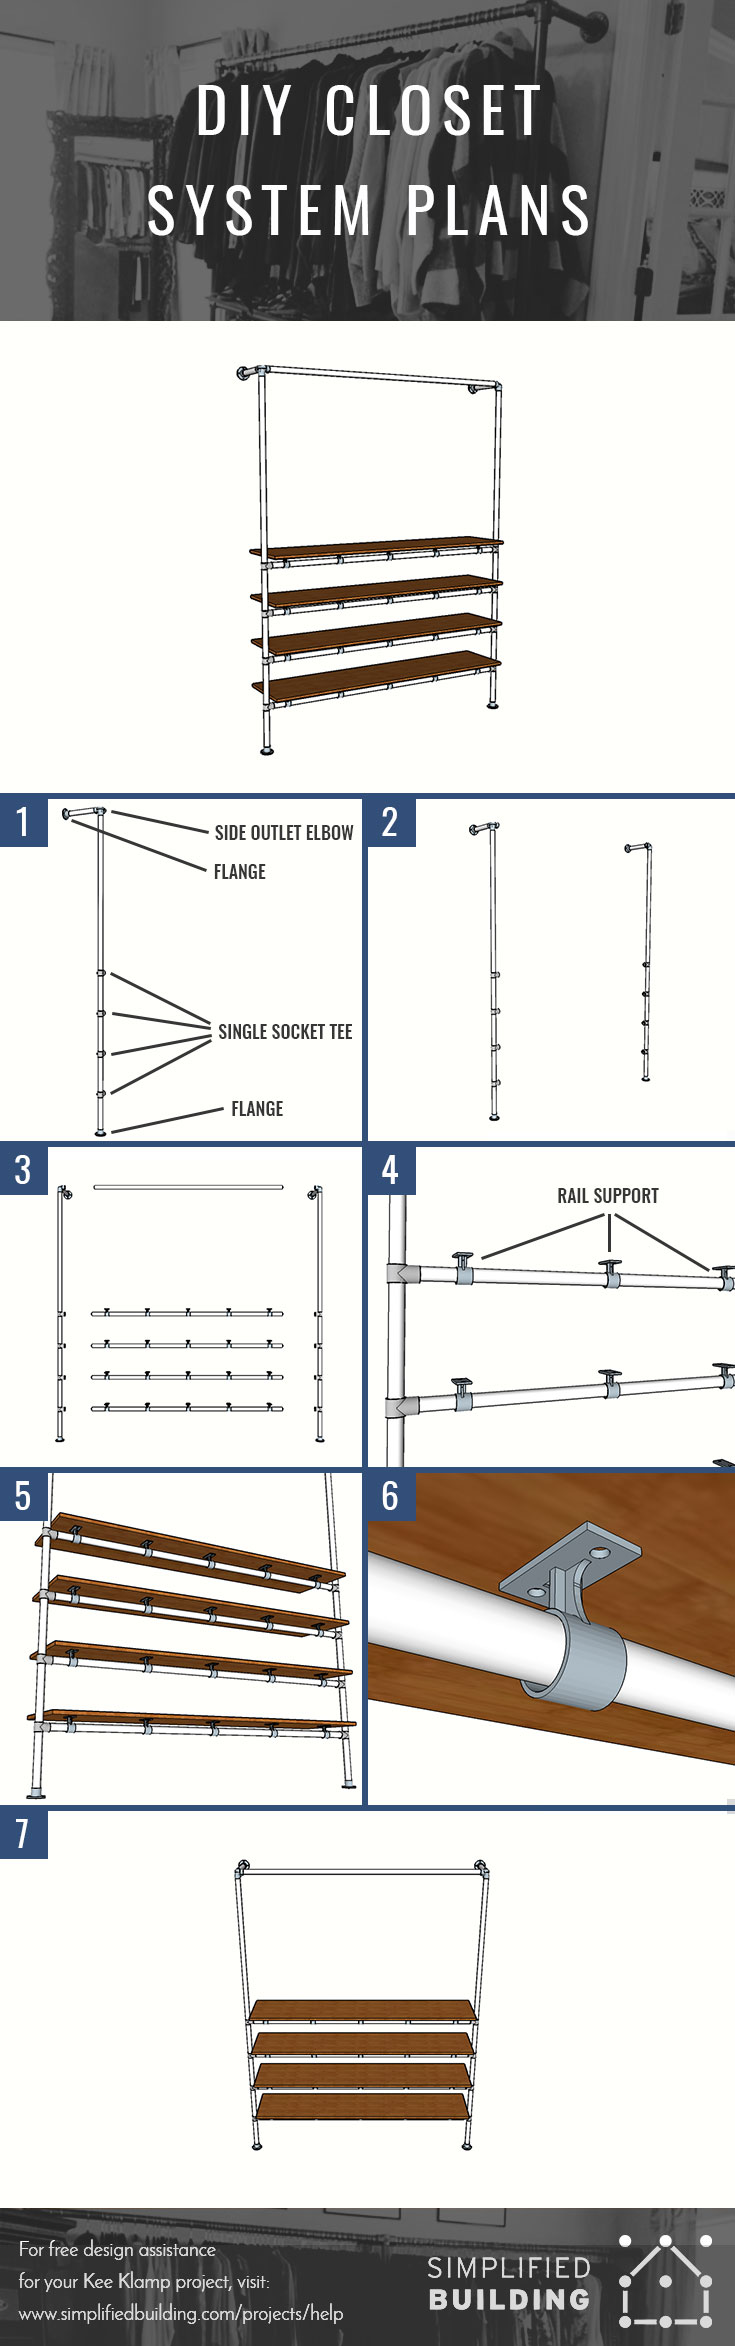
To build the two-tiered clothing rack, first start by assembling the vertical supports, starting with the two on each end and then the one in the middle:

Each end vertical support will utilize three Flange fittings (two used to mount to the wall and one to mount to the floor), one Side Outlet Elbow fitting, and one 90 Degree Side Outlet Tee fittings. Be sure to mark the height of the 90 Degree Side Outlet Tee (at the middle of the support) so you can place it at the same height on the other vertical support.
Once each end support is assembled, move onto the middle vertical support:
The middle vertical support will again utilize three Flange fittings but will also utilize two Three Socket Cross fittings. Set the correct height and tighten down the set screw to each fitting to secure it in place.
You should now have three complete vertical supports as pictured below:
Now, all you have left to do is join together the three vertical supports:
You may want to have someone help you at this point as the clothing rack can be rather heavy when completely assembled. With the rack assembled, you can attach it to the wall and ground via the Flange fittings. Each Flange fitting has four holes in it for mounting. Be sure to attach the rack to studs in the wall or use drywall anchors to ensure the clothing rack is secure.
If you have any problems assembling any of the clothing racks, or need some help designing your own custom closet system, don't hesitate to reach out to our projects team for free design assistance. Our team is experienced in using Kee Klamp and has helped many customers come up with their own perfect design for their closets and boutique fixtures.
If you need some inspiration, we have compiled 44 DIY Closet Ideas to organize your clothing and shoes.


