How to Build Your Own Railing for Stage Design
Theaters, shows, and local productions are always trying to come up with creative ways to build the stage elements they need to put on a quality and safe show.
Well, that's exactly what this high school did for a musical of the classic film, Titanic.
The cast needed a railing for the balcony/second level and staircase for their production. Instead of going the costly route of hiring a local railing company to weld a speciality railing, the school was able to use Kee Klamp's selection of pipe fittings and pipe to create a railing just for this purpose.
And best of all, the railing can be completely disassembled, stored, and reassembled for future shows. The fittings and pipe can even be repurposed for other railings or creative structures.
So to showcase just how this school was able to create such a flexible system for their production, in this post, we're going to take a closer look at their project, the fittings they used to build the railing, and how each fitting is used so you can build your own.
Let's take a closer look...
Theater Stair Railing for Local High School Musical:

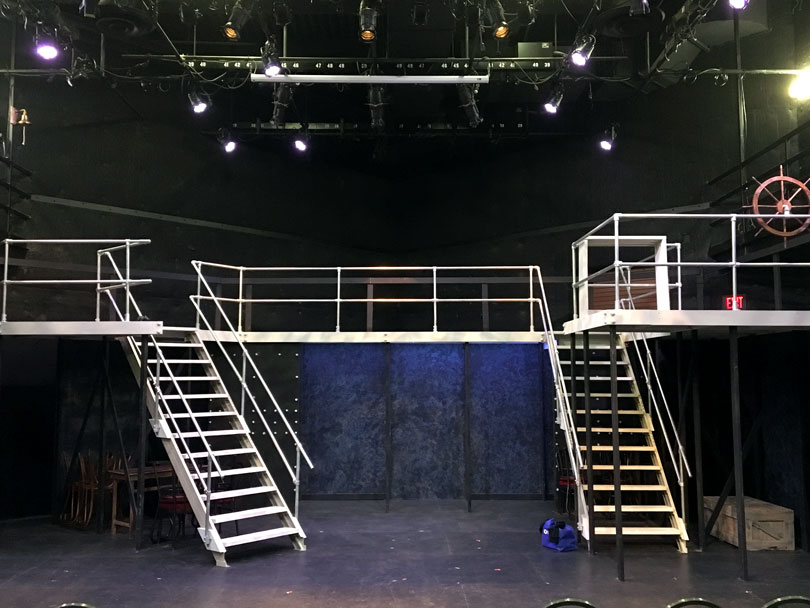
As mentioned above, this railing was custom built for a musical of Titanic at a local high school in Arroyo Grande, California.
Instead of having to hire someone to weld together a solution, the school was able to use Kee Klamp fittings and pipe to build the railing for the stage staircase and upper level.
This was not only crucial to put on an accurate performance but also worked to keep the students safe.
Kee Klamp fittings work by sliding over a section of pipe and securing their position by tightening down a set screw on the fitting using an Allen Wrench. This allows railing and other structures built with Kee Klamp to be assembled by just about anyone (even if you have no prior building experience). We should note that the students put together the railing themselves.
This also allows the railing to be dissembled for storage purposes, travel, or to be repurposed for another structure. Thus, making the railing much more flexible than a traditional welded railing. The school can disassemble the railing after shows and use it for future stage productions.
"In theatre everything is temporary but needs to feel & look permanent. The Kee Klamp product allowed us to build a customized structure that was strong and beautiful. Then when the show is over we can take it all apart easily and use it again sometime in the future. The great support and customer service I received from people like Daniel Hannah was the icing on the cake."
Now, let's take a closer look at the railing itself and how each fitting is used...
How to Build Stage Sets with Pipe and Railing:
Above is an image of the railing accompanying the staircase up to the top of the balcony/second level.
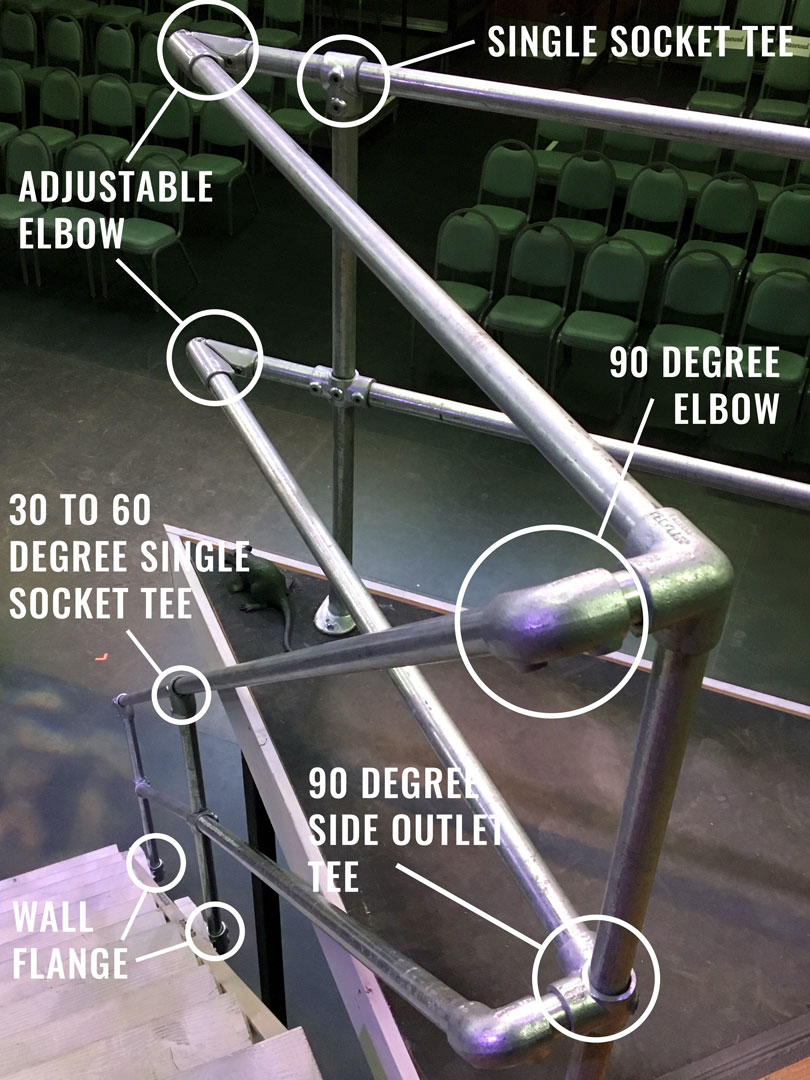
A few fittings are used here. To attach the railing to the side of the staircase, the Wall Flange is used. At the base of the midrail, the 30 to 60 Degree Single Socket Tee is used and at the top of the midrail (where it meets the second level railing) a 90 Degree Elbow is used.
At the midpost, the 30 to 45 Degree Adjustable Cross is used. This allows pipe to slide through in the one direction and connects two separate sections of pipe in the other direction.
Again, looking at the base and midpost of the railing, a 30 to 60 Degree Single Socket Tee is used to attach the top railing. At the top, the 90 Degree Elbow is used again.
Looking at the second level, you'll notice there is a very sharp angle at the corner of the stage. At this point, our Kee Lite Adjustable Elbow is used. Kee Lite fittings work just like Kee Fittings, but are made of Aluminum versus galvanized steel.
To turn the corner from the staircase, the 90 Degree Side Outlet Tee is used at the midrail and the Side Outlet Elbow is used at the top rail.
To attach the railing posts to the stage floor, the Standard Railing Flange is used. On the second floor railing, the Two Socket Cross is used at the railing post midrail intersection and the Single Socket Tee is used on the top rail.
Need Help With Your Own Custom Railing or Stage Structure?
This high school musical railing may seem fairly complex, but putting together a railing like this is possible even if you have little to no prior building experience. Assembling the railing requires very few tools, and the railing itself can be put together with just an Allen Wrench.
If you need any help with putting a railing like this together, picking out the fittings you'll need for your specific project, or want some help with coming up with the actual design for your project, don't hesitate to reach to our projects team for help.
Our team is experienced in building and designing projects using Kee Klamp and will work with you to come up with a design that works perfectly for your application. We'll even go so far as to create a 3D Sketchup drawing of your project so you can see it before you make a purchase. Our team can reached on this page.
Lastly, if you enjoyed this project, make sure to sign up for our email newsletter to get weekly updates on projects just like this one.


