Industrial Pipe Curtain Rods
Why go for a standard curtain rod made of flimsy plastic when you can have something made out of pipe! That's what I thought when I needed to outfit my new office with curtains. Since I was already making the desk and shelves out of pipe, why not the the curtain rods as well. Pipe is easy to work with and it's very rigid. It fits perfectly into most modern, industrial decors and is surprisingly cost effective when compared to other window treatments. I actually used three different styles of pipe curtain rods in this project and I will take you step by step through all three styles.
A note about the fittings: For this project I'll be using Kee Klamp pipe fittings. These are not your traditional threaded pipe fittings. The advantage of these fittings is that they are connected to the pipe with the use of set screw. As opposed to plumbing pipe that is threaded, the set screw allows you to disconnect the pipe and clean your curtain.
Curtain Rod Style 1: Open Ends
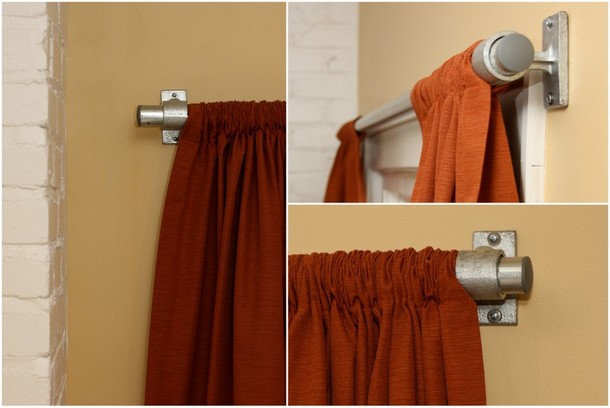
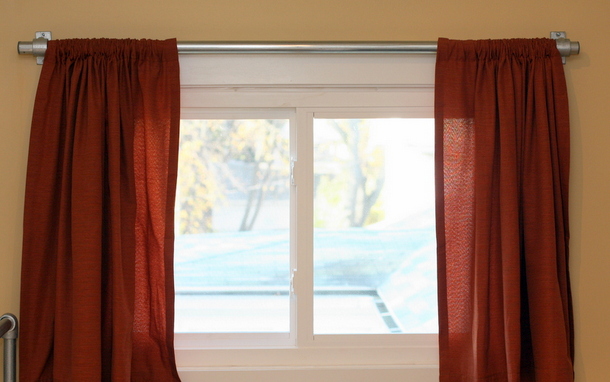
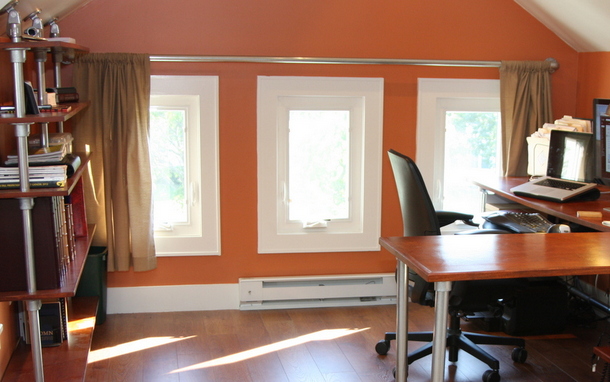
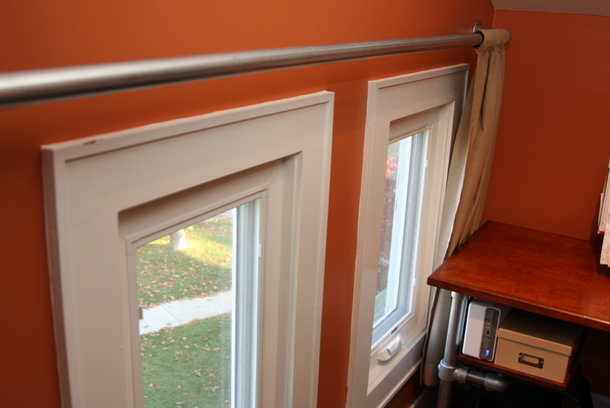
I used the open ended curtain rod style to cover the windows on either end of my office. The open ended industrial curtain rod uses two 70-6 rail fittings. These fittings are typically used to attach a handrail to a wall, but they can also hold a pipe that supports a curtain. The steps for building this curtain rod goes like this:
- Begin by attaching the fittings to the pipe (equidistant from each end). Tighten the set-screws in the fittings. Do this on a flat surface so that the attachment points are flat.
- Set the entire unit onto the wall and mark the holes in the 70-6 fitting. Use a level and a friend to make sure that you get it just right.
- Remove the pipe from the fittings (loosen the set screws).
- Using the marks you made, drill pilot holes and then attach the 70-6 rail fittings to the wall.
- Spool the curtain onto the pipe.
- Put the pipe into the fittings on the wall and tighten the set screws in the fittings.
- Pound in the End Caps to each end of the rod.
In the end you'll get an industrial looking curtain rod that can be easily detached when you need to clean your curtains. The curtain panels can easily be pulled back and forth along the pipe.
Alternative Part

Cost Per Curtain Rod: With metal plugs each curtain rod will cost your around $40.
Curtain Rod Style 2: Elbow Ends
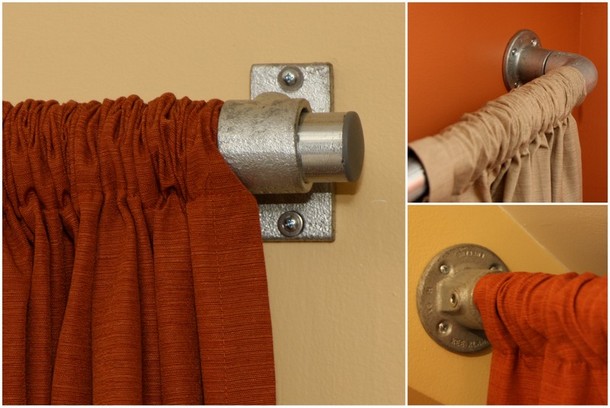
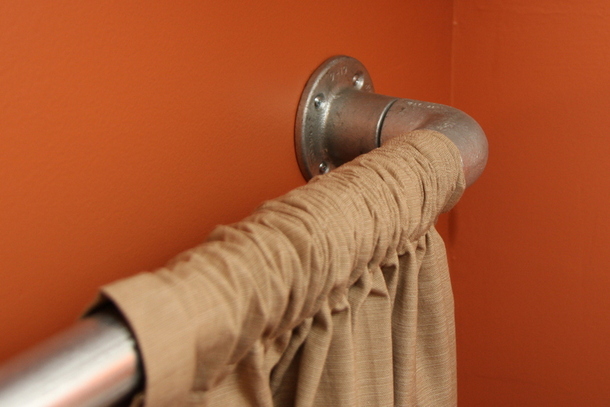
The elbow ended curtain rod gives a slightly different look, and can also be easily detached from the wall. I used this curtain rod on a bank of windows that spans the front of my office. Pipe is great for creating really rigid curtain rods that can span large distances. This configuration also allows the curtain to be brought out from the wall. This can be helpful when you need to navigate some sort of obstruction.
Steps for constructing this curtain rod:
- Spool the curtain onto the pipe.
- Attach the Elbows to the the ends of the curtain rod pipe.
- Attach a shorter pipe to each end of the elbows.
- Attach the flanges to the shorter pieces of pipe that will end back toward the wall.
- Set the entire curtain rod onto the wall and mark the holes for the 61-6 flange fitting. Use a level and a friend to make sure that you get it just right.
- Using the marks you made, drill pilot holes into the wall.
- Secure the curtain rod to the wall with the appropriate wall hardware.
Parts you'll need
Cost Per Curtain Rod: The cost for this curtain rod was around $70. That was mostly because it was such a long length of pipe.
Curtain Rod Style 3: Flange Ends
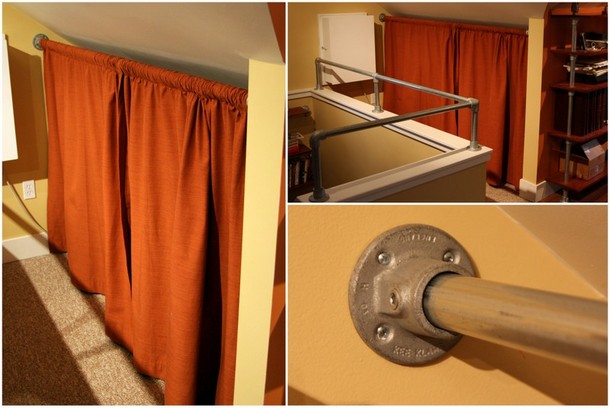
The last of my industrial curtain rods was the simplest. I used this curtain rod to string a curtain across a storage space on the side of my office. It is simply two flanges and a piece of pipe. This is the trickiest to install because, unlike the other curtain rods, the curtain has to be attached before you secure the fittings to the wall. I feel a little silly recounting the steps to build this one given it's simplicity, but I'll try to give you some tips along the way.
- Attach the flanges to both ends of the pipe and ensure that you have the right length of pipe. There is a little bit of play in the fittings, but you have to get this one just right.
- Disconnect one of the fittings from the pipe.
- Spool the curtain onto the pipe.
- Attach a flange to the other end.
- Get a friend to help you hold the rod in place... two friends are better! While one person holds one end against the wall (careful, metal fittings can mark the paint), attach the other end of the curtain rod to the wall by putting a single screw through the flange.
- Using a level, make sure that the rod is level in the space and then connect the other end of the curtain rod to the other side of the wall.
- Once you've got one screw in each flange, and you've ensured that everything is level, go back and put three more screws into each flange.
This is the simplest curtain rod from an aesthetic perspective, but it is also the most difficult to deal with if you ever need to get the curtain off the wall. You'll have to unscrew one of the sides to get access to the pipe.
Parts you'll need
Cost Per Curtain Rod: The cost of this rod was about $55. The fittings cost about $35, so the rest will depend on what kind of distance that you need to span.
Create According to Your Own Style
These three versions are not the only way to build pipe curtain rods. Now that you've discovered Kee Klamp pipe fittings you can come up with lots of different ideas. If you need some help deciding what fittings to use, call the customer service team at Simplified Building. They are experienced and helpful.
