How To Build Your Own DIY Sukkah
 Sukkot, the Feast of Tabernacles, or Feast of Booths, is a seven or eight-day celebration of the “glory clouds” that YHWH sent to protect the Jews from harm during their 40 years of wandering through the Sinai desert before entering into the Holy Land. Today, the Sukkot is a mandatory observance of one of the Three Pilgrimage Festivals, collectively known as Shalosh Regalim. It is celebrated in the United States, for seven days, starting the fifth day after Yom Kippur, the Day of Atonement.
According to kosher Jewish tradition, the walls of your Sukkah, also called Succah, can be made from any material. However, the roof covering must be constructed out of raw vegetation, such as corn stalks, untreated bamboo poles or evergreen branches. It is important to note that some Jewish authorities believe that you may use thin, narrow-planked, unfinished lumber on the ceiling of your Sukkah. Therefore, when you are ready to build your own Sukkah, you should speak with your Rabbi concerning the varying beliefs in Sukkah ceiling materials.
Your Sukkah must also have at least three walls, with an entry opening at least 3.2 inches wide. The entire structure must be no taller than 30 feet, and the walls must be at least 32 inches high. Additionally, the roof must adequately cover the ceiling in such a way so that when the midday sun seeps through it, there is more shade than sunlight visible on the floor. Finally, the raw vegetation roof must cover the entire Sukkah, with no more than 9.6 inch gaps allowed anywhere on the ceiling.
Instructions for Building Your Own Sukkah
It is not hard to learn how to build your own Sukkah. Simplified Building's customer Ariel Zusya Benjamin was gracious enough to share his own DIY Sukkah tutorial with us, using galvanized steel pipe and Kee Klamps to give structural cohesiveness to the piece. Ariel's materials list and step-by-step instructions are outlined below:
Parts you'll need


Additional Supplies
- 3 x 10' 2x4's
- 4 x 8'x10' Tarps
- 4 x 4x8 Thin, Narrow-Planked, Unfinished Lattice Pieces or Your Choice of Raw Vegetation
Step By Step Instructions for Building the Sukkah
Click on the pictures to enlarge the images for each step.
 |
Step 1: Connect three, 10' galvanized steel sections to three, 2' galvanized steel pipe sections using three straight Kee Klamp connectors. |
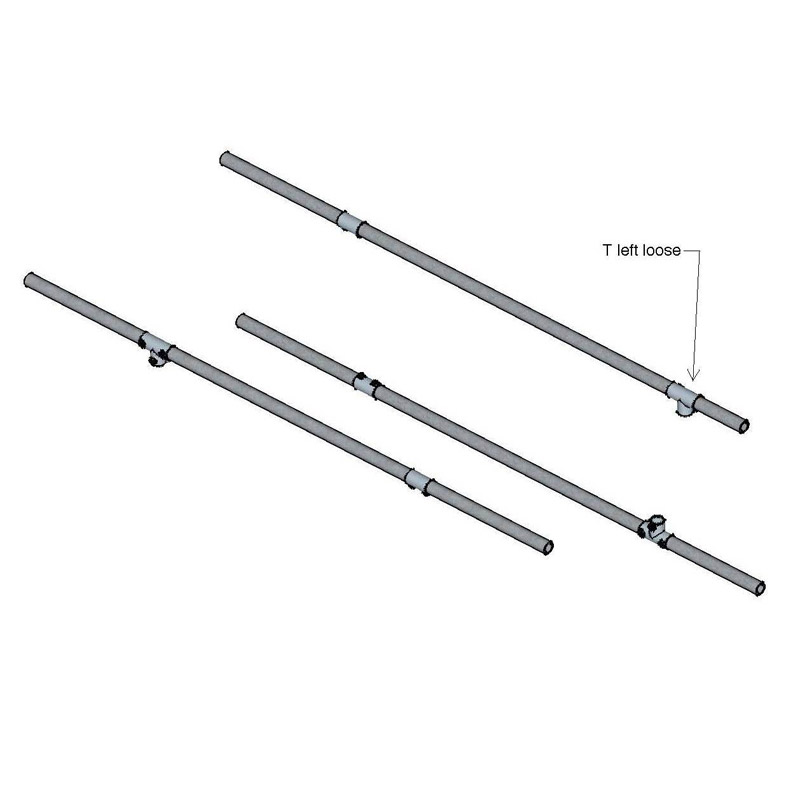 |
Step 2: Slide 3 T-connectors onto the 10' side of your newly made 12' pipe sections. Leave the T connectors loose along the pipe. You will tighten them later during a later phase of the assembly process. |
 |
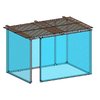
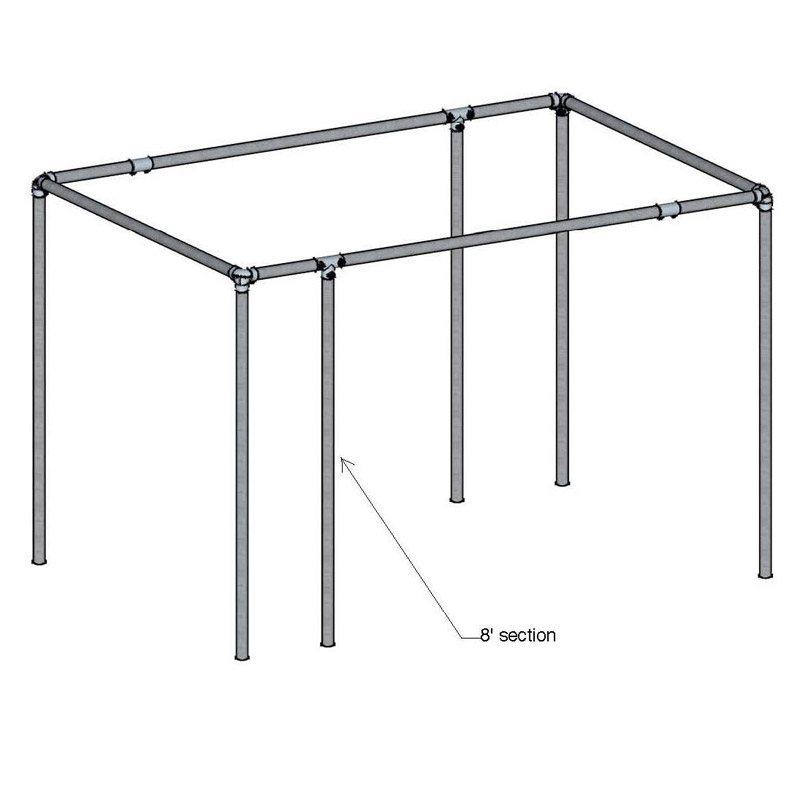
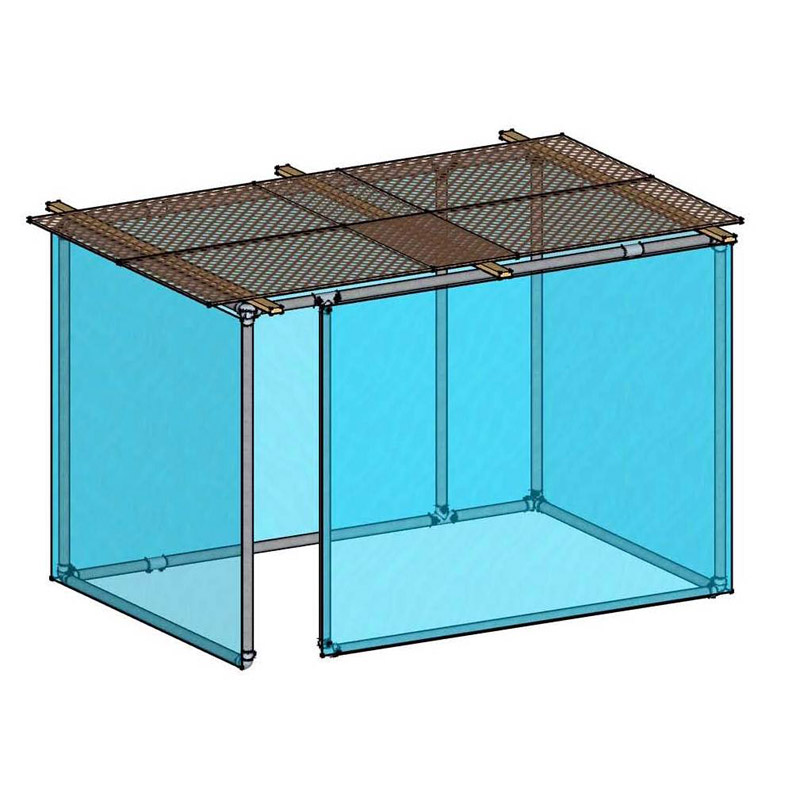
Step 3: Use four, 3-way connecting Kee Klamps to create a rectangle out of two of the 12' pipe sections you assembled in Step 1, and one, 8' pipe section. Attach the 8' pipe section to the left end of the rectangle. As the rectangle will be the top of your Sukkah, the bottoms of the Kee Klamps should now be pointing down to the ground. |
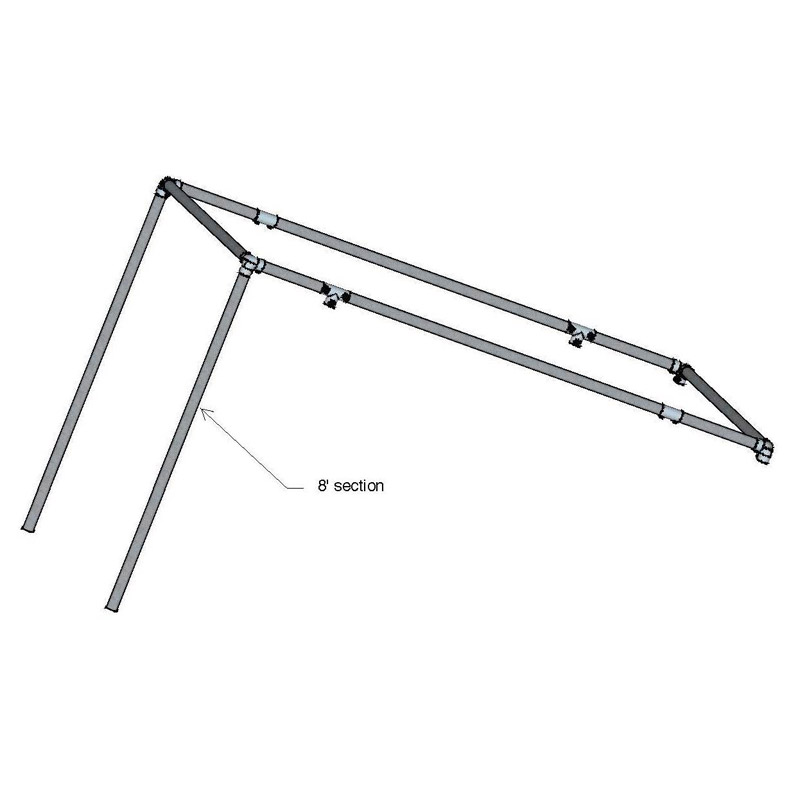 |
Step 4: Insert four, 8' pipe sections into each of the 3-way connectors now pointing down to the ground. This can be done by one person by connecting two of the pipes on one side and then proceeding to insert the other two pipes on the other side. We recommend building with a friend - it makes construction safer and more enjoyable! |
 |
You should now have a rectangle on top with four poles descending from each corner of the rectangle. |
 |
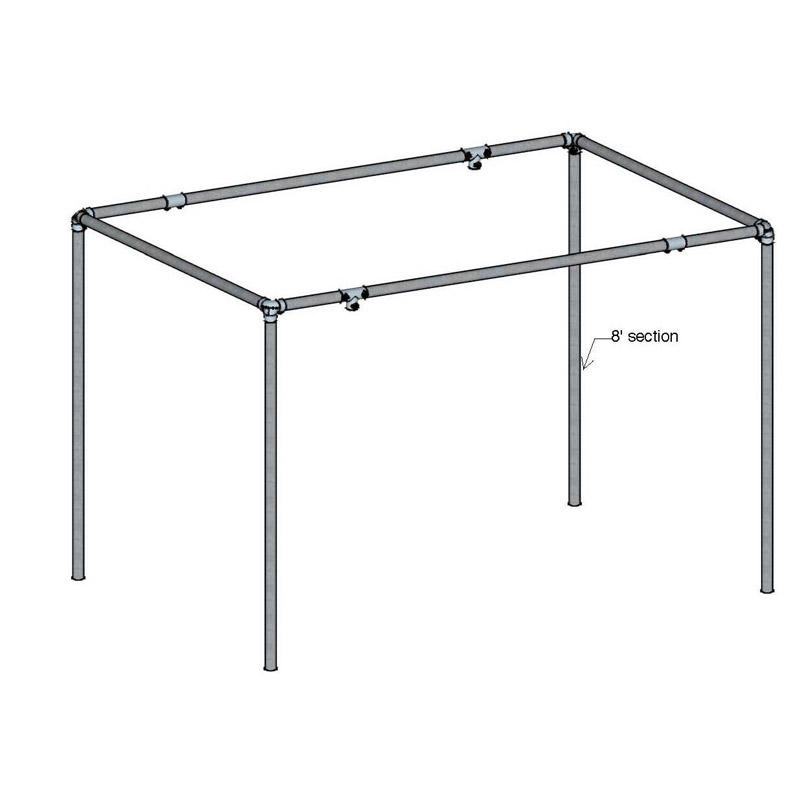
Step 5: Insert one, 8' pipe section into the straight connector closest to the left side of the front of the structure. Tighten each pipe into the connecting piece, so the pipe does not fall out. However, leave the rest of the T connector loose so you can better secure the whole structure later. There should now be a doorway opening on the front, left side of your DIY Sukkah. Now you will attach the galvanized steel pipe sections to the bottom of the Sukkah. |
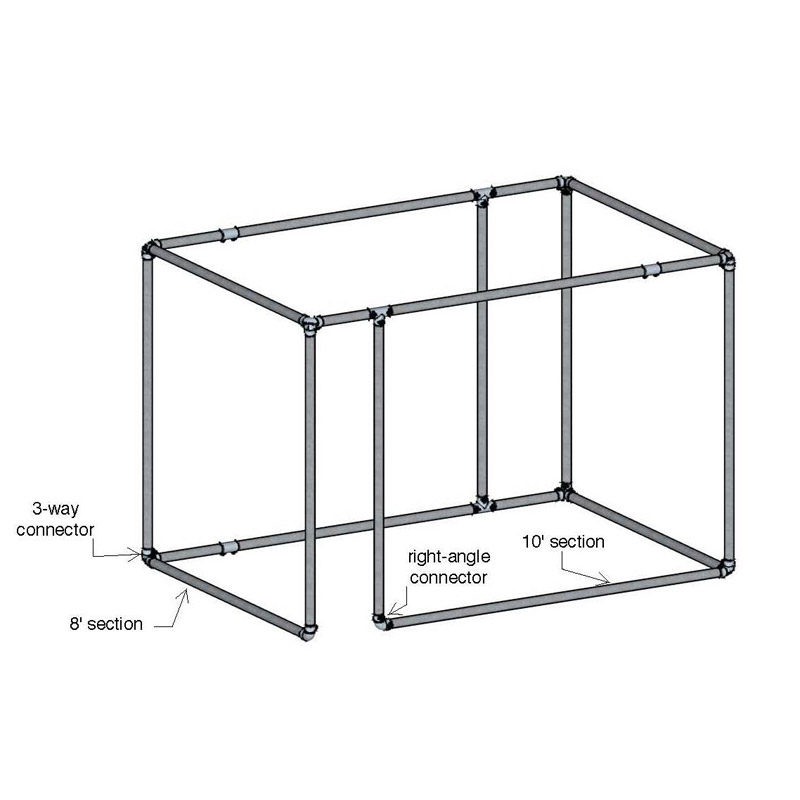 |
Step 6: Insert one, 8' pipe section into the straight connector closest to the right side of the back of the structure. Step 7: Attach two, 8' inch pipe sections to each end of the Sukkah. Attach one, 10' pipe section you made in Step 1 to the side of the Sukkah with the door opening. Note: You will use right angle connectors to attach both pieces of pipe to either sides of the door. You have now built the Sukkah's external structure, so you can now permanently tighten any loose Kee Klamp fittings. |
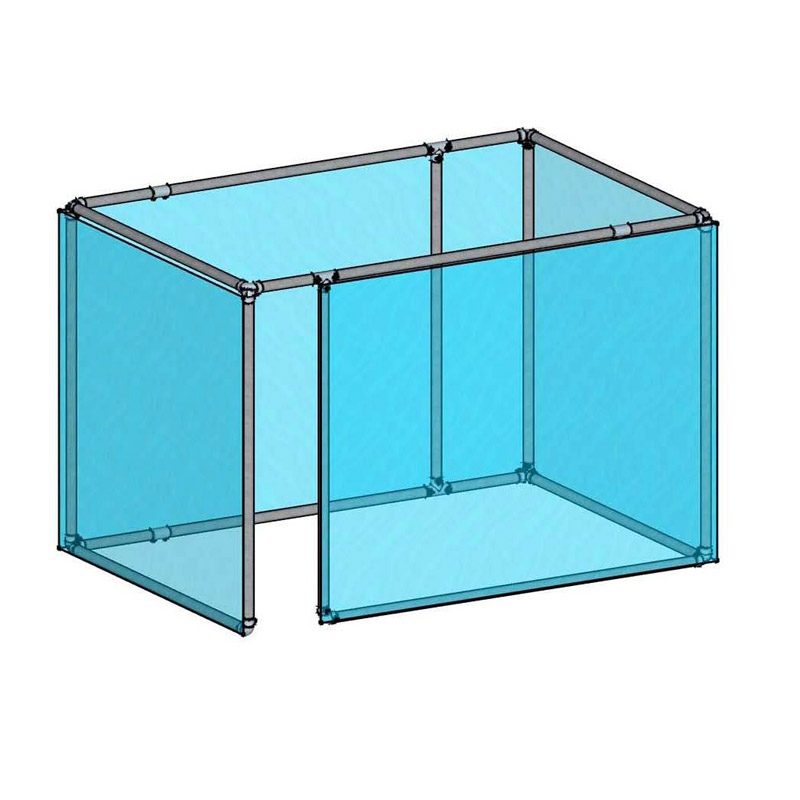 |
Step 8: Use rope or clothesline to enclose the sides of the structure with the tarp. You will probably need to overlap the tarp sections to ensure a lasting, secure fit. |
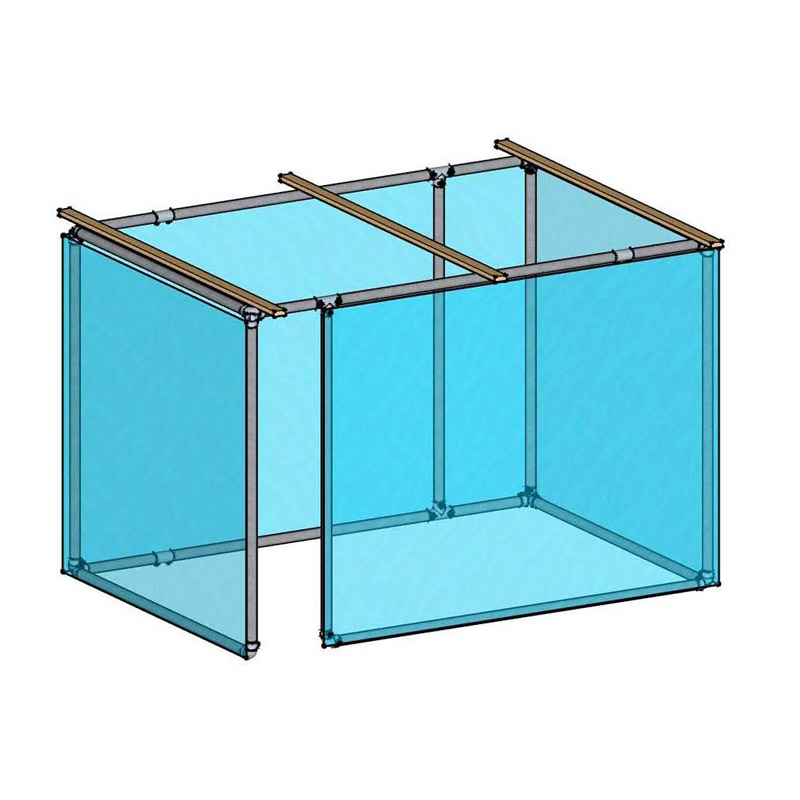 |
Step 9: Place the 2x4s across the roof of the Sukkah. The 2x4s will support the raw vegetation or unfinished lattice Sukkah ceiling. |
 |
Step 10: Cover the Sukkah with your choice of raw vegetation or thin, unfinished narrow-planked lattice. Tie the ceiling materials to the top of the Sukkah's walls with rope. |
Your Sukkah is now complete, and ready to be slept in, eaten in, and shared with your family members and friends during the week of Sukkot!!!
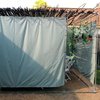
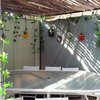
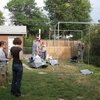
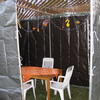
Pictures of Completed DIY Sukkah
Some pictures of a finished Sukkot are below:
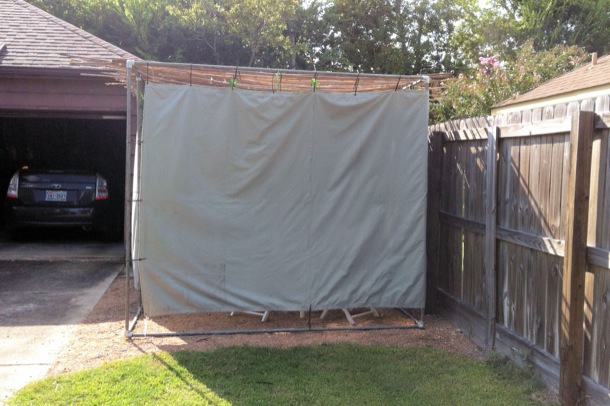
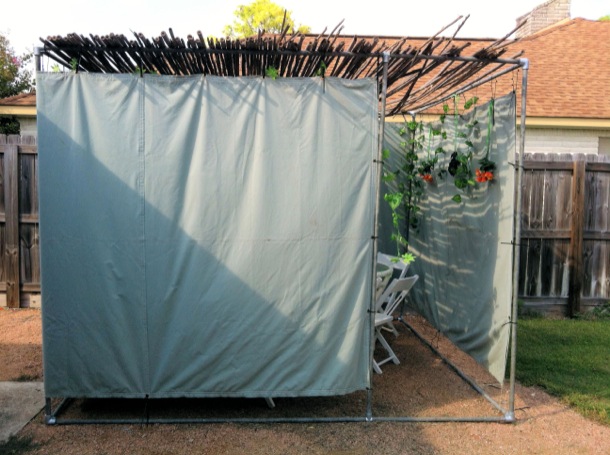
An end view of a DIY Sukkah
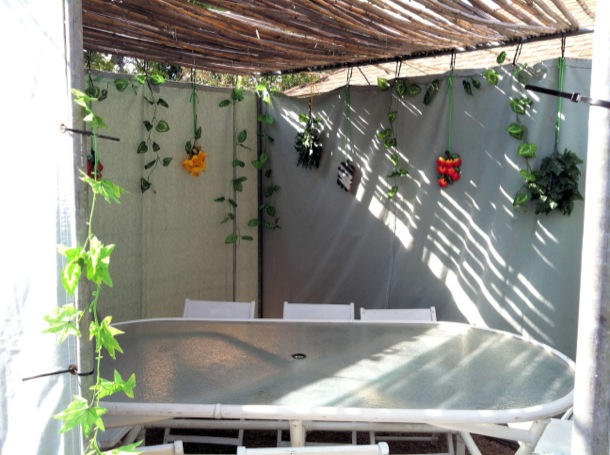
An inside view of a beautifully decorated DIY Sukkah.
A view of the doorway leading into Ariel's DIY Sukkah.
Get Assistance When Building your Own Sukkah
Ready to learn how to build your own Sukkah? We have all of the Kee Klamp fittings and steel or aluminum pipe you need to create your own unique, kosher Sukkah based off of Ariel's design here. We are also available to answer any questions you might have about building your own Sukkah. Please contact our Design Team today for free design assistance.
