How to Build a Heavy Duty Dolly Cart (with Step-by-Step Plans)
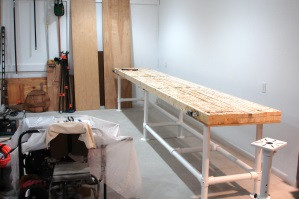
Sometimes buying just what you need isn't always possible or it's simply too expensive to do so. That's when you need to turn to coming up with your own DIY solution. Well, that's exactly what Kenneth did when he built this heavy duty DIY dolly cart using Kee Klamp fittings and pipe.
The dolly cart was built specific to Kenneth's dimensions and the cart can even be dissembled and reassembled if needed. In this post, we're going to cover the details of Kenneth's dolly cart, the fittings needed to build one just like it, and show you the steps to do so (with detailed diagrams) so you can build your own. Follow along:
Kenneth's DIY Dolly Car Project Details:
As mentioned above, Kenneth's DIY dolly cart was built using Kee Klamp fittings and pipe. Kee Klamp fittings are like traditional pipe fittings, however, instead of using a threaded connection, the fittings slide over pipe and tighten down using a set screw. This makes them much easier to use. In addition, since there's such a wide variety of Kee Klamp fittings, the possibilities are endless as to what you can build with the fittings.
In Kenneth's case, the fittings allowed him to build a dolly cart that was custom to his exact specifications.
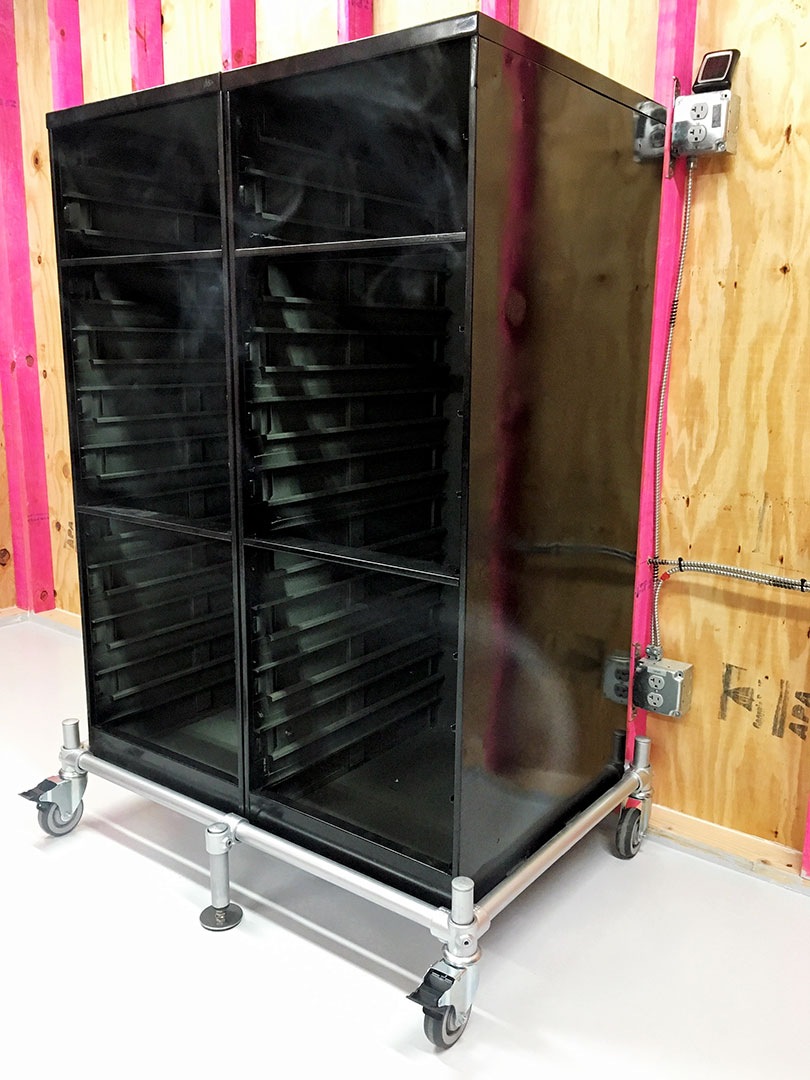
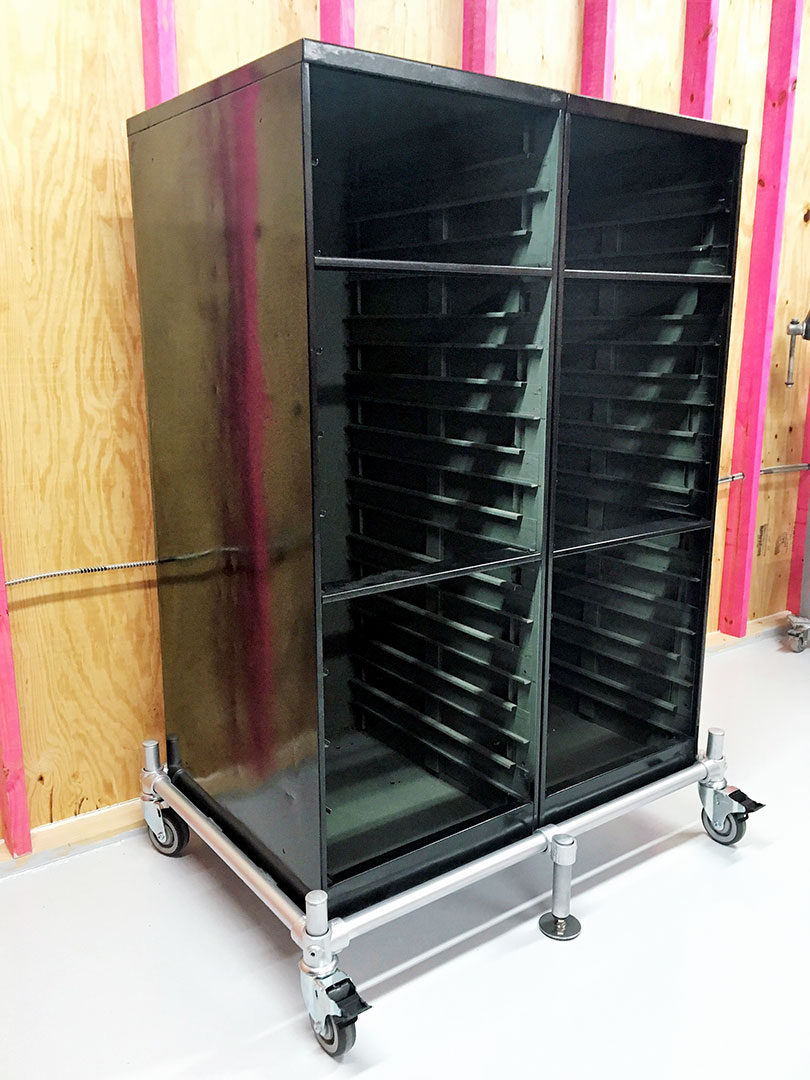
Kenneth needed to move a 20-drawer parts and hardware cabinet from the 1960s that he is refinishing. The dolly fits the cabinet perfectly and supports the weight just fine. Kee Klamp fittings are made of galvanized steel which makes them quite strong and heavy-duty (they're also rust resistant).
Kenneth can keep the cabinet on the dolly so that it's always easy to move. But, it can also be used to move other pieces of furniture or equipment. The cart can be completely dissembled and reassembled if needed and the fittings can be repurposed for future structures should Kenneth ever find that he no longer has a use for the dolly.
The dolly cart uses two casters that can be locked down and two that move freely.
The Fittings You'll Need to Build the Dolly Cart:
Below, you will find all of the fittings you need to build a heavy-duty dolly cart just like the one Kenneth built:


How to Assemble the DIY Dolly Cart:
As with and Kee Klamp built project, the exact order in which you assemble your project is entirely up to you as there is no set order. However, we've detailed what we believe to be the simplest approach to assembling the dolly cart.
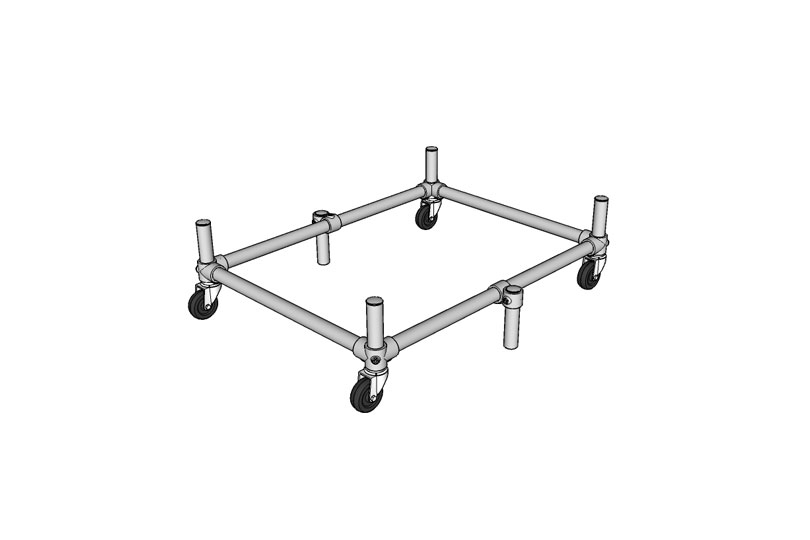
First, start by assembling each of the four caster supports:
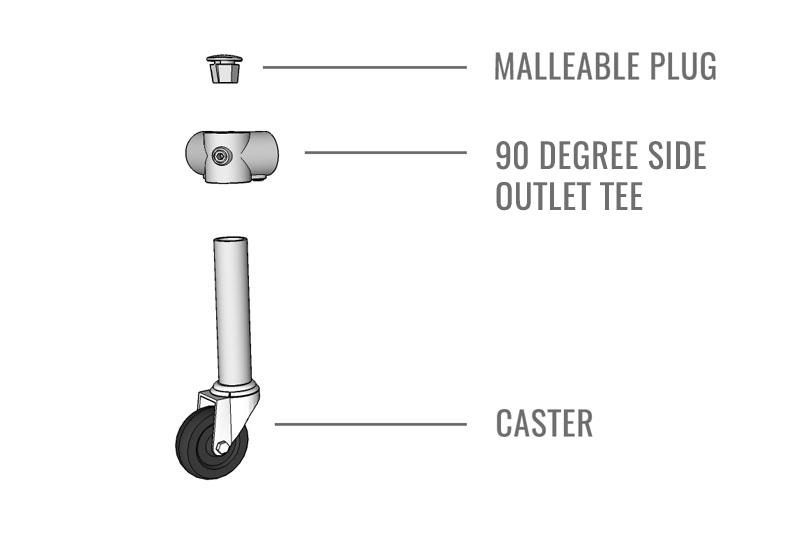
Each of these supports will utilize one Caster, one 90 Degree Side Outlet Tee, and one Malleable Plug.
Since there are no internal walls inside the 90 Degree Side Outlet Tee, assembling these supports first will allow the horizontal lengths pipe (that connect to the 90 Degree Side Outlet Tee) to "butt up" against the vertical pipe that is already positioned through the fitting.
Follow the diagram above to assemble the support. The caster will slide into the exposed end of pipe. It can be tightened using a wrench or by simply turning the caster clockwise until the connection is tight. A detailed instruction video for attaching casters can be found on the proudct page here.
The 90 Degree Side Outlet Tee can now slide onto the pipe all the way until it meets the edge of the caster. Then, secure the fitting to the pipe by tightening the set screw using an Allen Wrench.
Lastly, the Malleable Plug is used to cap off the exposed end of pipe at the top of the support. Place this into the pipe and hammer it in with a soft edge mallet or a hammer with a piece of cardboard covering the top of the plug (to protect the finish).
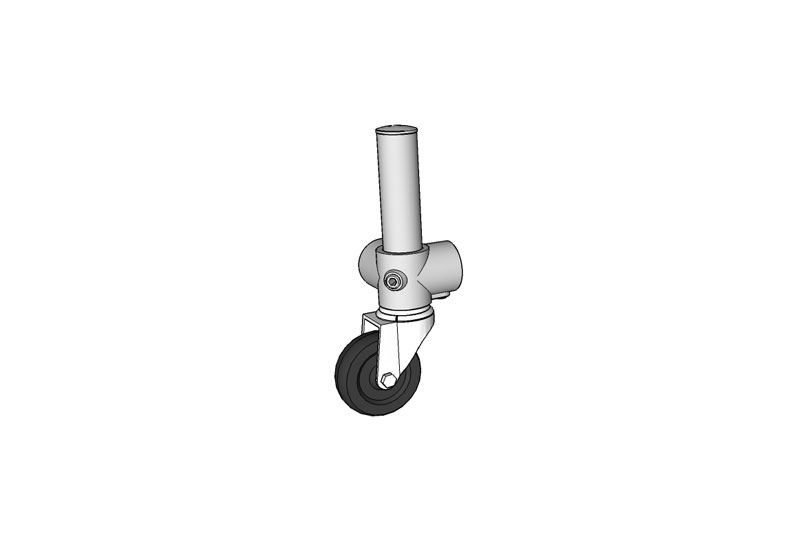
You should have a complete support as pictured in the diagram above. Repeat this process for all four supports.

You should now have the four caster supports complete as pictured in the diagram above.
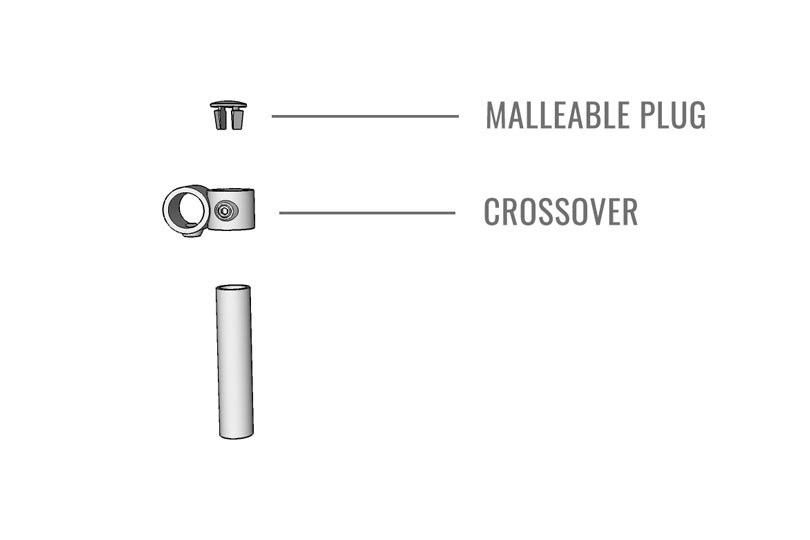
Now, you can assemble the additional supports. These attach to the middle of the horizontal lengths of pipe and keep the dolly from tipping when large objects are placed on the structure.
There are two of these supports and each will use on Malleable Plug and one Crossover fitting. Follow the diagram above to assemble these supports.
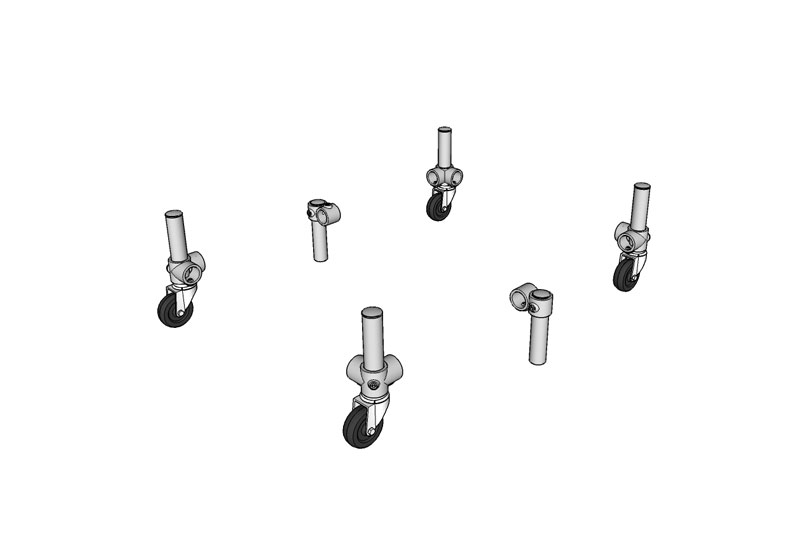
So far, you should have all of the supports assembled as pictured in the diagram above.

All that's left to do now is to connect these supports. Follow the diagram above to finish assembling the dolly cart. Make sure to completely tighten down the set screw on each fitting. Double check the connections as needed.
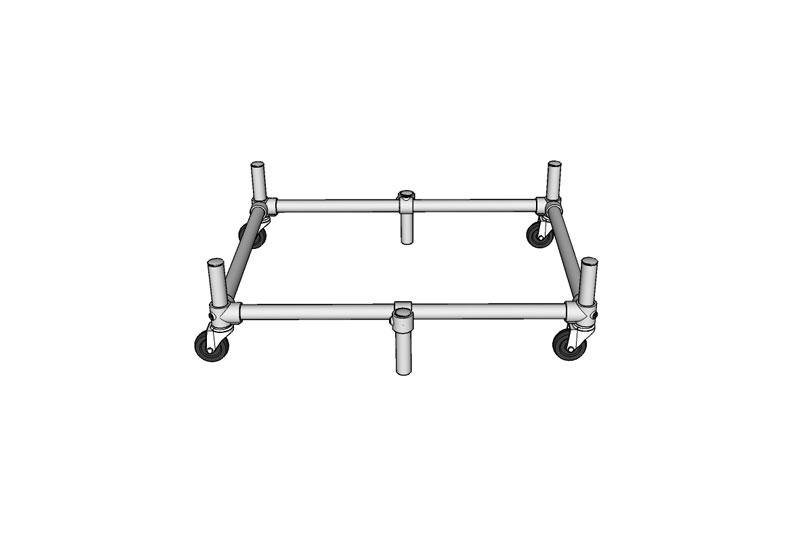
That's it! You should now have a complete dolly cart as pictured in the diagram above.
If you have any questions on assembling the dolly cart or about which fittings you should order, reach out to our project team for help by emailing projects@simplifiedbuilding.com or visiting our free design assistance page here.