DIY Kitchen Island Lighting Fixture (& How to Build Your Own)
Getting the lighting right in your home can be tricky. Nevermind when you want to mount a lighting fixture in a kitchen with an angled ceiling. Well, that's exactly what Chris did with this DIY kitchen island fixture built from reclaimed wood and Kee Klamp pipe fittings.
If you're looking to build a custom lighting solution for your kitchen, just like Chris did, then this is a project you'll want to check out.
In this article, we'll cover the details of Chris' unique DIY lighting fixture, the fittings you'll need to build one just like it, and how to use them. So follow along:
DIY Lighting Fixture Project Details:
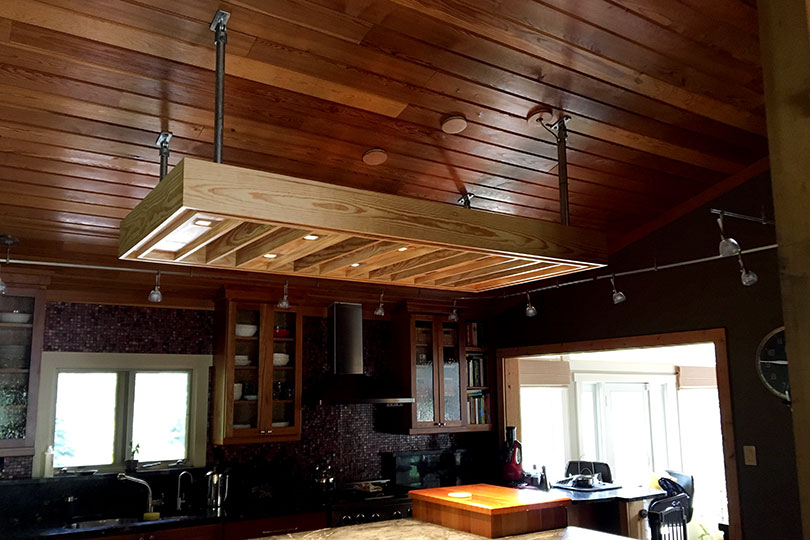
Chris built the lighting fixture from reclaimed wood taken from an old bleacher out of a local high school in central Wisconsin. The boards were then sanded down to raw wood and coated with a Polycrylic clear coat finish.
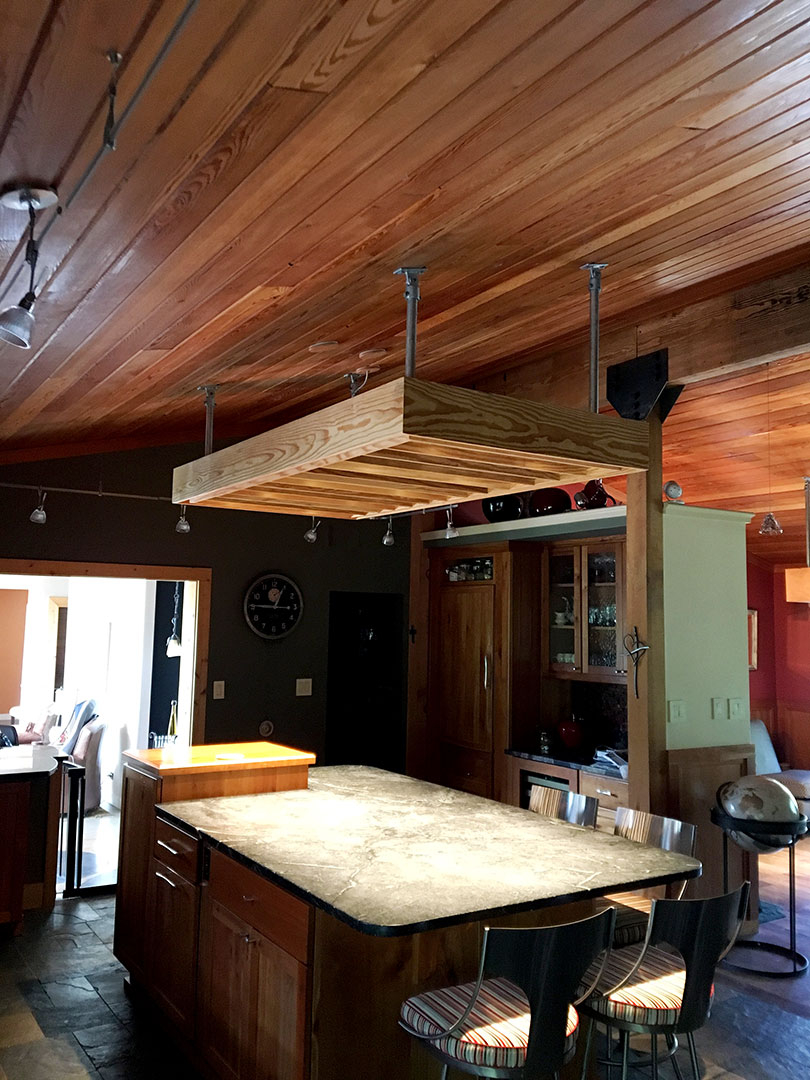
The wood boards were used to create the lighting fixture frame while pipe and fittings were used to attach the fixture to the ceiling. The wood frame is 86" long, 42" wide, and 7" tall.
For the fixture lighting, 3" square LED can lights, from Element by Tech Lighting, were used. These lights feature a recessed design with a satin nickel square trim. Lastly, the lighting fixture hangs roughly 16" down from the ceiling and is about 8' from the floor.
Chris refers to the lighting fixture as the "island cloud".

Fittings Used in this Project:
Parts You'll Need

Since the ceiling in the kitchen is slanted, this provided a bit of a challenge to get a flush mount between the fixture and the ceiling.
To compensate for this angle, Chris was able to use the Kee Klamp Swivel Flange. This fitting has a socket on one end to attach to pipe. This socket is then attached to a flat plate via a bolt. This allows the fitting to swing freely in order to attach to angled surfaces (the fitting has a range of motion of 170 degrees). The fitting "plate" then has two countersunk holes in it for mounting.
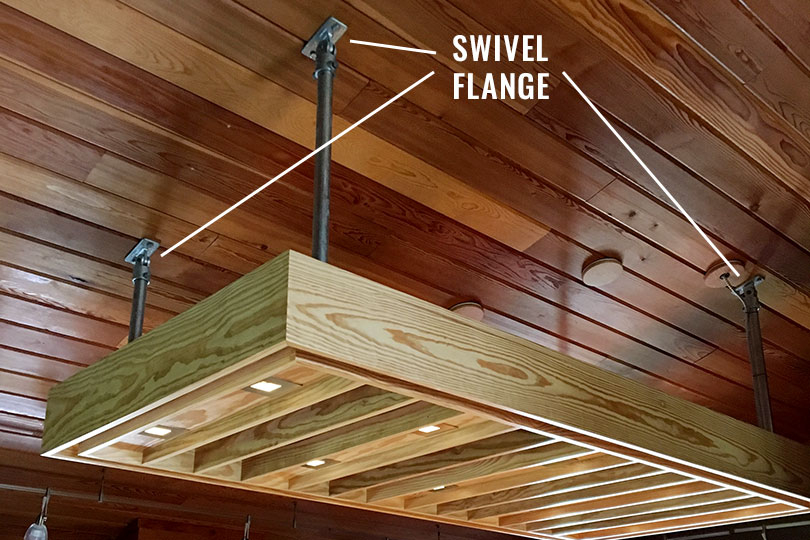
Using four of these fittings, Chris was able to attach the fixture to the ceiling and ensure there was a solid, flush connection.
These are then attached to the pipe and another Swivel Flange is used on the opposite end to attach to the wood frame.
Need Help with Your Project?
Well, that's all there is to Chris' project. We hope you enjoyed it and found it helpful. But, if you need any assistance with your own Kee Klamp project, we're here to help.
Our projects team is experienced in designing and building Kee Klamp projects and will work with you to come up with a design that will work for you. We offer free design assistance and will even go as far as creating a 3D SketchUp drawing of your project so you can see how it will look before you buy.
In any case, be sure to check out our wide range of Kee Klamp fittings and our projects area for more inspiration. Lastly, if you enjoyed this project, make sure to sign up to our email newsletter to get weekly updates on projects just like this one.


