DIY Ikea Wall & Floor Mounted Table (with Step-by-Step Plans)
Using Ikea products to create something truly unique is a popular DIY approach on the internet and this project is no different. This unique DIY Ikea wall mounted table uses a table top from Ikea while using a leg support, built using Kee Lite fittings and pipe, to provide stability to the table.
The table was built by one of our customers, Bob, who needed a table/desk for use in his small garage apartment. Having used our fittings before to build a workbench and coffee table, Bob decided to again use Kee Lite fittings to create a stunning piece.
In this project, we'll cover the detail's of Bob's wall & floor mounted table, the fittings needed to build the leg support, and how to put it all together (with helpful diagrams).
Check it out:
Bob's Ikea Table Project Details
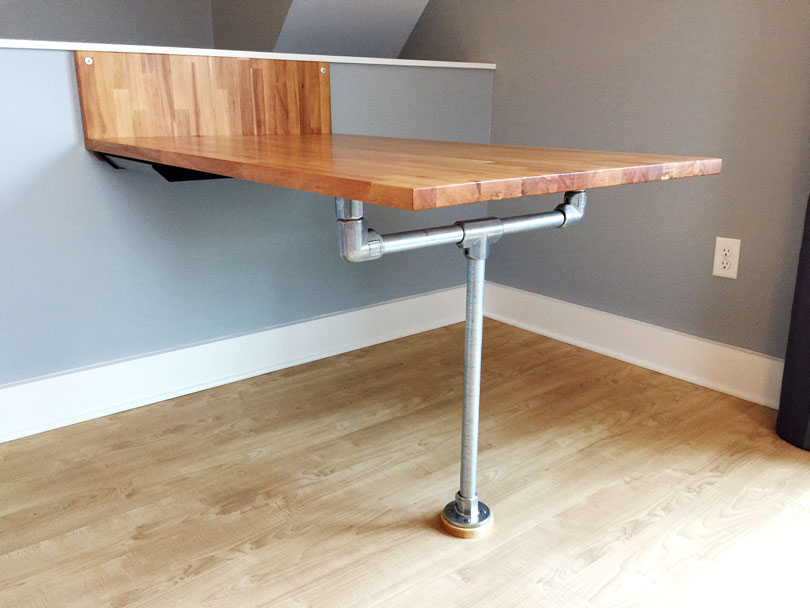
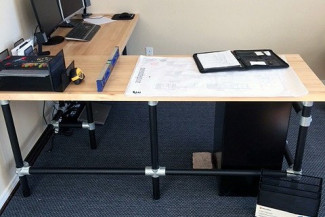
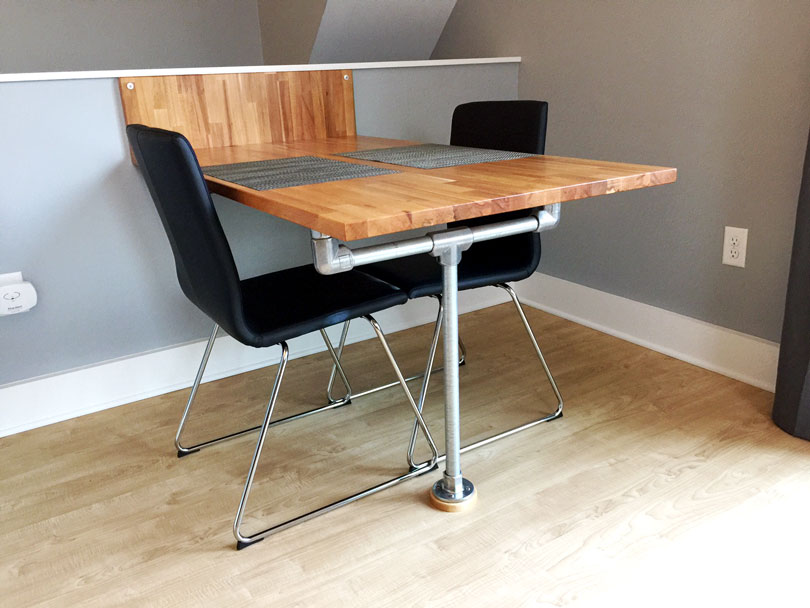
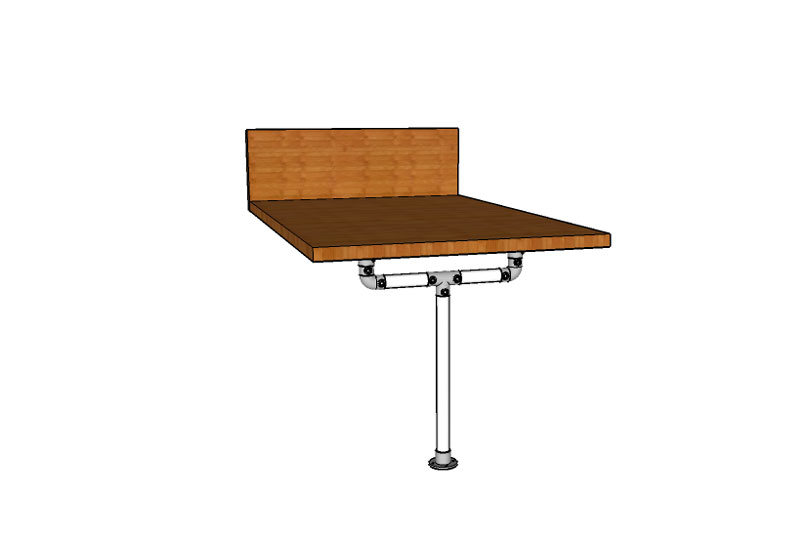
Bob's table features a simple design that use Kee Lite fittings and pipe to support the table at one end while the other end is mounted to the wall.
The finished table is 51" long x 29-1/2" wide x 36" tall. The table top itself is a Gerton top from Ikea that costs $90. The original dimensions of the top were 61" x 29-1/2" x 1-1/8" thick. However, Bob wanted the table to be a bit shorter lengthwise, so he cut 10" off. This extra bit was then used as an accent on the wall to continue the modern look.
To attach the table to the wall, Bob used a 2" oak cleat on the bottom of the table top and the extra 10" length on top. The table top is essentially wedged between these two boards. Bob then used 3 lag screws to drill up through the oak cleat, through the table top, and into the 10" length board to connect everything together.
From there, Bob then used three Spax screws (one on each upper corner of the 10" length and one in the middle of the bottom oak cleat) to screw the entire assembly to the wall studs. He also painted the heads of each Spax screw in galvanized paint to match the Kee Lite fittings.
Lastly, Bob used a maple board, which he turned himself using a lathe, as a "foot" for the Flange fitting attached to the floor. He then finished the table top with a few clear coats of oil urethane to complete the look.
Overall, Bob appreciated the simplicity, ease of use, and sturdiness of using Kee Lite to build the table, stating "It is VERY sturdy despite only having one leg."
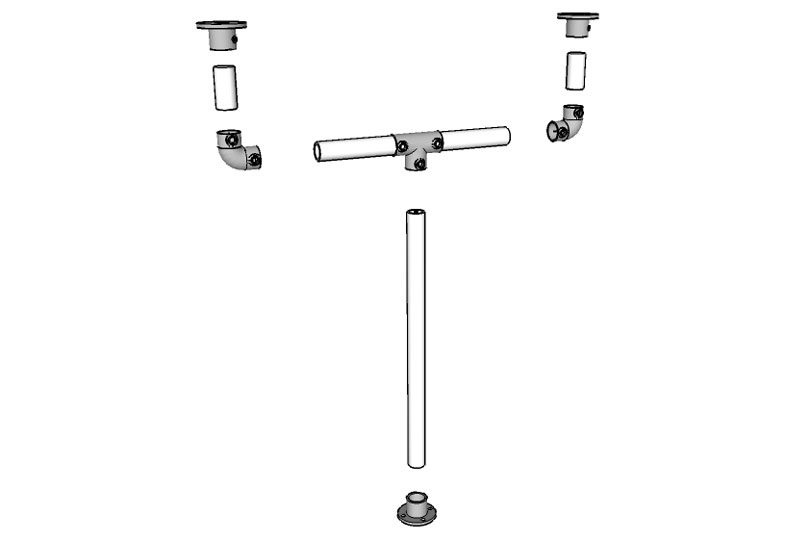
Fittings Used for the Table
Below, are all of the fittings needed to assemble the leg support. Pipe length is entirely up to you based on the dimensions you would like your table to be and the table top you elect to use. Pre-cut pipe can be ordered to your specific dimensions on this page.


How to Assemble the Table Leg Support
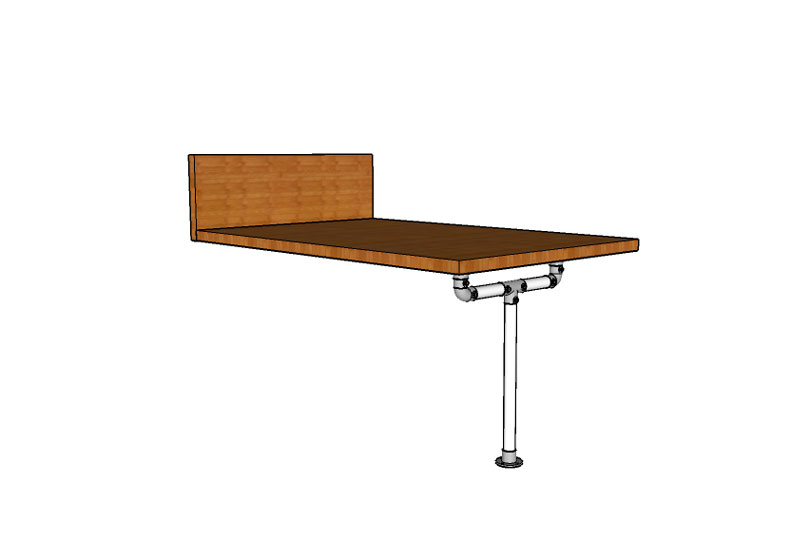
Assembling the leg support is fairly straightforward, using only a few fittings to create it. Use the steps below as a guide when assembling the leg:
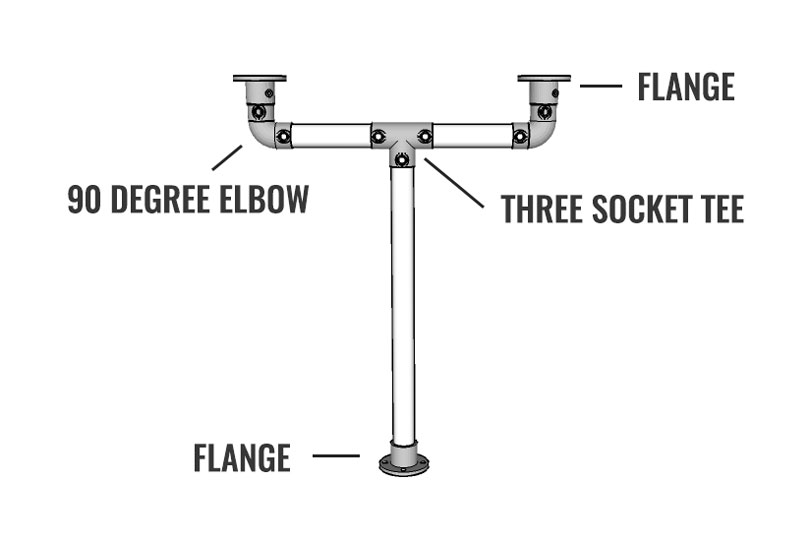
There is no exact order for assembling the support. However, when attaching the Three Socket Tee, you will likely want to attach the horizontal length of pipe first, as this pipe will slide through the fitting and work as a "stop" for the vertical pipe going into the bottom socket (best illustrated in the diagram below). Alternatively, you could also join two separate lengths of pipe or use the Single Socket Tee for a similar approach.
Each fitting has a set screw to secure it to the pipe:
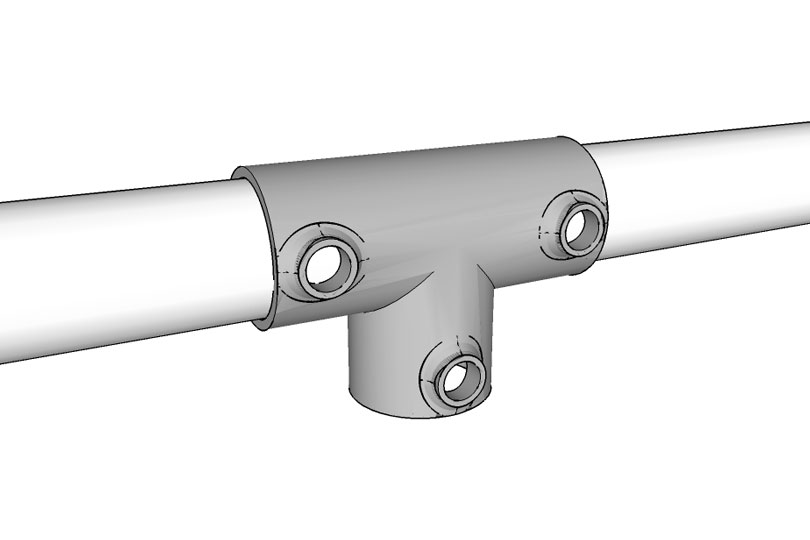
This can be tightened down using an Allen Wrench. When you have each fitting in place, you can tighten the set screw down to secure it to the pipe.
Each Flange fitting has four countersunk holes in it for mounting the table top: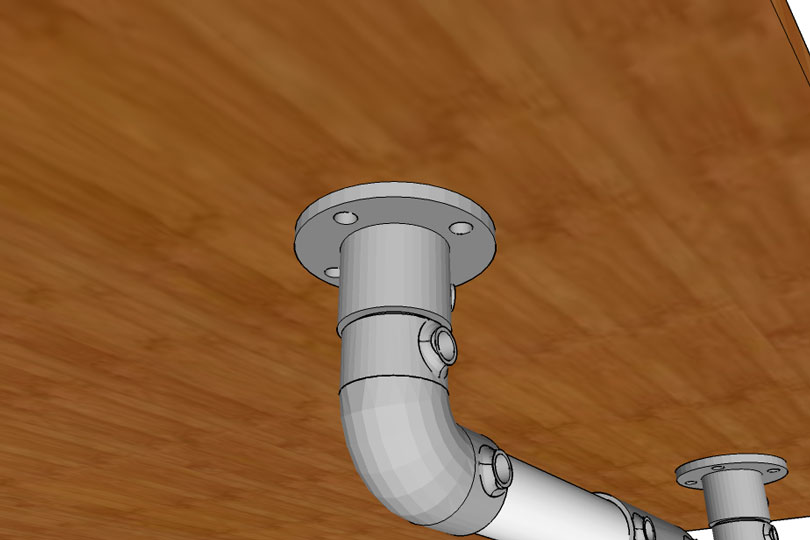
Wood screws are likely your best option when attaching a similar table top.
With the Flange fittings attached to the table top, the table is now complete. You can elect to secure the Flange fitting at the base of the leg to the floor if you wish. This will add a bit more stability but will obviously put holes in your floor which could be an issue should you ever move the table, move from your place, etc. So you may want to see how sturdy the table feels to you without doing this first and go from there.
We hope this tutorial was helpful to you. If you have any questions, or need some help with a custom table or desk design, feel free to reach out to our projects team for assistance. Our team can be reached at projects@simplifiedbuilding.com or by visiting our free design assistance page.
Also, if you're looking for a simpler approach, we do have a few table/desk kits that you may want to check out. Finally, if you enjoyed this project be sure to sign up to our email newsletter for updates on future projects like this one.