DIY Fishing Tower with Wakeboarding Rack
Boating is a great way to relax with family and friends, but the cost of the boat, maintenance, and accessories can really add up. When you’d rather spend more time on the water and less time making repairs or paying bills, it’s important that your upgrades are durable and cost-effective.
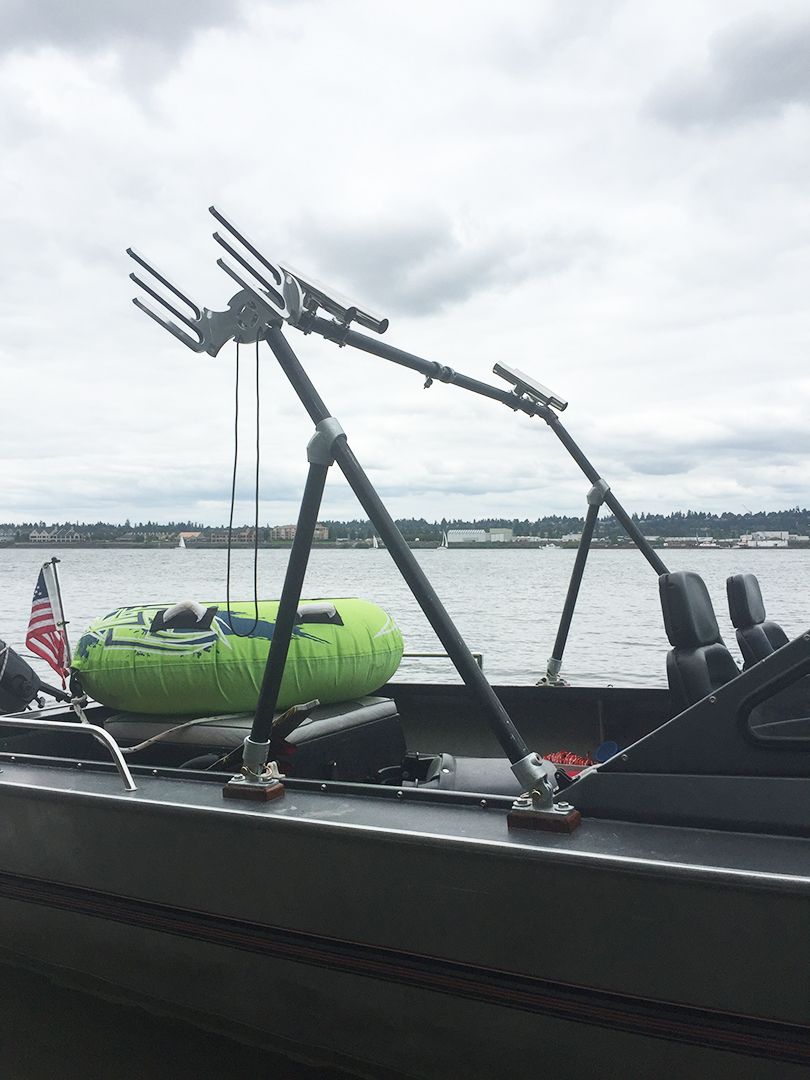
So when Dale wanted to upgrade his boat with a tower, fishing rod holders, and a wakeboarding rack, he turned to Kee Klamp fittings to help him get the job done. The result is a boat tower that is as sturdy as a pre-assembled competitor but with more customization options and a cheaper price tag.
In this article, we share the exact fittings and all the accessories Dale used to bring his fishing tower to life. We even list step-by-step instructions for building your own using helpful 3D diagrams.
Let’s get started:
Dale’s Boat Tower Project Details
There are countless premade boat tower options available, with prices ranging from $500 to $1000 or more. But as we stated earlier, Dale decided to create a more pragmatic and cost-effective version — without scrimping on durability.
There are two fittings in particular that helped achieve this boat tower’s ruggedness and versatility:
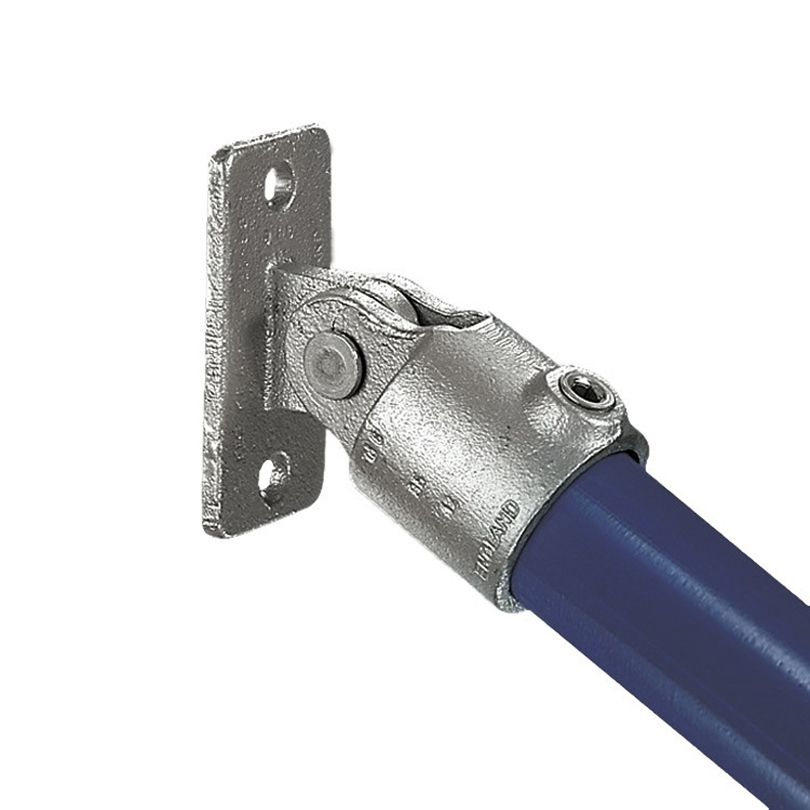
The first is the Swivel Flange. The Swivel Flange has a total range of 160 degrees, making it a great choice for mounting to any surface where you might need an angled connection. This wide range of motion also allows for added flexibility when you’re drafting your own design, as you’re not limited by fixed angle fittings.
Dale appreciated this function, citing that the “variety of angles” was what ultimately encouraged him to use the fitting for his project.
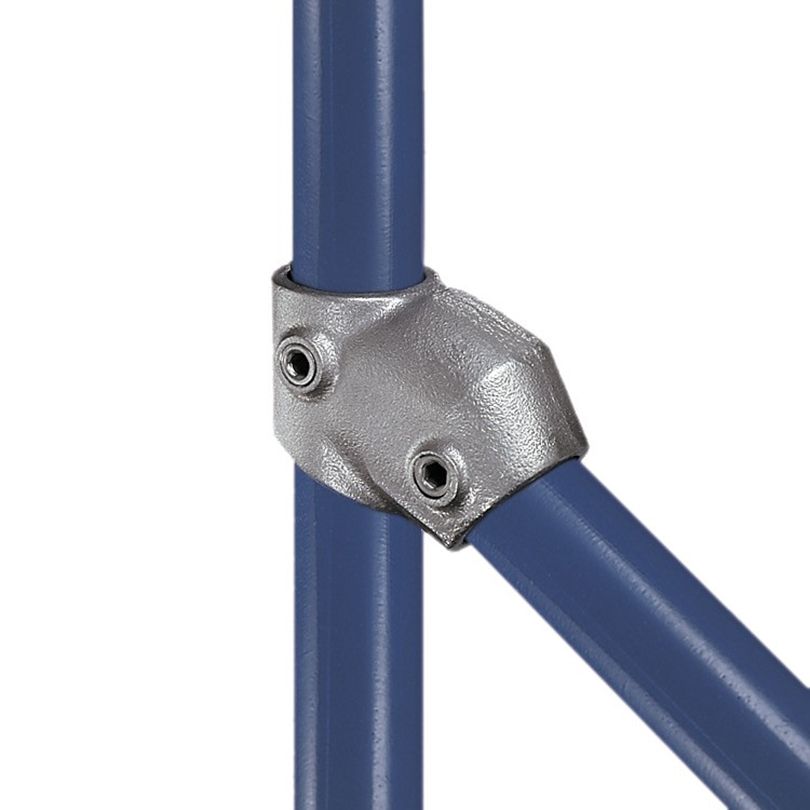
The second fitting of note is the 30° to 60° Single Socket Tee. Although the 30° to 60° Single Socket Tee is limited to a smaller range of adjustment, it ensures a strong connection.
In fact, the most common use of the 30° to 60° Single Socket Tee is to brace a structure and provide extra strength. That means a lot when you need to build a fishing tower that can stand up to strong winds and high speeds.
Another element of this tower’s rugged design is the diameter of the pipe and fittings. While many common household projects (such as these bookshelves and bed frames) call for pipe and fittings with only 1” diameter, we recommend going up to at least 1 ½” for this project.
This not only ensures additional strength but also makes the tower immediately compatible with most accessories on the market, like the wakeboarding rack and fishing rod holders we’ve listed below.
Fittings for the DIY Fishing Tower
Here’s where you’ll find all the fittings and pipe you’ll need to build a boat tower based on Dale’s design. However, please note that we don’t have the exact dimensions of Dale’s boat tower.
If you’re unsure about how many feet of pipe to buy, we recommend reaching out to our team for free design assistance. They’ll make sure you get the exact parts you need and the dimensions best suited for your unique project.
Start Building Your Own Boat Project
Specs:
- Length: Configurable (Standard 6')
- Depth: Configurable (Standard 2')
- Height: Configurable (Standard 3')
Assembly:
- One Hour
- Allen Key
What's included:
What's not:
Part of what makes this project so fun is the accessories. If you want a tower with the same customization as Dale, then you will also need:
The price tag for a basic premade boat tower (without a wakeboarding rack or fishing rod holders) starts at $500, but Dale’s Kee Klamp design with all the accessories included totals to roughly $500.
Steps to Build the Fishing Tower
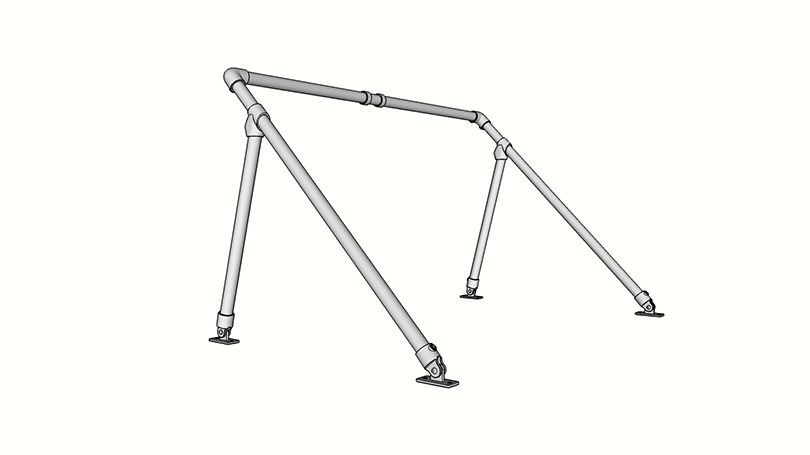
Dale started his fishing tower project with these 3D plans. The entire assembly is relatively straightforward and requires only three basic steps.
Let’s take a look at where to use each fitting:
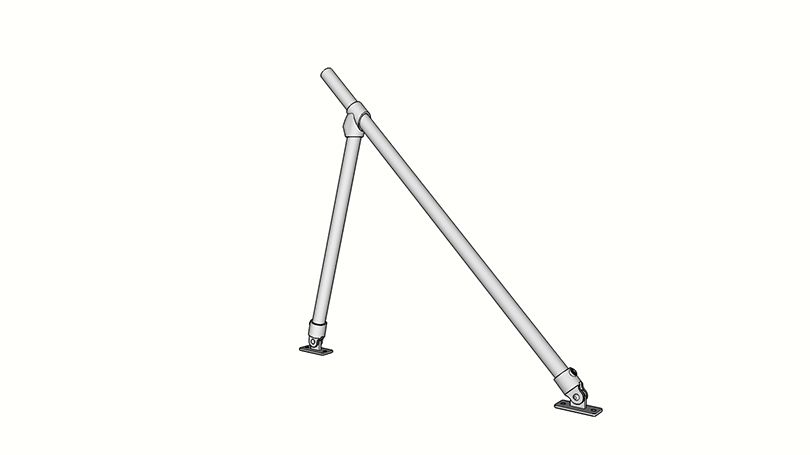
- Assemble one side of the tower with two lengths of pipe, a single 30° to 60° Single Socket Tee, and two of the Swivel Flanges.
- Mount each side of the tower to the boat with the four Swivel Flange fittings.
- Attach the crossbar to each side of the tower with the 90° Elbow fittings. Don’t forget to tighten the set screw for each piece, as this is what gives the fittings the same strength as a welded joint.


After assembling the tower, it’s time to add the accessories. The wakeboarding rack and fishing rod holders will likely come with spacers so that you can adjust the clamp to the size of your pipe. In addition, the wakeboarding rack (like the one listed here) has a swivel so that you can adjust the angle of the rack after you’ve mounted it to the tower.
Dale’s favorite thing about working with Kee Klamp fittings was their “ease of use.” With a wide range of angles and adjustable set screw function, building a customizable fishing or boat tower has never been simpler with Kee Klamp fittings.
Dale’s tower shows that there’s no limit to the watercraft accessories you can create with Kee Klamp fittings. What customizations will you add to yours?
If you’re interested in upgrading your own boat but aren’t sure how you want to do it, take a look at this incredible pontoon boat restoration. The owner not only saved this aging Craigslist find from the junkyard but completely converted it into a multipurpose craft with hidden wiring — all with just Kee Klamp fittings and pipe.
Don’t let a lack of ideas or design skills get in the way of your boat upgrade. Our experienced team offers free design assistance and would be more than happy to help you finalize the boat project of your dreams.


