How to Build a Barstool with Pipe (DIY Step-by-Step Plans)
Thinking about building your own DIY bar stools? Then, you're in the right place.
In this post, we're going to cover the full details of these industrial-style bar stools built by our customer, Dan in Oakdale Minnesota. Additionally, we're going to talk about the fittings that Dan used to build these awesome bar stools and give you step-by-step instructions on how to build your own. So without further ado, let's get to it:
Dan's Bar Stools Project Details:

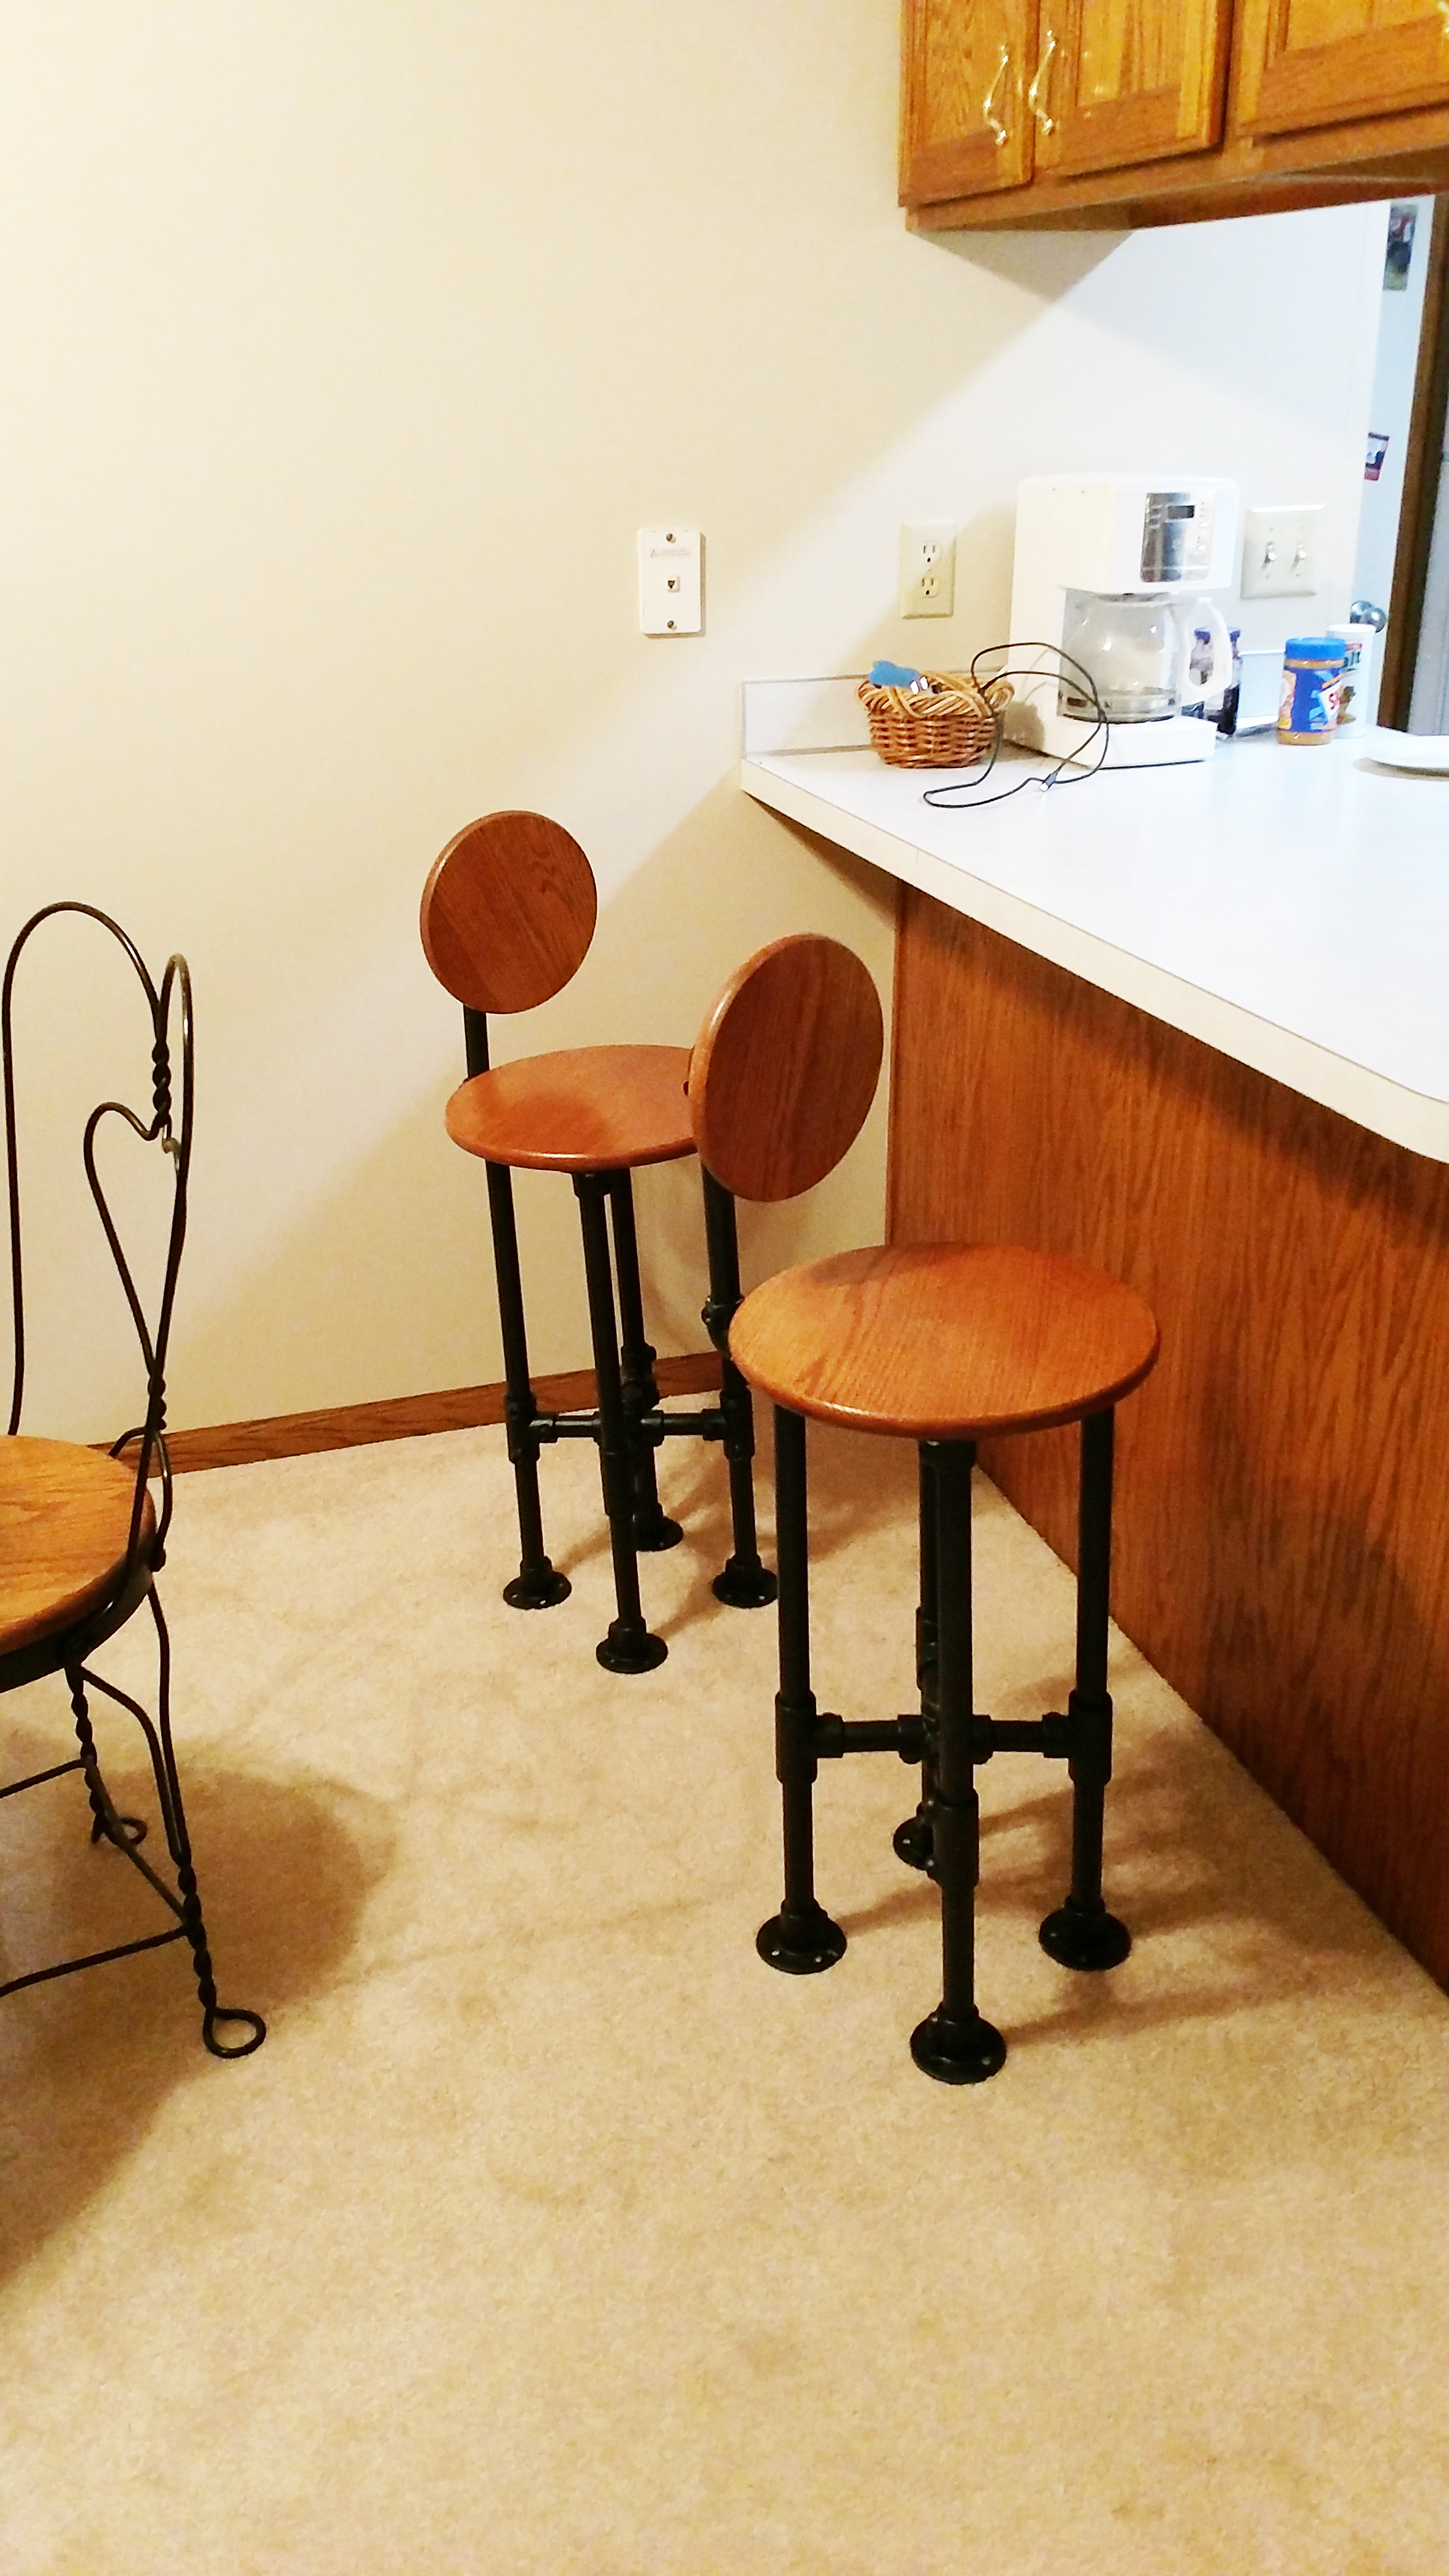
Dan built these bar stools because he wanted a few stools to accompany the open counter in his kitchen and to be able to watch TV from the space while eating. He came across our site after researching ways to build bar stools using pipe fittings and decided to build his stools using Kee Klamp.
Unlike traditional pipe fittings that connect to pipe via a threaded connection, Kee Klamp fittings slide over the pipe and secure in place by tightening down a set screw on the fitting (this can be done using an Allen Wrench). This generally makes Kee Klamp fittings easier to use for a few reasons:
- Kee Klamp built projects are easier to assemble and level
- They can be taken apart and reassembled relatively easier
- There are a lot more variations of Kee Klamp fittings vs. traditional fittings (there are over 80 different types of Kee Klamp fittings)
- Kee Klamp built projects can often be adjusted. For example, many of our customers have built adjustable height desks using Kee Klamp.
Thus, Dan decided to build his project with Kee Klamp and has been very pleased with the results.
Lastly, to finish the look of the bar stools, Dan paired the stools with custom wood seats and backrests. He then spray-painted the fittings and pipe to complete the look.
Fittings Needed to Assemble the DIY Bar Stools:
Below, you will find all of the fittings you need to build a bar stool just like the ones Dan built. However, feel free to modify the design however you please. If you don't want to include the backrest, simply deduct one Flange, one Single Socket Tee, and two 90 Degree Elbow fittings from the list below. For further pipe stool and chair ideas, you may also want to check out this list of ideas.


Step-by-Step Instructions to Assemble the Bar Stool:
As with any project built with Kee Klamp fittings and pipe, the exact order you assemble your project is entirely up to you. There is no right or wrong way to do it. With that said, however, we've listed what we believe to be the simplest approach to assembling these bar stools. Follow the step-by-step instructions below for guidance.
First, we recommend starting off by assembling each of the bar stool legs. Then, when all four legs are complete, you can connect them together.
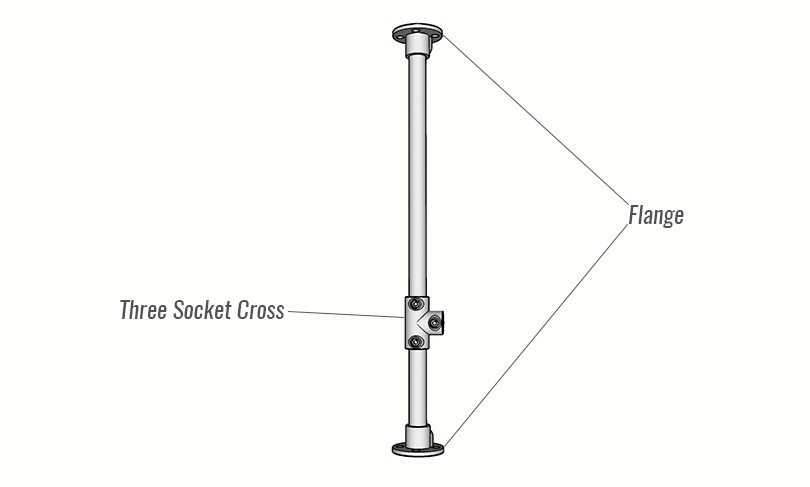
To assemble the first bar stool leg, you will need two Flange fittings and one Three-Socket Tee fitting. Alternatively, you could use a Single Socket Tee fitting in place of the Three-Socket Tee. Both can be used is the same way. Generally, the Single Socket Tee will be used when you want one length of pipe to slide through the open socket. The Three-Socket Tee is typically used when you are connecting two separate pieces.
In this case, Dan used the Three-Socket Tee, but it appears the leg is one continuous length of pipe.
Follow the diagram above to assemble the bar stool leg. Once the fittings are in position, secure them in place by tightening down the set screw on each fitting.
Repeat this process until all four legs are complete. Make sure to set the height of the Three-Socket Tee the same on all four legs. This fitting will be used to connect them all together. Also, note that one of the legs should also have a Single Socket Tee added to the top of the leg. This will be used to connect the backrest. Don't forget to add this fitting before you add the Flange to the top of this leg.
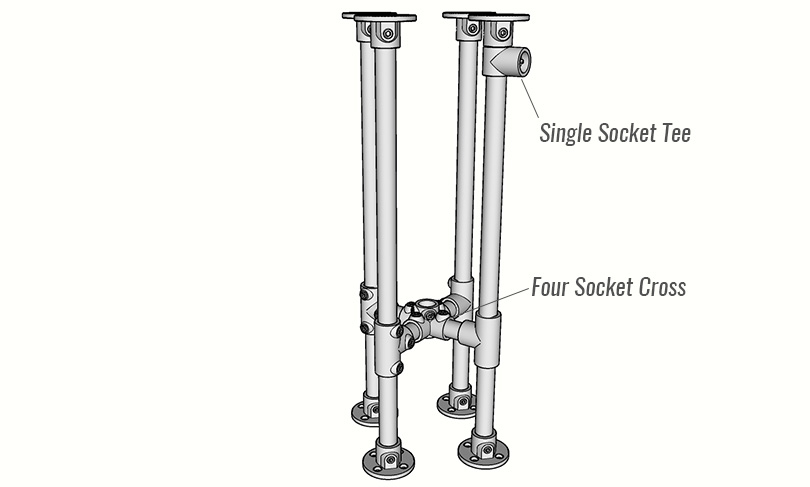
Once all four legs are complete, you can connect them together. To do this, you will need to use the Four Socket Cross. Follow the diagram above to connect the legs together.

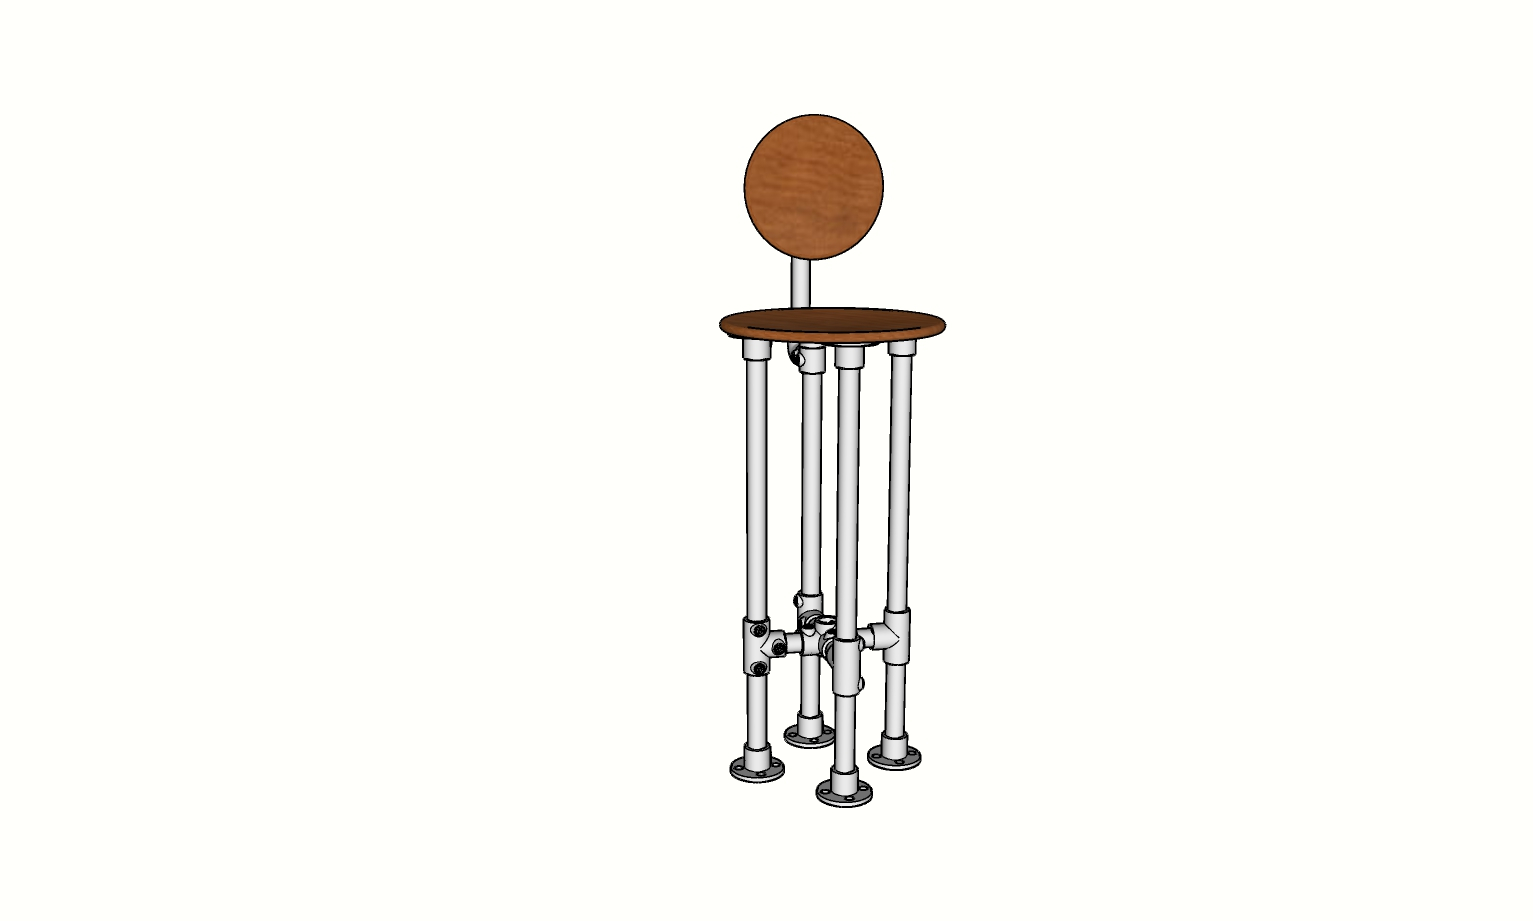
Now, you can connect the seat to the bar stool frame. Place the seat over the Flange fittings. Each Flange fitting has four countersunk holes in it for mounting. Use the holes to attach the seat to the frame.
At this point, the bar stool should look as it does in the diagram above.
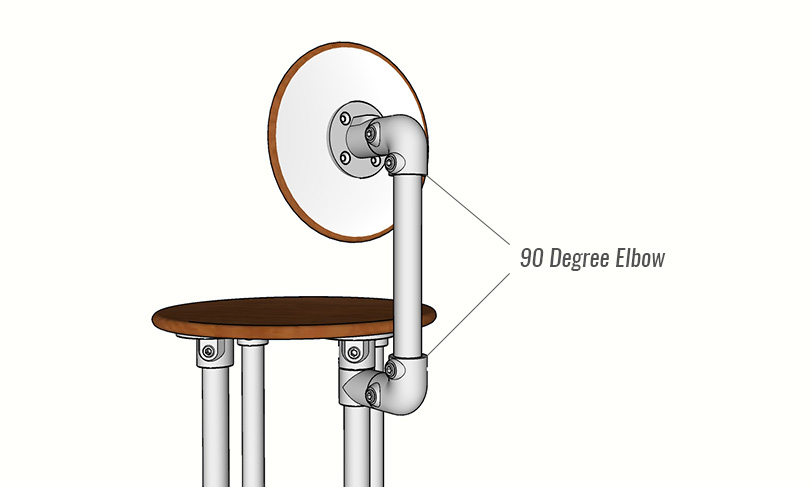
Lastly, you can add the bar stool backrest. This is completely optional. However, the backrest will use two 90 Degree Elbows and one Flange fitting. It will connect to the Single Socket Tee that was added to one of the stool legs earlier. Follow the diagram above to assemble the backrest.
You should now have a complete bar stool just like the ones Dan built for his kitchen. If you have any trouble assembling the bar stool or picking out the right fittings, don't hesitate to reach out to our team for help. Our projects team will help you in any way they can and will even help you to design a custom solution that fits your application perfectly.
