DIY Contemporary Retail Shelving Units (with Step-by-Step Plans)
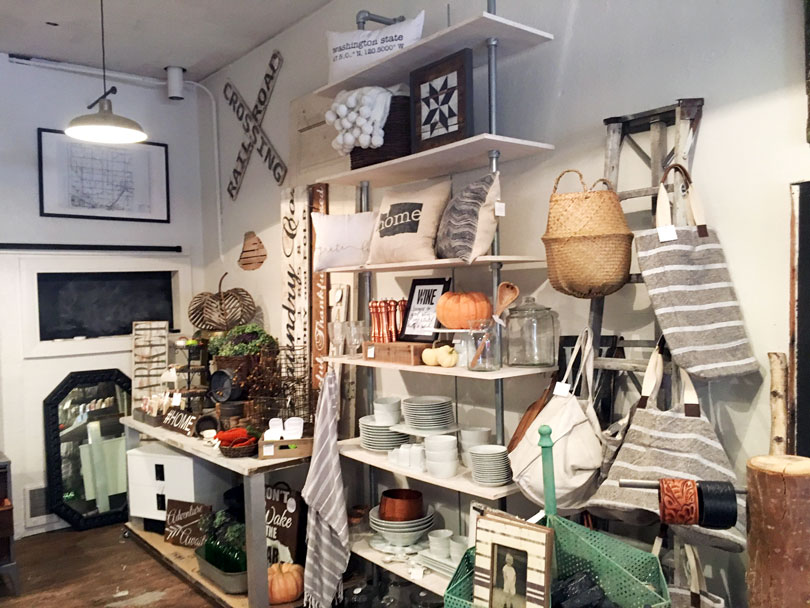
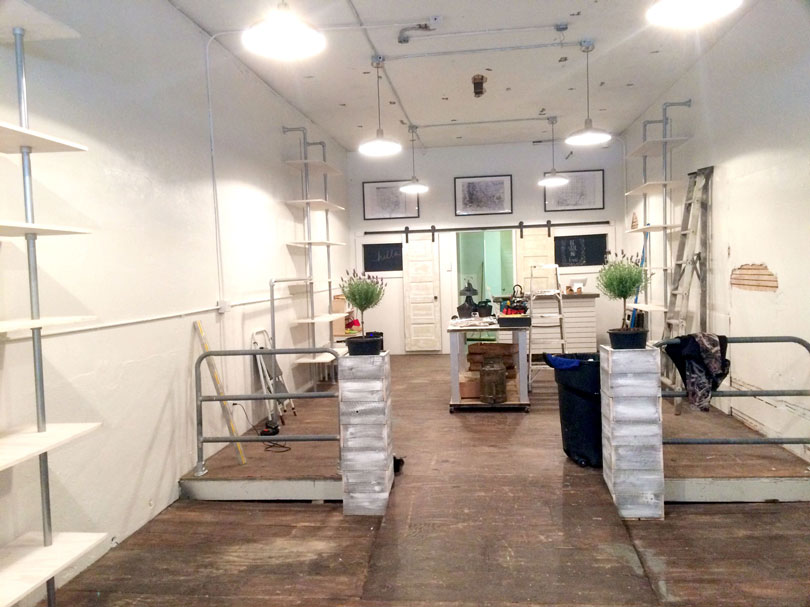
When Joseph's wife needed some contemporary retail shelving units for her small shop in Enumclaw, Washington (about an hour from Seattle), he turned to Kee Klamp fittings and pipe to create something sturdy, unique, and that fit the look of the small retail store.
The shelving unit features 6 shelves but since the fittings are adjustable, additional shelves can always be added and the height of each shelf can always be modified even after assembly. Therefore, making it a very functional piece especially in a retail setting where you may need to adjust the height of a shelf for different merchandise.
In this post, we're going to cover the details of Joseph's shelving units, the fittings used to build them, and the steps to do so (with detailed diagrams) so you can build your own.
Without further ado, let's get to it:
Joseph's Retail Shelving Unit Project Details
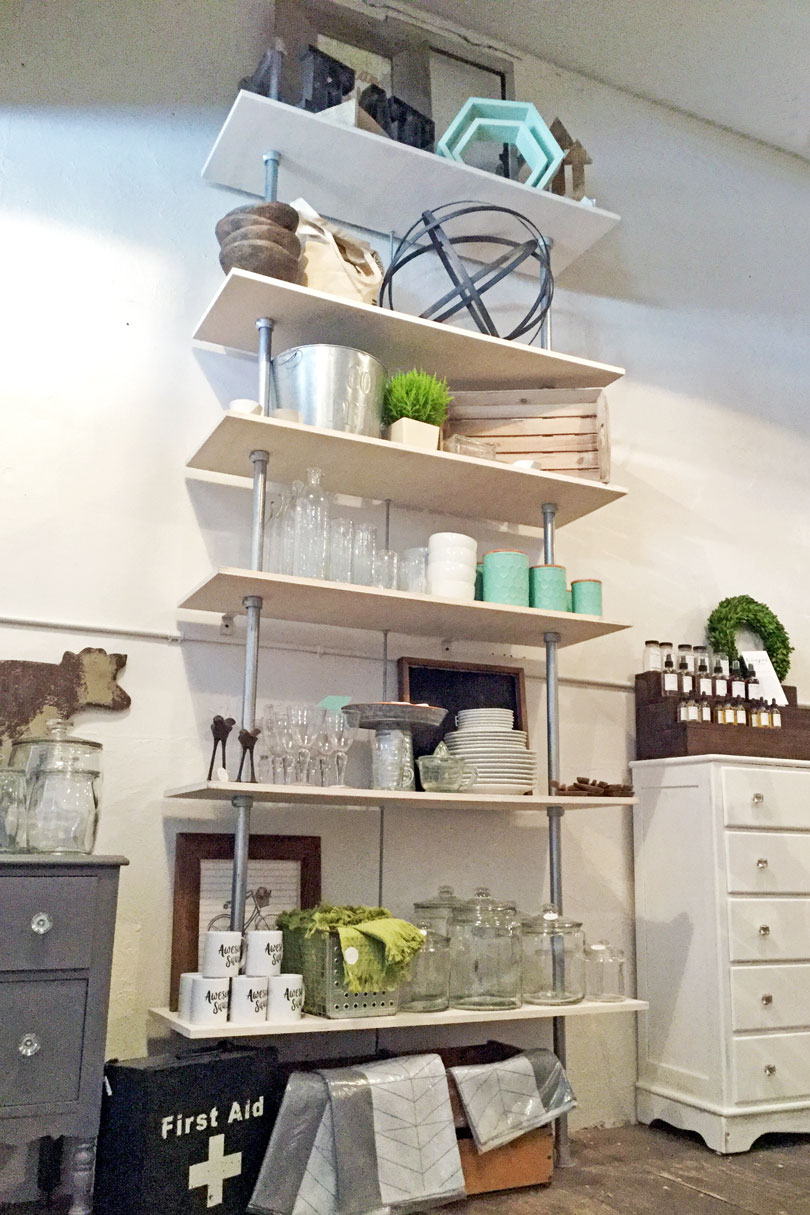
The shop features multiple shelving units of the same design that stand at 10' tall by 4' wide. The shelf boards themselves are 3/4" plywood from Home Depot and are 48" long by 16" wide.
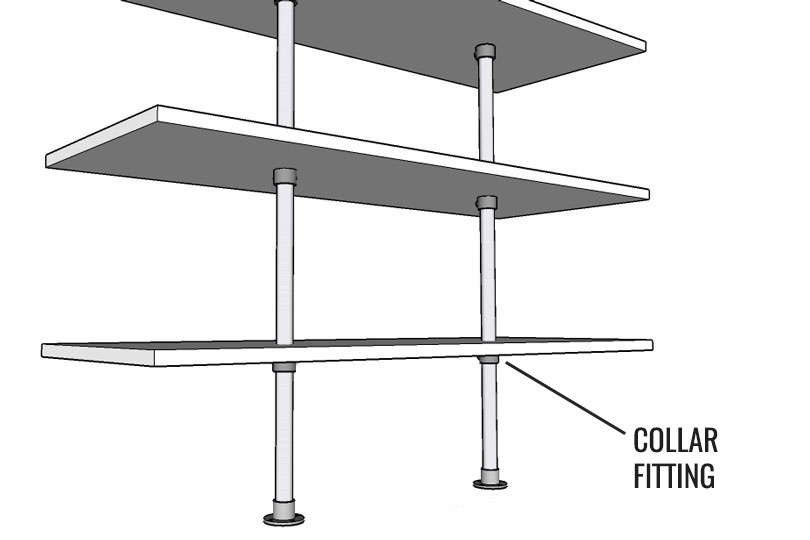
Joseph drilled two holes in each board, one on each side, using a Hole Saw. These holes are big enough to allow the vertical pipe supports to slide through but small enough to ensure the boards can rest on the Collar fittings. These fittings slide over the pipe and are secured in place using a set screw (that is tightened down using an Allen wrench).
These fittings can be adjusted after assembly. Meaning, the shelves themselves can be adjusted in height even after the shelving unit has been assembled.
Now, let's take a look at the fittings you'll need to build one of these shelving units...
Fittings Needed to Assemble the Shelving Unit
Below, you will find all of the fittings you need to build a shelving unit exactly like the ones Joseph built. However, should you want additional shelves per unit, you can simply add two Collar fittings for each additional shelf you'd like to add (each shelf rests on two Collar fittings). Vice versa if you would like fewer shelves.
Finally, we do offer a few shelving kits you may want to check out, and if you need help with a custom design, reach out to our projects team for free design assistance.


How to Assemble the Shelving Unit

Of course, you can approach the assembly process in any way that makes sense to you. The flexibility and adjustability of Kee Klamp allows every project to be built and disassembled in a variety of ways.
However, the likely best approach to assembling this shelving unit is to assemble the shelving unit first and then with the help of a friend, attach the unit to the wall (it will be quite heavy when fully assembled). This way, you don't have to worry about lining up the unit with the Flange fittings (which would be the case if you attached the fittings to the wall first).
To assemble the unit, start at the base and work your way up. This design is relatively simple, primarily using two long lengths of pipe as the shelf supports. Start by sliding the longest lengths of pipe into the Flange fittings. Then, tighten the set screw on each fitting to secure it to the pipe.
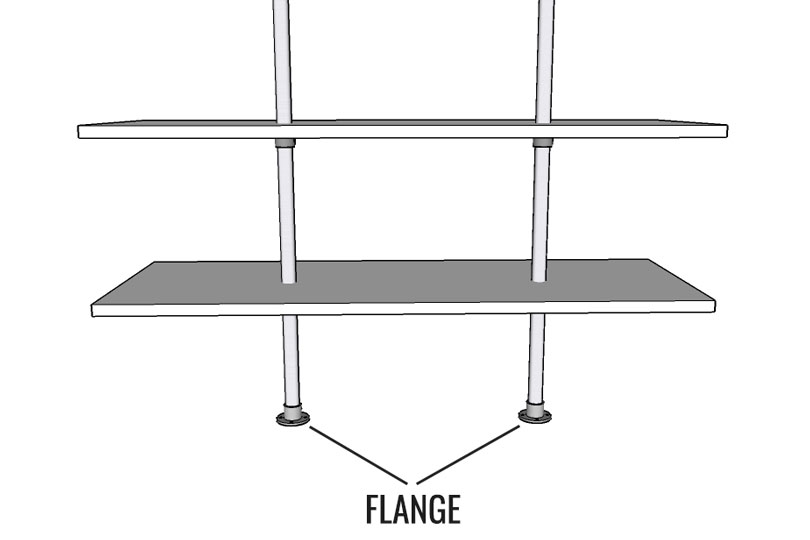
From there, slide a Collar fitting onto each pipe, set the height, and secure them in place by tightening down the set screw on each fitting. Remember to make sure each Collar fitting is set to the same height on each pipe. The shelf boards will rest on these fittings, so these need to be level.
Each shelf board will need to have two holes cut in them to allow each pipe to slide through. These holes should be big enough to allow the pipe to slide through but small enough so that they can rest on the Collar fitting. This is what will keep the shelves in place.
Repeat this process until you have all of the shelves attached.
Once all of the shelves are added, you can finish assembling the unit by attaching the 90 Degree Elbow fittings and Flange fittings following the diagram below.
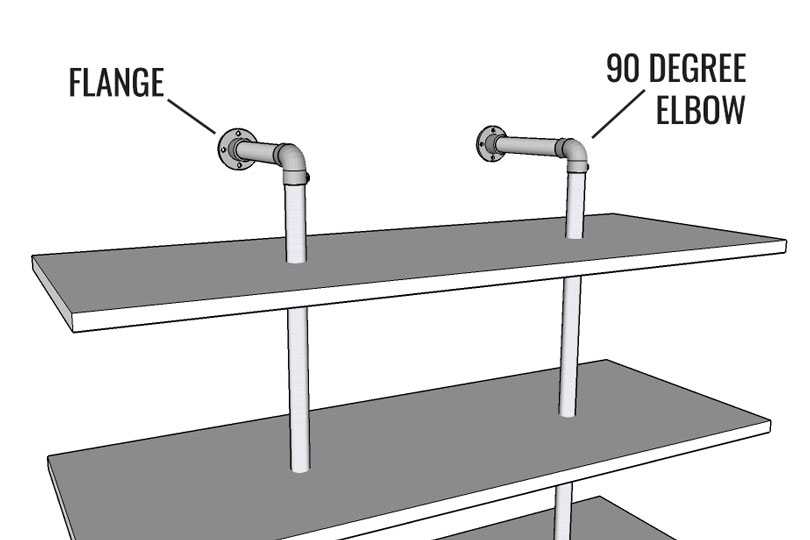
With that done, the shelving unit is now complete and can be attached to the wall. Each Flange fitting has four countersunk holes in it to allow for mounting.
The shelving unit will be rather heavy when complete. So have a friend or two help you hold it when attaching to the wall.
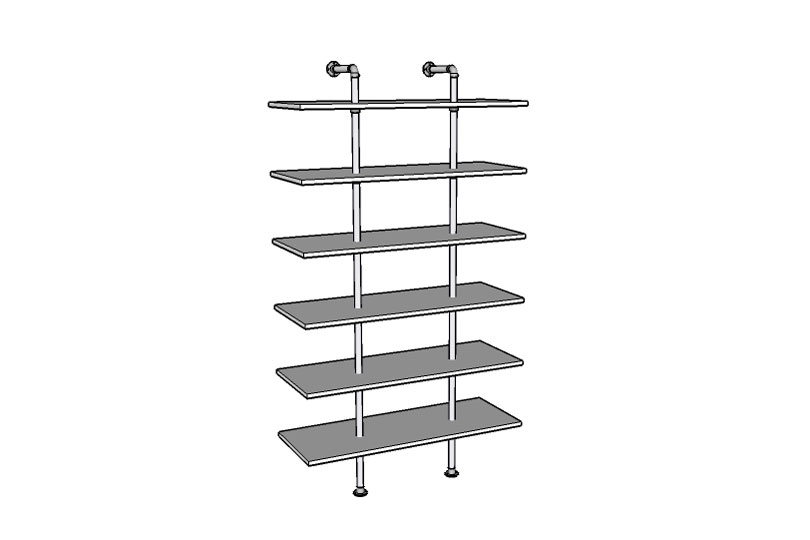
That's all there is to it! It's a simple design yet very functional. The shelving unit can always be modified in the future by adjusting the height of the shelves or by adding/subtracting shelves. Also, since the fittings are so versatile, the structure could be completely dissembled and used to create a different style of shelving unit or even a completely different structure like a table or desk frame. Thus, increasing the lifetime value of the unit.
If you have any trouble ordering the fittings for this shelving unit or assembling it, feel free to reach out to our projects team at projects@simplifiedbuilding.com for help. We even offer free design assistance for custom projects. If you'd like to take a simpler approach, try checking out our shelving kits to see if there is a fit for you.
Lastly, if you enjoyed this project and want to see more like it, be sure to sign up to our email newsletter to receive weekly updates to your inbox.


