DIY Floating Shelves: How to Build Your Own
Do you want to build your own floating shelves, but not sure where to start? Take a look at the following projects for a little inspiration!
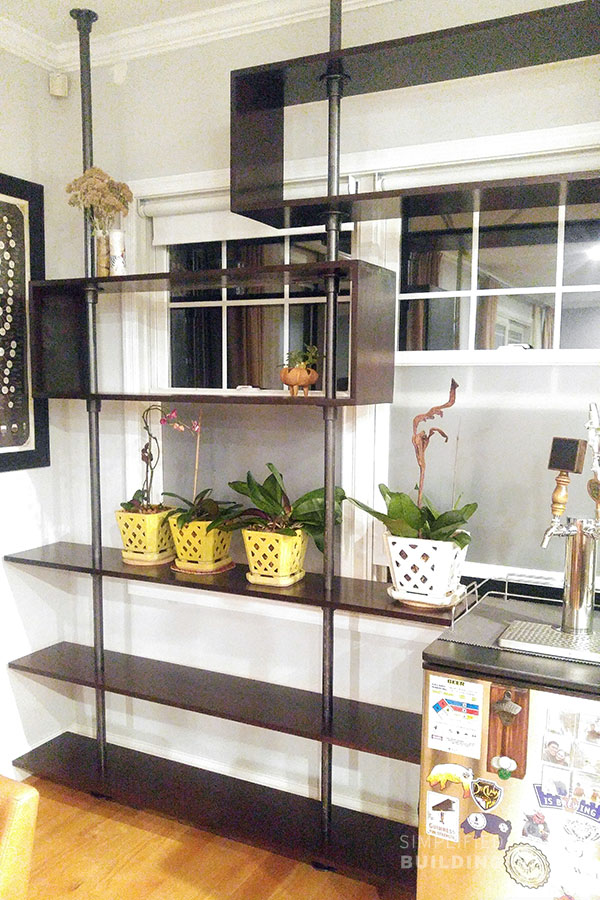
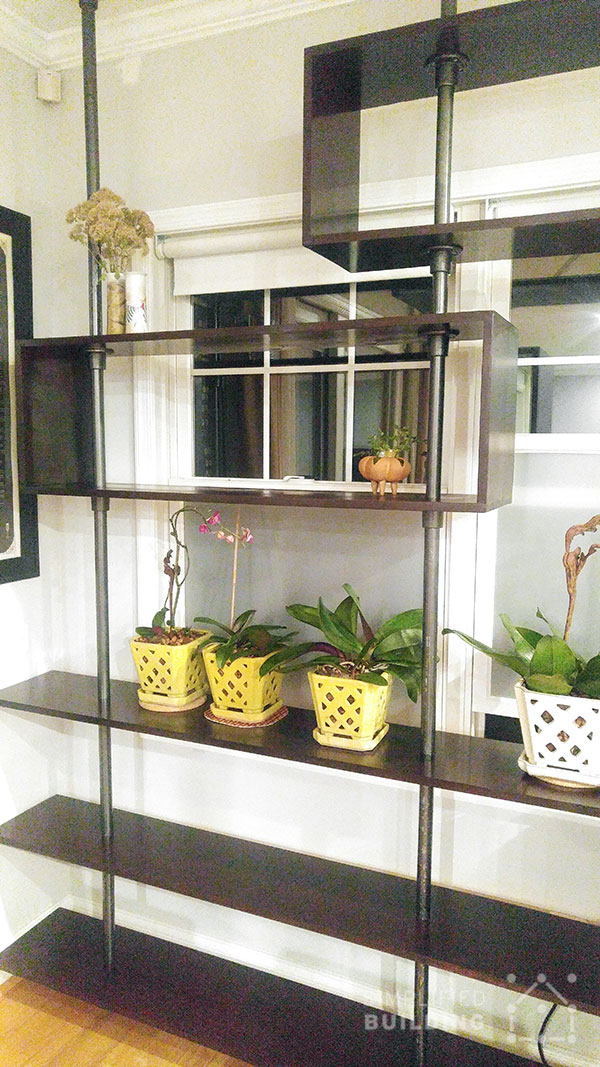
Tommie's Kitchen-Integrated Floating Shelf
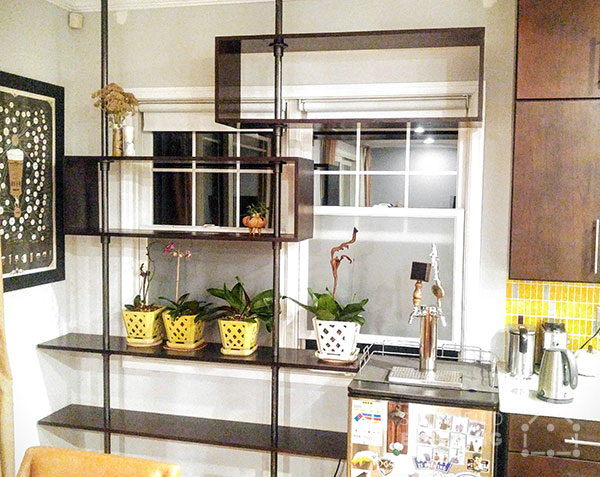
This floating shelf design was built by Tommie for the kitchen in his home. The idea was to create a space for holding bottles and room decorations to fit next to the kitchen cabinetry.
The end result looks fantastic and offers a minimal, modern element to Tommie's kitchen.
Tommie came to the idea after browsing the internet and finding a similar idea on our blog.
He was drawn to the idea after realizing the flexibility of using Kee Klamp and the ability to adjust the position of the shelves even after assembly (Tommie can loosen the fittings that hold the shelves in place, reposition the shelves, and tighten them back down to secure the shelves in place).
Fittings & Pipe Needed to Assemble the Shelves
In Tommie's design, he used Kee Klamp Flange fittings with the middle "bore out" in order to allow pipe to slide through the center. This is a custom service we can provide if requested (the Kee Klamp Flange does not normally allow pipe to slide through but instead "butts" up against an interior wall).
However, you may use the Kee Lite L61 Flange fittings instead. These fittings already come with the middle "bore out" so that pipe can slide through. This is a more cost-effective and simpler solution. Therefore, this tutorial will utilize the Kee Lite version of the Flange fitting.
Below are the fittings and pipe you will need to build the shelves. For the shelves you can use any platform you like. Tommie used wood boards and custom made "box" shelves.
- 16x L61 Kee Lite Flange fittings
- Pipe for the vertical supports. This can of course be any height you want. If you're mounting the shelving unit to the floor and ceiling, like in Tommie's design, then you will want to make note of that measurement and order that length.
If you need any assistance, please reach out to our projects team for help and free design assistance.
How to Assemble the Floating Shelves
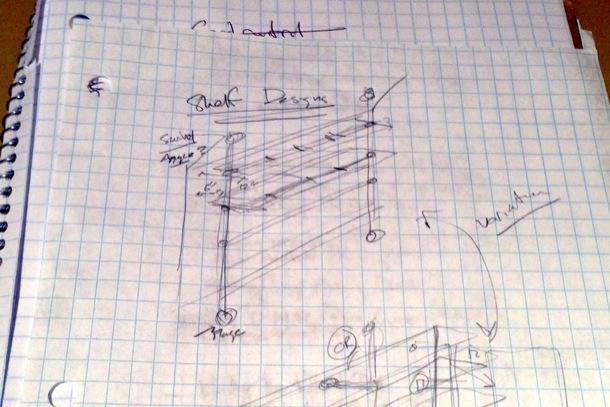
Follow the diagram below, and the proceeding steps, to assemble the shelves. As with any Kee Klamp or Kee Lite project, exact order can depend on how you would like to approach the assembly process. However, the order of steps listed below, are recommended.
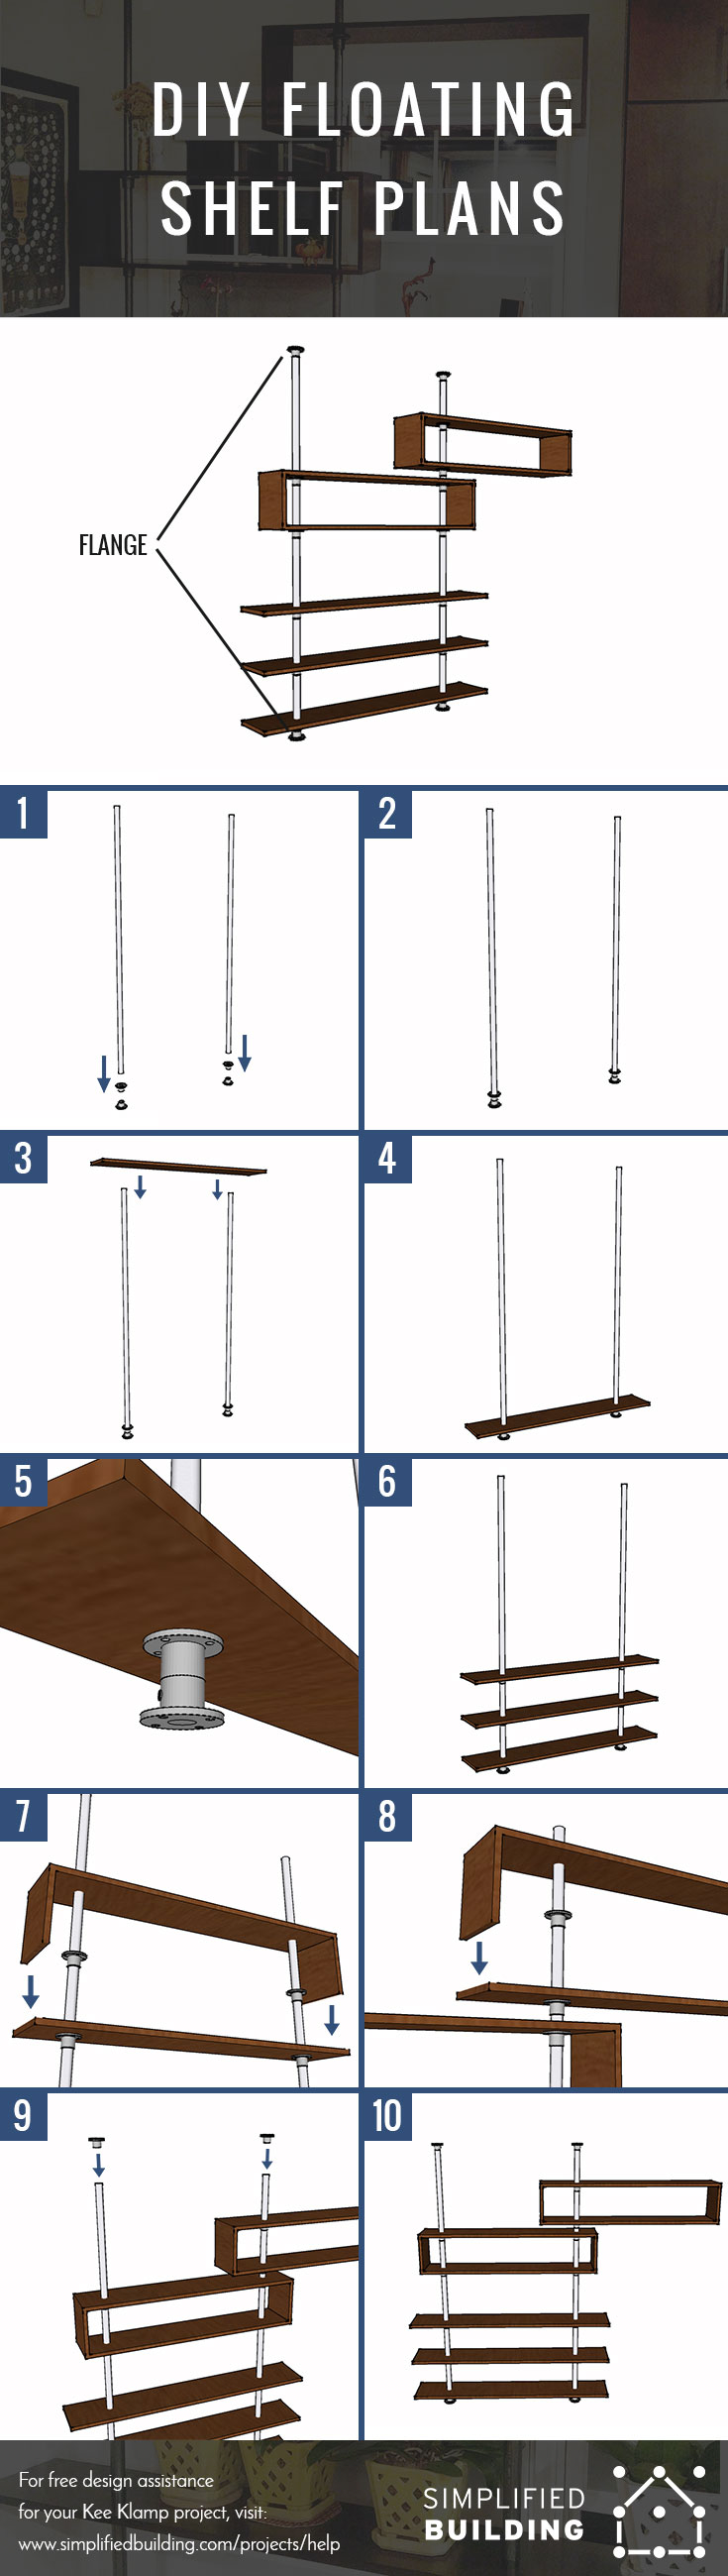
- To assemble the floating shelving unit, first start by taking the two vertical uprights and sliding two Flange fittings onto the base of each (one facing the floor and the other facing the ceiling). Then, tighten down the set screw to each fitting to secure it in place. You will likely need to assemble the unit on the floor and then have someone help you position it into place once complete.
- So far, the unit should look like the diagram in Step 2.
- Then, you can slide the first shelf onto the uprights. Each shelf will need to have two holes cut out to allow the pipe to slide through. Slide the shelf onto each upright until it rests on the Flange fitting. Then, you can secure the shelf to the Flange fittings (there are four holes in each Flange fitting for mounting).
- Now, the shelf should like the diagram in Step 4.
- Again, Step 5 shows a closer look at the underside of the shelf. This is where you can mount the shelf to the Flange fittings.
- Repeat this process until you have attached all of the "normal" shelves. In this case, we have three of these "normal" shelves. The unit should look like the diagram in Step 6.
- Now, following Tommie's design, the "box" shelves will need to be attached in sections. First, you will slide the Flange fittings on for the bottom of the shelf and tighten them down. Then, you'll slide the bottom of the shelf onto the frame. From there, you'll slide on and attach another set of Flange fittings. And finally, you can slide the top of the "box" shelf into place. Follow the diagram in Step 7 for a closer look.
- You will repeat the same process for the "box" shelf at the right of the frame.
- Finally, you can attach the final Flange fittings. These will face the ceiling. Slide them over the pipe and secure them in place by tightening down the set screw to each fitting.
- That's it! You're finally done. You should have a complete floating shelving unit as pictured in Step 10. If you assembled the frame on the ground first, have someone help you position it slowly into place and then mount the frame to the ceiling and ground.
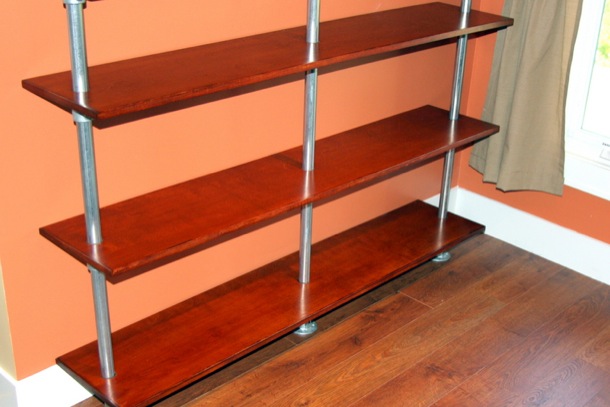
Chris' Office-Integrated Floating Shelf
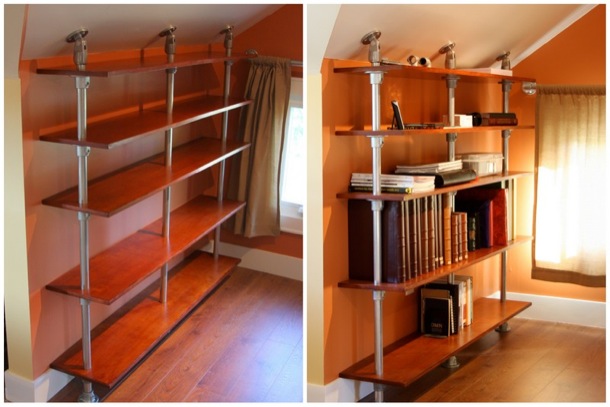
I had a small wall on the back of my office that where I wanted to put a shelf. Having limited wall space, I wanted to utilize a connection on the floor and ceiling to create a set of shelves that looked like they were floating on poles. I was inspired by some other floating shelf projects, but mine took on a different flare. Below I have outlined exactly what I did to build a pole-mounted floating bookshelf.
Begin with a Design
As always, DIY projects take planning. I had to measure my back wall and figure out how much pipe I would need and how long the shelves would be.
Gathering the Materials
Shelves: I'm not a woodworker, so I had a local contractor build and and stain the shelves that were going to be used in the floating bookshelf. You can have the shelves built to whatever dimension suits your wall. You can paint, stain, or leave the shelves unfinished, it doesn't matter for this project, the shelf texture can be whatever you choose.
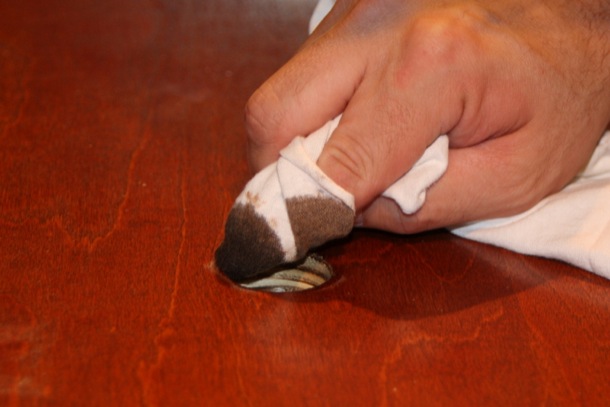
Pipe: I used standard 1" Galvanized Schedule 40 Pipe (12 Gage Gator Tube works too) as the support pipes. I had them cut to length before being sent to me. I had to trim them down a bit once I got into the project.
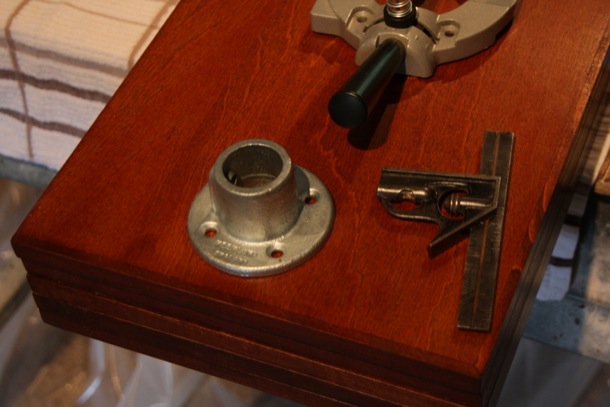
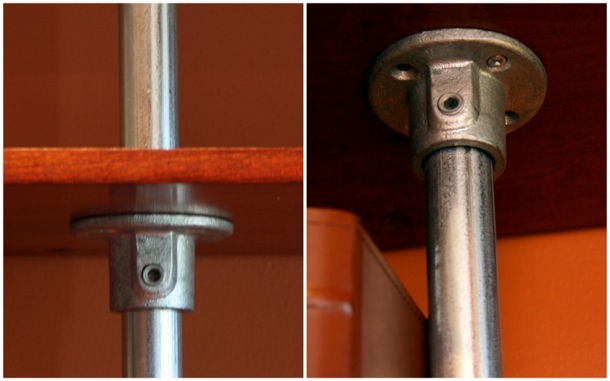
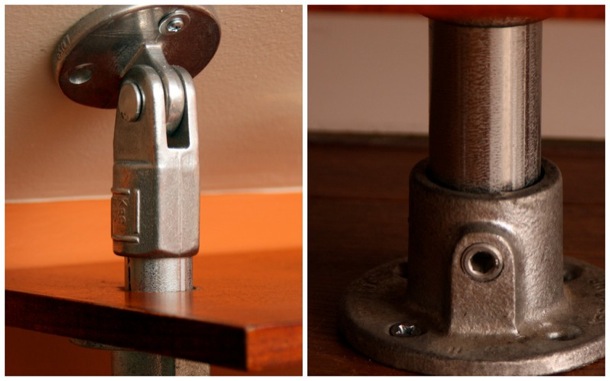
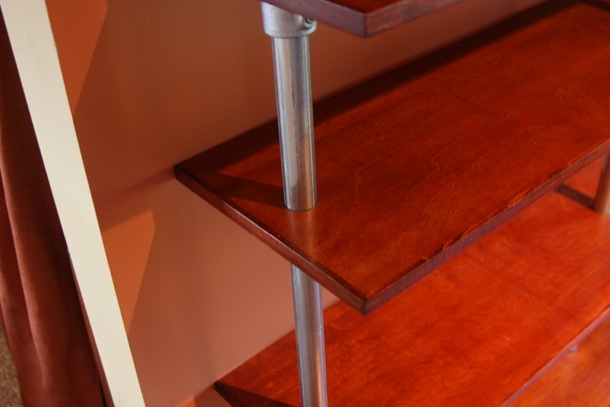
Fittings: This project uses a lot of flange fittings. The flange fittings that support the underside of the shelf have to be bored out. You can bore them out yourself (labor intensive) or you can order them from Simplified already bored out. Unfortunately because the boring is labor intensive it drives the cost of the project up significantly if you don't bore them out yourself.
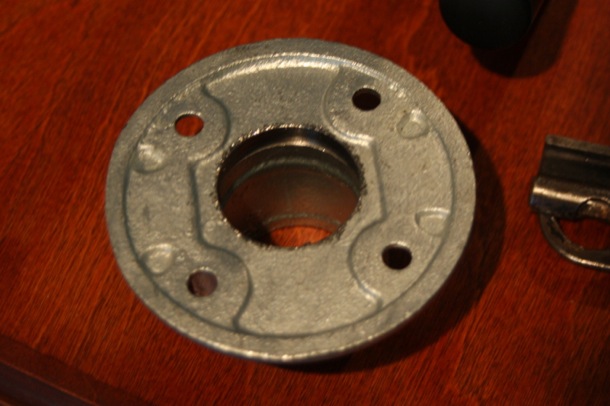
The bored out fitting allows the flange to support the shelf, but then the pipe can pass through the shelf. So boring out is critical to give the shelf the "floating look" and attach it to the pole.
The shelf is attached to the floor with standard flanges and then to the ceiling with swivel flanges. If your ceiling is flat you could easily use the standard flanges on the ceiling as well.
Parts you'll need


Additional Supplies
- 5 x Wood Shelves
Approximate Costs:
- Shelves: $100-300 depending on finish, material, etc.
- Pipes: $50
- Fittings: $200
- Boring Services: $200
So the minimum this shelf could be built for is around $300. That is assuming you do your own woodworking on the shelf and that you bore out your own fittings.
I did not build this shelf based on price. My goal was not to do this "on the cheap" but to create something that would look great and be rock solid! This bookshelf will be a work of art when it's finished; fully customized and fully integrated into your home or office setting.
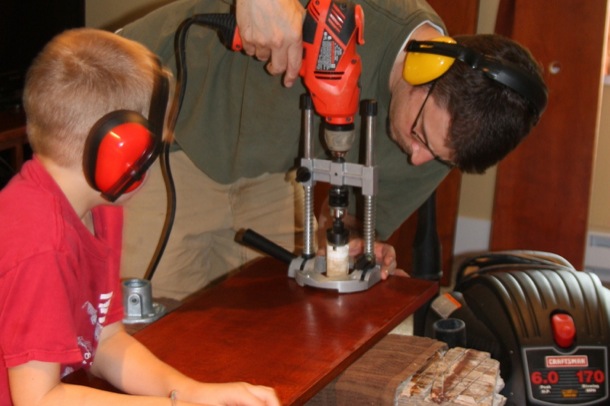
Boring Out the Shelves
WARNING: This is by far the most complicated part of the project. The holes in all five shelves MUST line up perfectly or else the shelf will not line up properly with the pipe. YOU'VE BEEN WARNED.
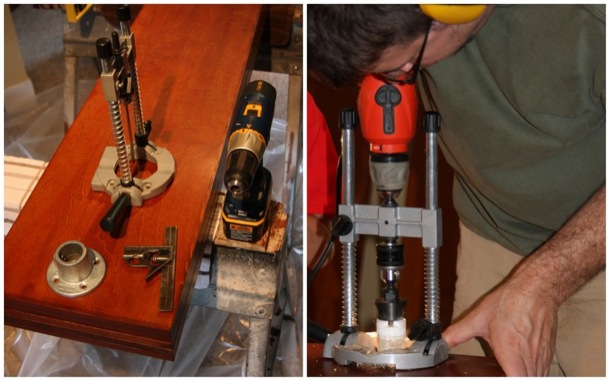
The way that I ensured that all five shelves would be lined up was to clamp the shelves together and then drill a pilot hole through all five boards at the same time. Use of a drill press is imperative. Do not attempt to do this with a hand drill. The drill press is important to make sure that you're drilling into the shelves at a perfect right angle to the surface. Don't do it by hand, use a drill press! (did I say that already?)
Once the boards are clamped together I measured out where the holes would be placed. Using a drill press, I drilled a pilot hole through all five shelves. Once the pilot hole was drilled in the shelf, I could separate the shelves and work with them individually.
Using the correct size hole-saw: 1-3/8" (35mm) for the O.D. of 1" Schedule 40 Pipe, I drilled through each shelf at the appropriate location. Once again, use of a drill press is very important. Use a hole saw that has a smaller drill bit that can be placed in the pilot hole you already drilled. This will ensure that you get everything lined up just right.
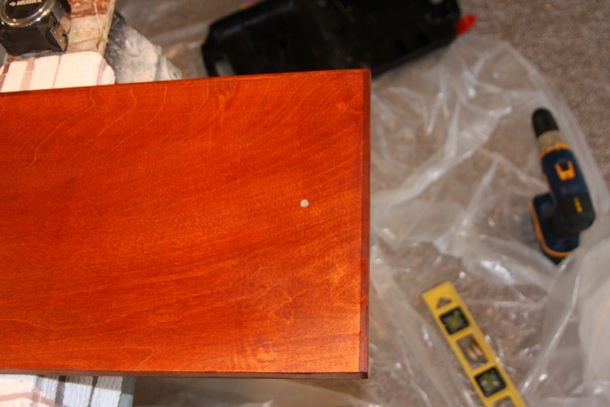
Test Fitting the Bookshelves on the Pipes
I set up the pipes in the flanges and after I finished boring out each shelf I placed the shelf on the pipes to test fit the shelf. This is the most nerve-racking part of the project because it will show you if you screwed up. Thankfully I got everything lined up just right.
Touch Up Finish (or Paint) on the Shelves
If I had built these shelves myself, I would have probably waited to paint or stain them until after I had bored them out. Because someone else did that work I needed to touch up the stain after the holes were made in the shelves.
Attach the Flanges to the Shelf
The best way to do this is to put the shelf onto the three pipes upside down, slide the bored out flange onto the pipe, and then screw the flange into the shelf. Putting the pipe in the hole will ensure that you get the flange hole lined up perfectly with the shelf hole.
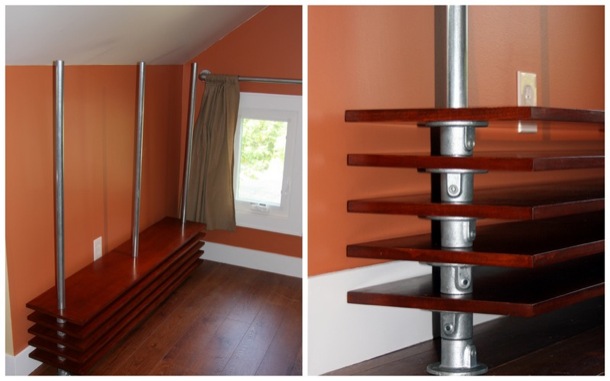
Install the Pole Mounted Bookshelf
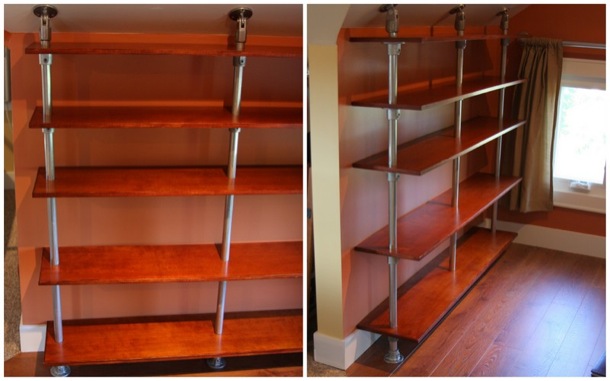
We're almost there! Attaching the bottom flanges, I move the pipes to the place where the shelf will be installed. I put on all five shelves on to the pipes and then tightened one shelf into place at the top of the pipes. I put swivel flanges onto the top and test fit the shelf in the installation location.
Once I'm confident that the shelf will fit, I start by attaching the three top connections to the ceiling. Adjustments may be necessary, but that's the great part about the Kee Klamp fittings. You can just loosen and tighten the set screws and shift the fitting on the pipe.
Once the top is attached, I move all the shelves into their approximate shelf height and tighten down the set screws in the flanges.
If everything is looking good, then you can screw the bottom flanges into the floor. I only used two of the four screw holes.
Level the Pole Mounted Shelves
Now you can go back through the shelf and ensure that each shelf is completely level. Loosen the set screw in the flange, move the shelf to level and then tighten everything down.
Check and Cross Check
Once you're done, go back through the shelf and ensure that you've tightened down all the set screws properly.
Add Some Books to Your Pole Mounted Bookshelf
If you've made it this far then I'm sure you're ready to stack on your books and show off your new pole mounted bookshelf.
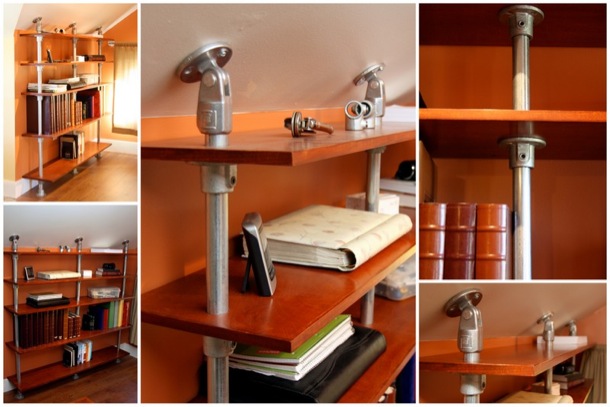
This project is part of several other Kee Klamp based projects that were built for my office.
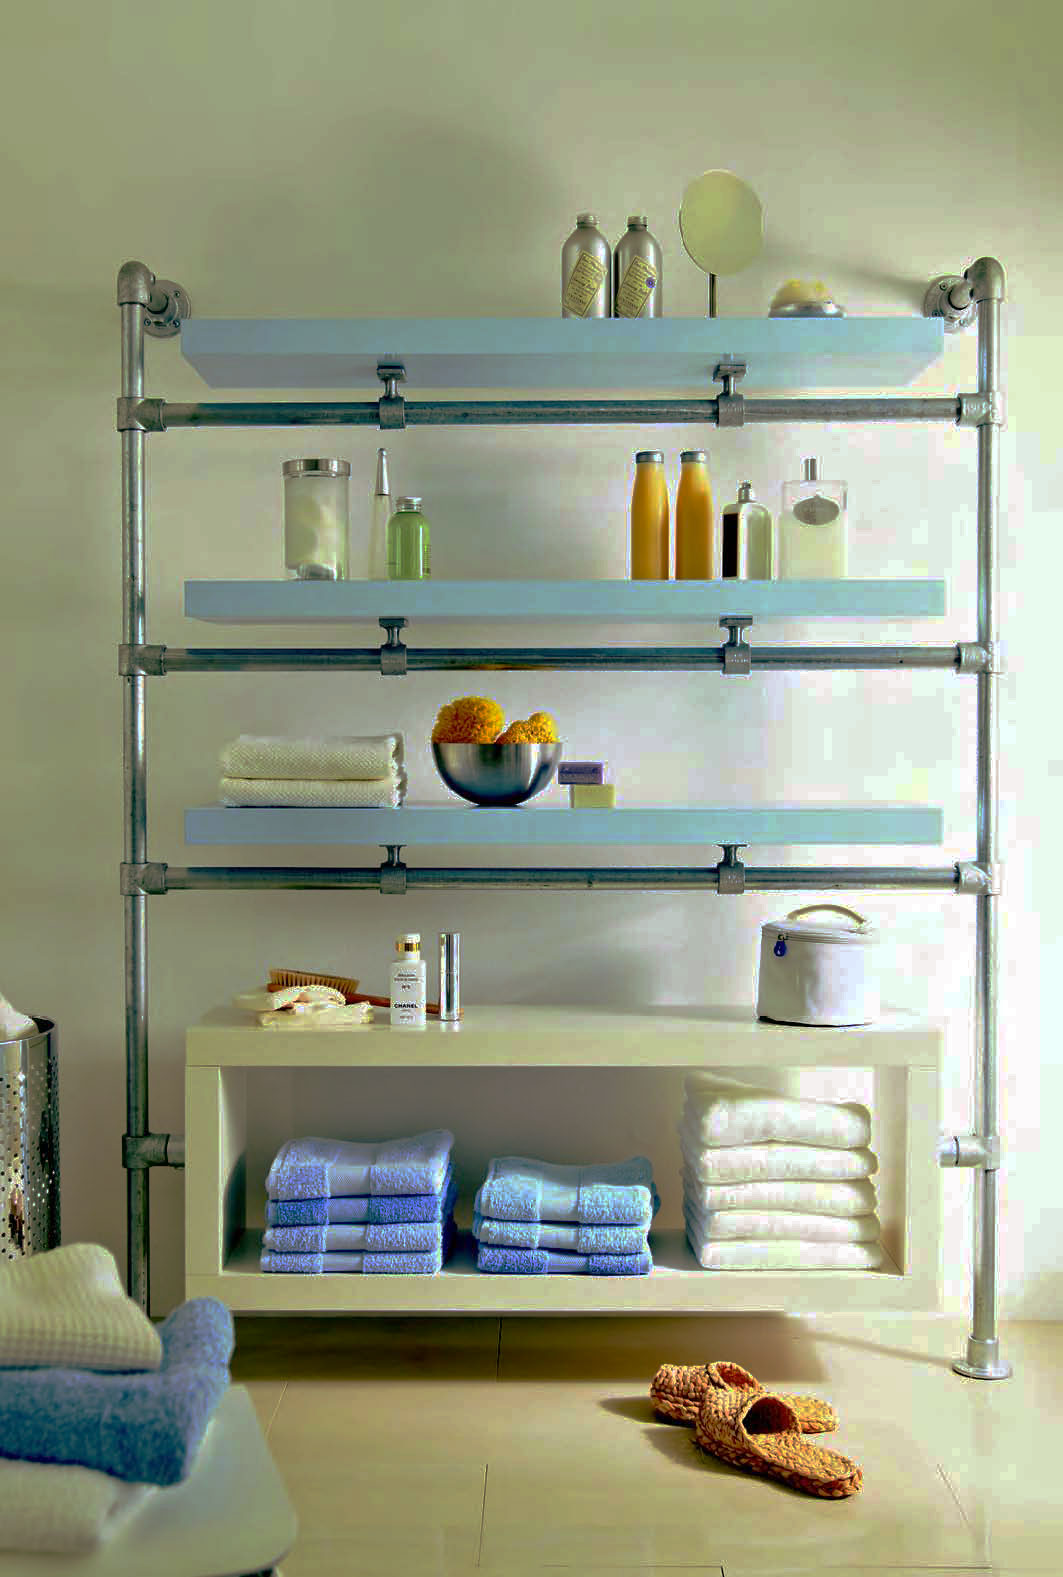
Selber Machen's Bathroom-Integrated Floating Shelf
The German DIY magazine, Selber Machen, featured this floating bathroom shelf using pipe, Kee Klamp fittings and some Lack components from Ikea. The shelves have a modern industrial look that will provide a lot of usable space to an unused bathroom wall. Of course there is nothing is limiting this shelf to the bathroom, using different color shelves or a different arrangement, you could use this approach for any room in your house.
The measurements on the diagram are in metric, see the parts list at the bottom of the project for the measurements translated into imperial.
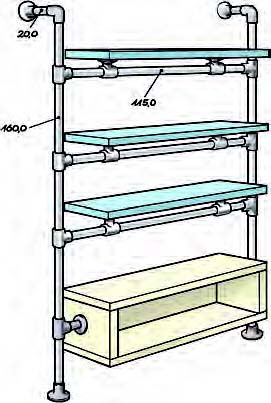
Bathroom Shelf Project Steps
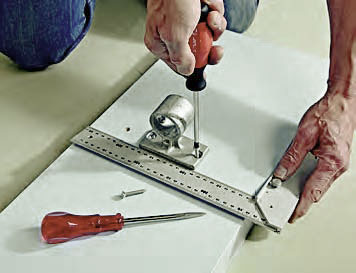 |
On the underside of the shelf screw two of the Type 70 Rail Support flanges to the board. |
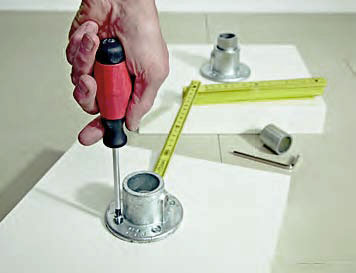 |
To attach the shelf box, the Type 61 Flange fittings are mounted centrally on the small shelf. The connection between the flange and tee connection is made with a short section of pipe. |
 |
Use a couple of screws to connect the long boards to the shorter side panels. |
 |
To obtain uniform spacing between the shelfs, measure the distances and then tighten the Type 10 Tee fittings in place. |
Selber Machen created this floating bathroom shelf made from Kee Klamp and Ikea LACK components. The Ikea shelving makes this project easy to tackle without requiring any carpentry skills. Kee Klamp fittings make the assembly of the frame a snap and also give the shelf a modern industrial look.
Customized It, Make it Your Own
The value of these projects and many others on this site is not that you necessarily recreate these projects exactly, but that you get inspired to do something totally unique.
If you have any trouble assembling the shelves, please don't hesitate to reach out to our projects team for help (projects@simplifiedbuilding.com). We will gladly assist you in your project, whether it's coming up with the design or if you get stuck putting it all together.
Finally, we do offer a few shelving kits for a simpler approach, try browsing our selection to see if there is a fit for you.
Did you enjoy this article? Let us know in the comments below what you thought of Tommie's shelves and be sure to sign up to our email newsletter to receive updates on future projects like this one.
