How To Turn Your Backyard Monkey Bars into Reality
If your favorite part of school was recess, this project was made for you.
At Simplified Building, we get a wide range of requests that can vary in their function/use. My personal favorites are the ones that require a bit of creativity. This was the case when a contractor reached out to us requesting assistance for her project.
She was helping her client’s child have the coolest playground addition in the neighborhood.
The client wanted custom monkey bars that ascended, leveled out, and then descended. The structure was to be made with industrial strength fittings and pipe.
Let me walk you through all the steps in this project, from our initial planning, custom modifications, and final installation so that you know how to do the same.
Envisioning the Monkey Bars
Before any steel hit the ground, we discuss the vision. We’ll talk about what you are trying to do and your concerns. At this stage, it’s important to not be overly concerned with what’s possible. We’ll get to that later.
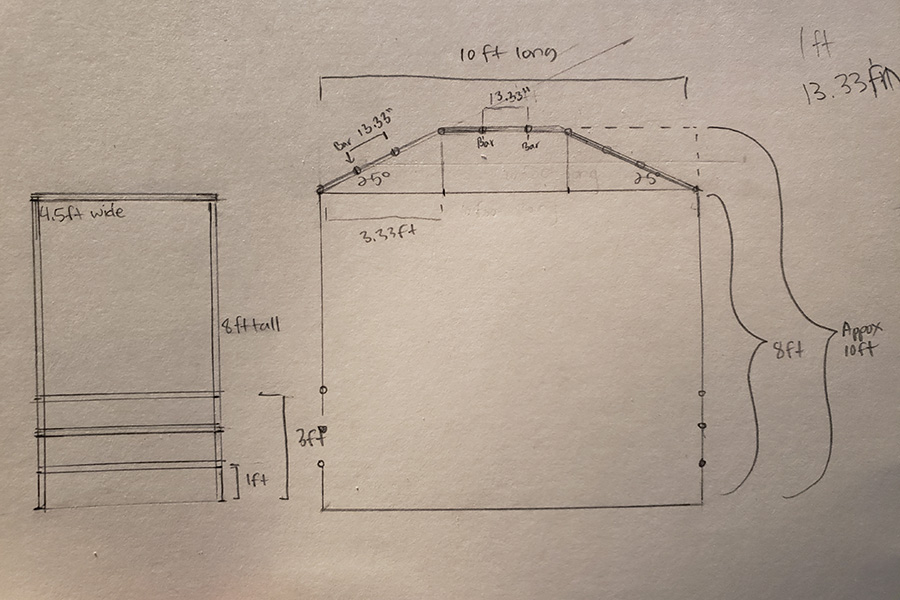
The next step is to provide any plans or drawings that could help me get a better understanding of your vision.
In all reality, this can be drawn with crayons on a napkin and that would be enough for me to get the picture. This customer happened to be more artistically inclined. But don’t feel any pressure to create a “Starry Night” or “Mona Lisa” if you happen to send a rough sketch over.
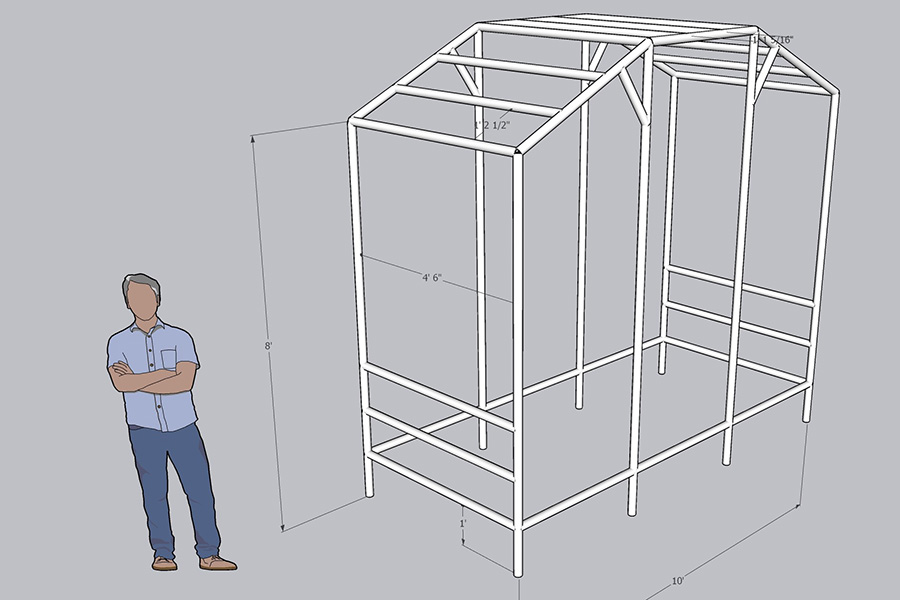
The drawing is just the beginning. We then discussed things like height and spacing between bars. Since we do not physically come on site, we try to be as detailed as possible for your project. For something like this, I like to create 3D models to make sure I’m in line with your vision.
The Monkey Bar Revisions
The next step of the process is collaborating on the design. This is where corrections are made to the layout and we talk about what’s possible and what may need to be modified. The goal here is bring the heart of your vision to reality. Sometimes, that can even result in a better solution.
This was the case with my customer. She loved the design but did have an idea for a revision. She sent me a picture touching up one of the 3D photos I sent her as an example.
Her idea worked well because it helped to make the structure stronger, even though that wasn’t the reason for the change. I suggested some additional changes to help reduce tripping hazards and save on material. With the new design, it was more stable and allowed for more mobility within the structure.
As a company, it is our goal to help you create safe solutions and eliminate any unnecessary expenses. It feels good when we can hit two birds with one stone. I sent the updated 3D Model to make sure we matched her vision.
Finalizing the Monkey Bar Design
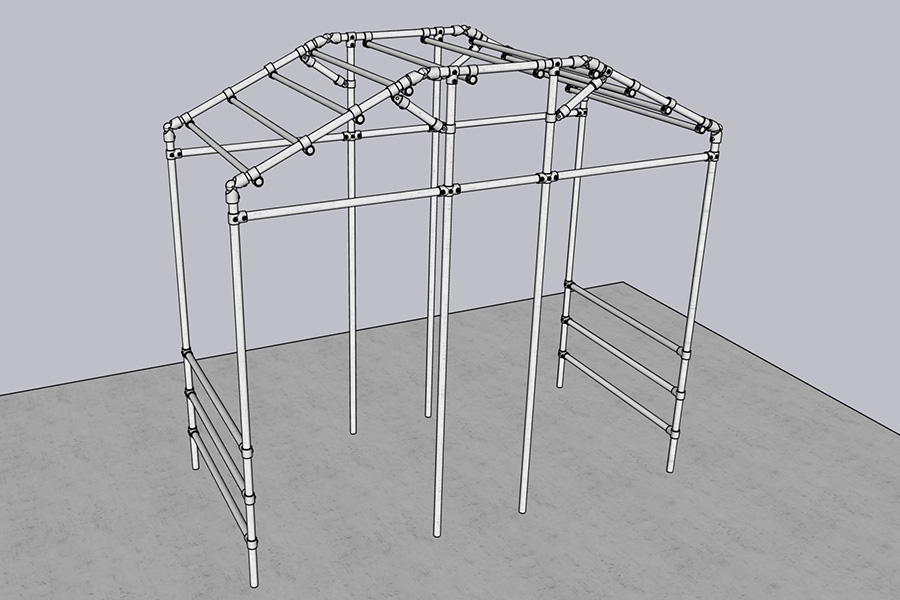
Once a greenlight is given based on the 3D model, the next step is to create a custom parts list. This includes a detailed quote that lists all the fittings and lengths of pipe it takes to create what the customer is requesting.
I sent some more detailed 3D Models so that the customer was better prepared for installation. These pictures included all the fittings and lengths of pipe labeled. This way there would be no confusion during installation where the parts go.
The contractor showed the quote to her customer, and the customer loved it. There was an additional adjustment requested related to how the monkey bars would be mounted. The customer asked us to remove the flanges and make the vertical uprights longer so she can bury them in the concrete. The adjustment was quick and easy to make and the final stamp of approval was given for the project.
Some Bumps Along the Monkey Bar Road
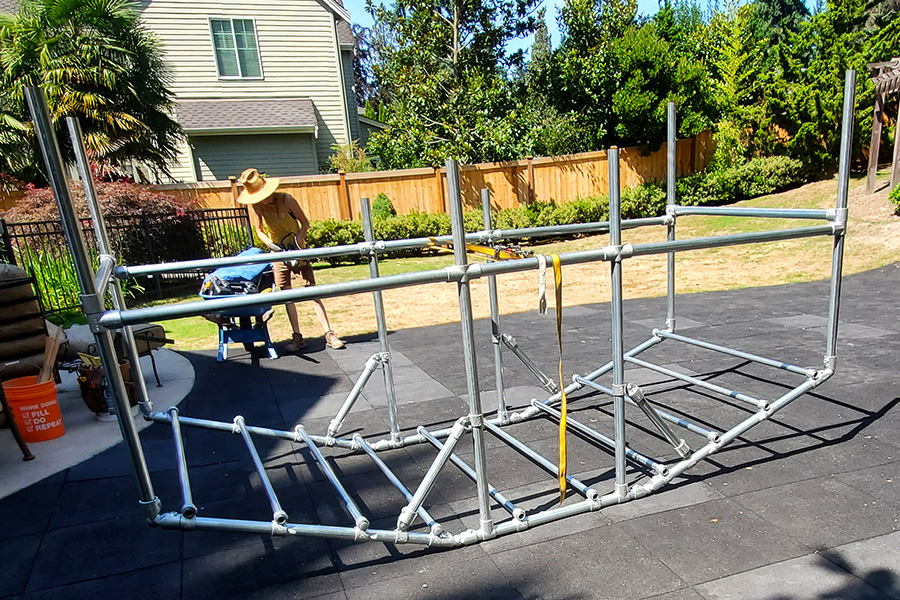
However, we were not riding into the sunset just yet. Plans don’t always go as intended. But, that’s okay. We’re here to walk you through the project until your kids are enjoying their swinging.
For this customer, after receiving the order, they discovered that the size pipe they received was bigger than expected. The size was a bit uncomfortable for their child.
Thankfully, I was able to help her by changing a couple fittings and getting some smaller pipe. This allowed her to keep the entire structure as it stood, and only change the hand bars themselves.
That is one of the wonderful things about this system. If you want to make a change, it is simple to do so. Even after installation.
It was easy to move forward once the customer agreed this was the best solution. She returned her fittings and received the new ones she needed for the change. New 3D Models were created that accurately depicted the monkey bars after the recent changes. I made sure these drawings got to her before the new parts did.
She received the new fittings, and it was a perfect fit. The contractor was happy, the customer was happy, and most importantly, the child was happy.
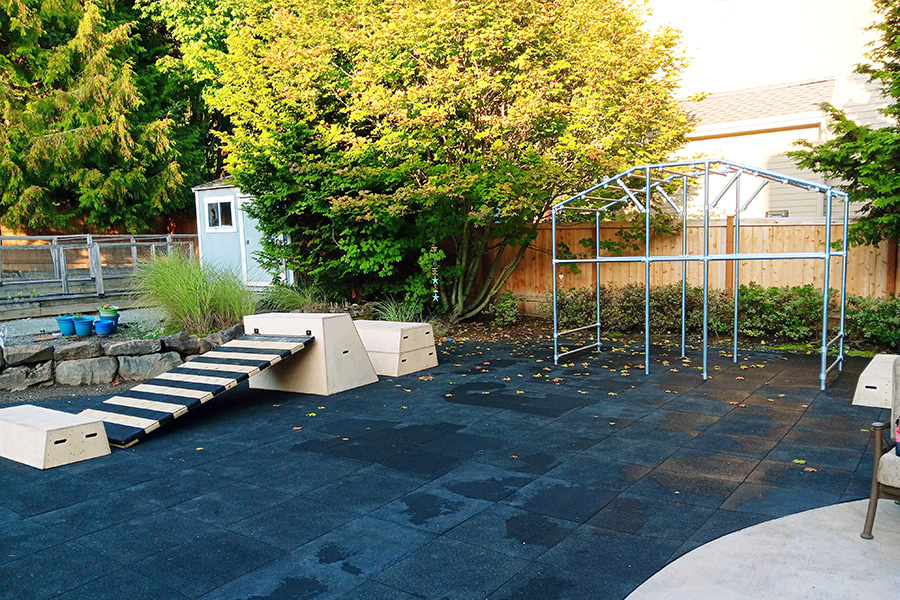
The Final Picture
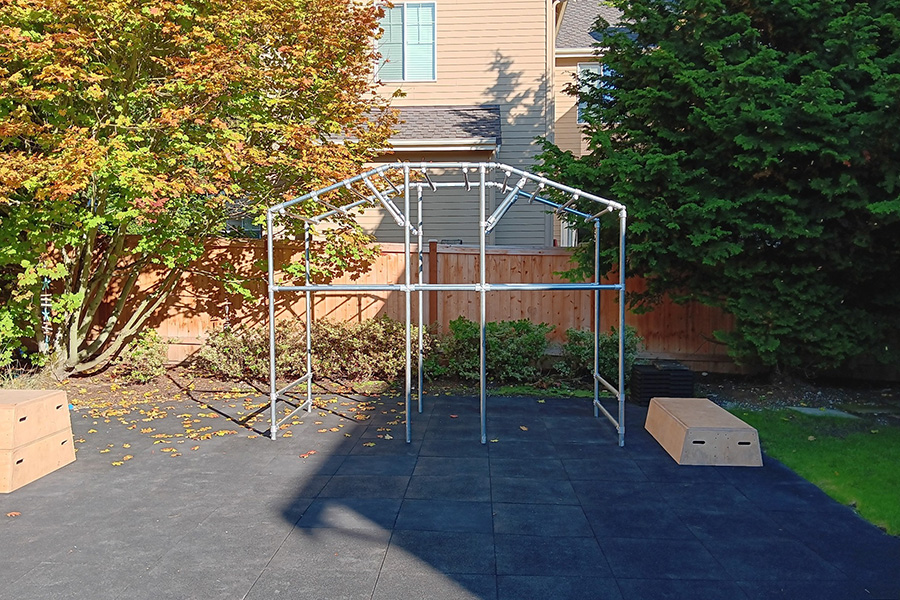
Ever since I started working on this project, I always thought the design was interesting, and I was excited to see how these 3D Models would translate to reality. The final product far surpassed my expectations.
There is nothing like things going right on the first try, but often in the real world, that’s not the case. This story is a prime example that our assistance does not end when you hit the order button. When you work with us at Simplified Building, we will be there with you every step of the way. We will make sure the final product matches your vision.
If you’re ready to see your vision come to reality, then please contact our experts to get the project started.


