Designing The Ultimate Desk With Kee Klamp
The marketing department here at Simplified Building needed a desk. Not just any desk, a desk that would be functional for video editing, but more importantly, one that looked awesome. This was the criteria, this is what I was asked to accomplish. I was tasked with designing a desk for the marketing department that simply looked cool.
With genuine excitement, I got to work. All the ideas and past projects of desk designs flood my mind as I begin to lay out my plans. This desk was going to be the coolest desk I’ve ever designed. Not over the top, not unnecessarily complex, just a unique design that works well to showcase our products.
I’m going to run you through my thought process and how I got from being asked to accomplish such a task to a completed desk design.
Step 1 - Picking The Material
With any design you need to start at square one; what material are you building this desk out of? With our pipe and fittings, you have two options:
Galvanized Steel
The stronger of the two metals and the more cost-effective, galvanized steel pipe and fittings are great options for a more rugged and industrial look and feel. The pipe is characterized mainly by its smooth metallic gray finish while the galvanization on the fittings leaves a more rough finish.
Aluminum
Lighter, cleaner, a more refined approach, aluminum pipe, and fittings have a much smoother finish. They are easier to use due to the lighter weight and give off a nice sheen on the finished product.
My decision was simple. Aluminum was to be the material for this desk.
To dive a little deeper into my decision-making process, I’ll take a step backward. This desk was to be used for photo/video editing. It will not be holding a lot of weight. At most, the desk would be holding the weight of employees leaning on it and the weight of the PC tower. The strength of the material is not a concern whatsoever.
This was going to be displayed in the marketing room. This room has clean white painted walls and very good lighting. The industrial look and feel were not top of mind. And personally, I think aluminum fittings look really sharp on desk frames.
Step 2 - Picking The Size
Tabletop dimensions and desk height are critically important when designing any desk. It gives you clear restraints for what can be added as features. For example, a sitting-height desk gives less room underneath for incorporating the PC tower and shelving. Standing height will likely need a crossbar for resting your feet. These all play into your final design. Knowing your desired height and tabletop dimensions comes first before designing any features.
As for the marketing desk, it was always meant to be a sitting-height desk. After measuring a standard office chair, I was able to quickly determine the height of the desk frame at roughly 30” tall. No one wants to bump their knee on a pipe or be reaching upwards to find the keyboard. At this point, all I needed to know was the desktop dimensions to see how much room I had to work with on top of the frame.
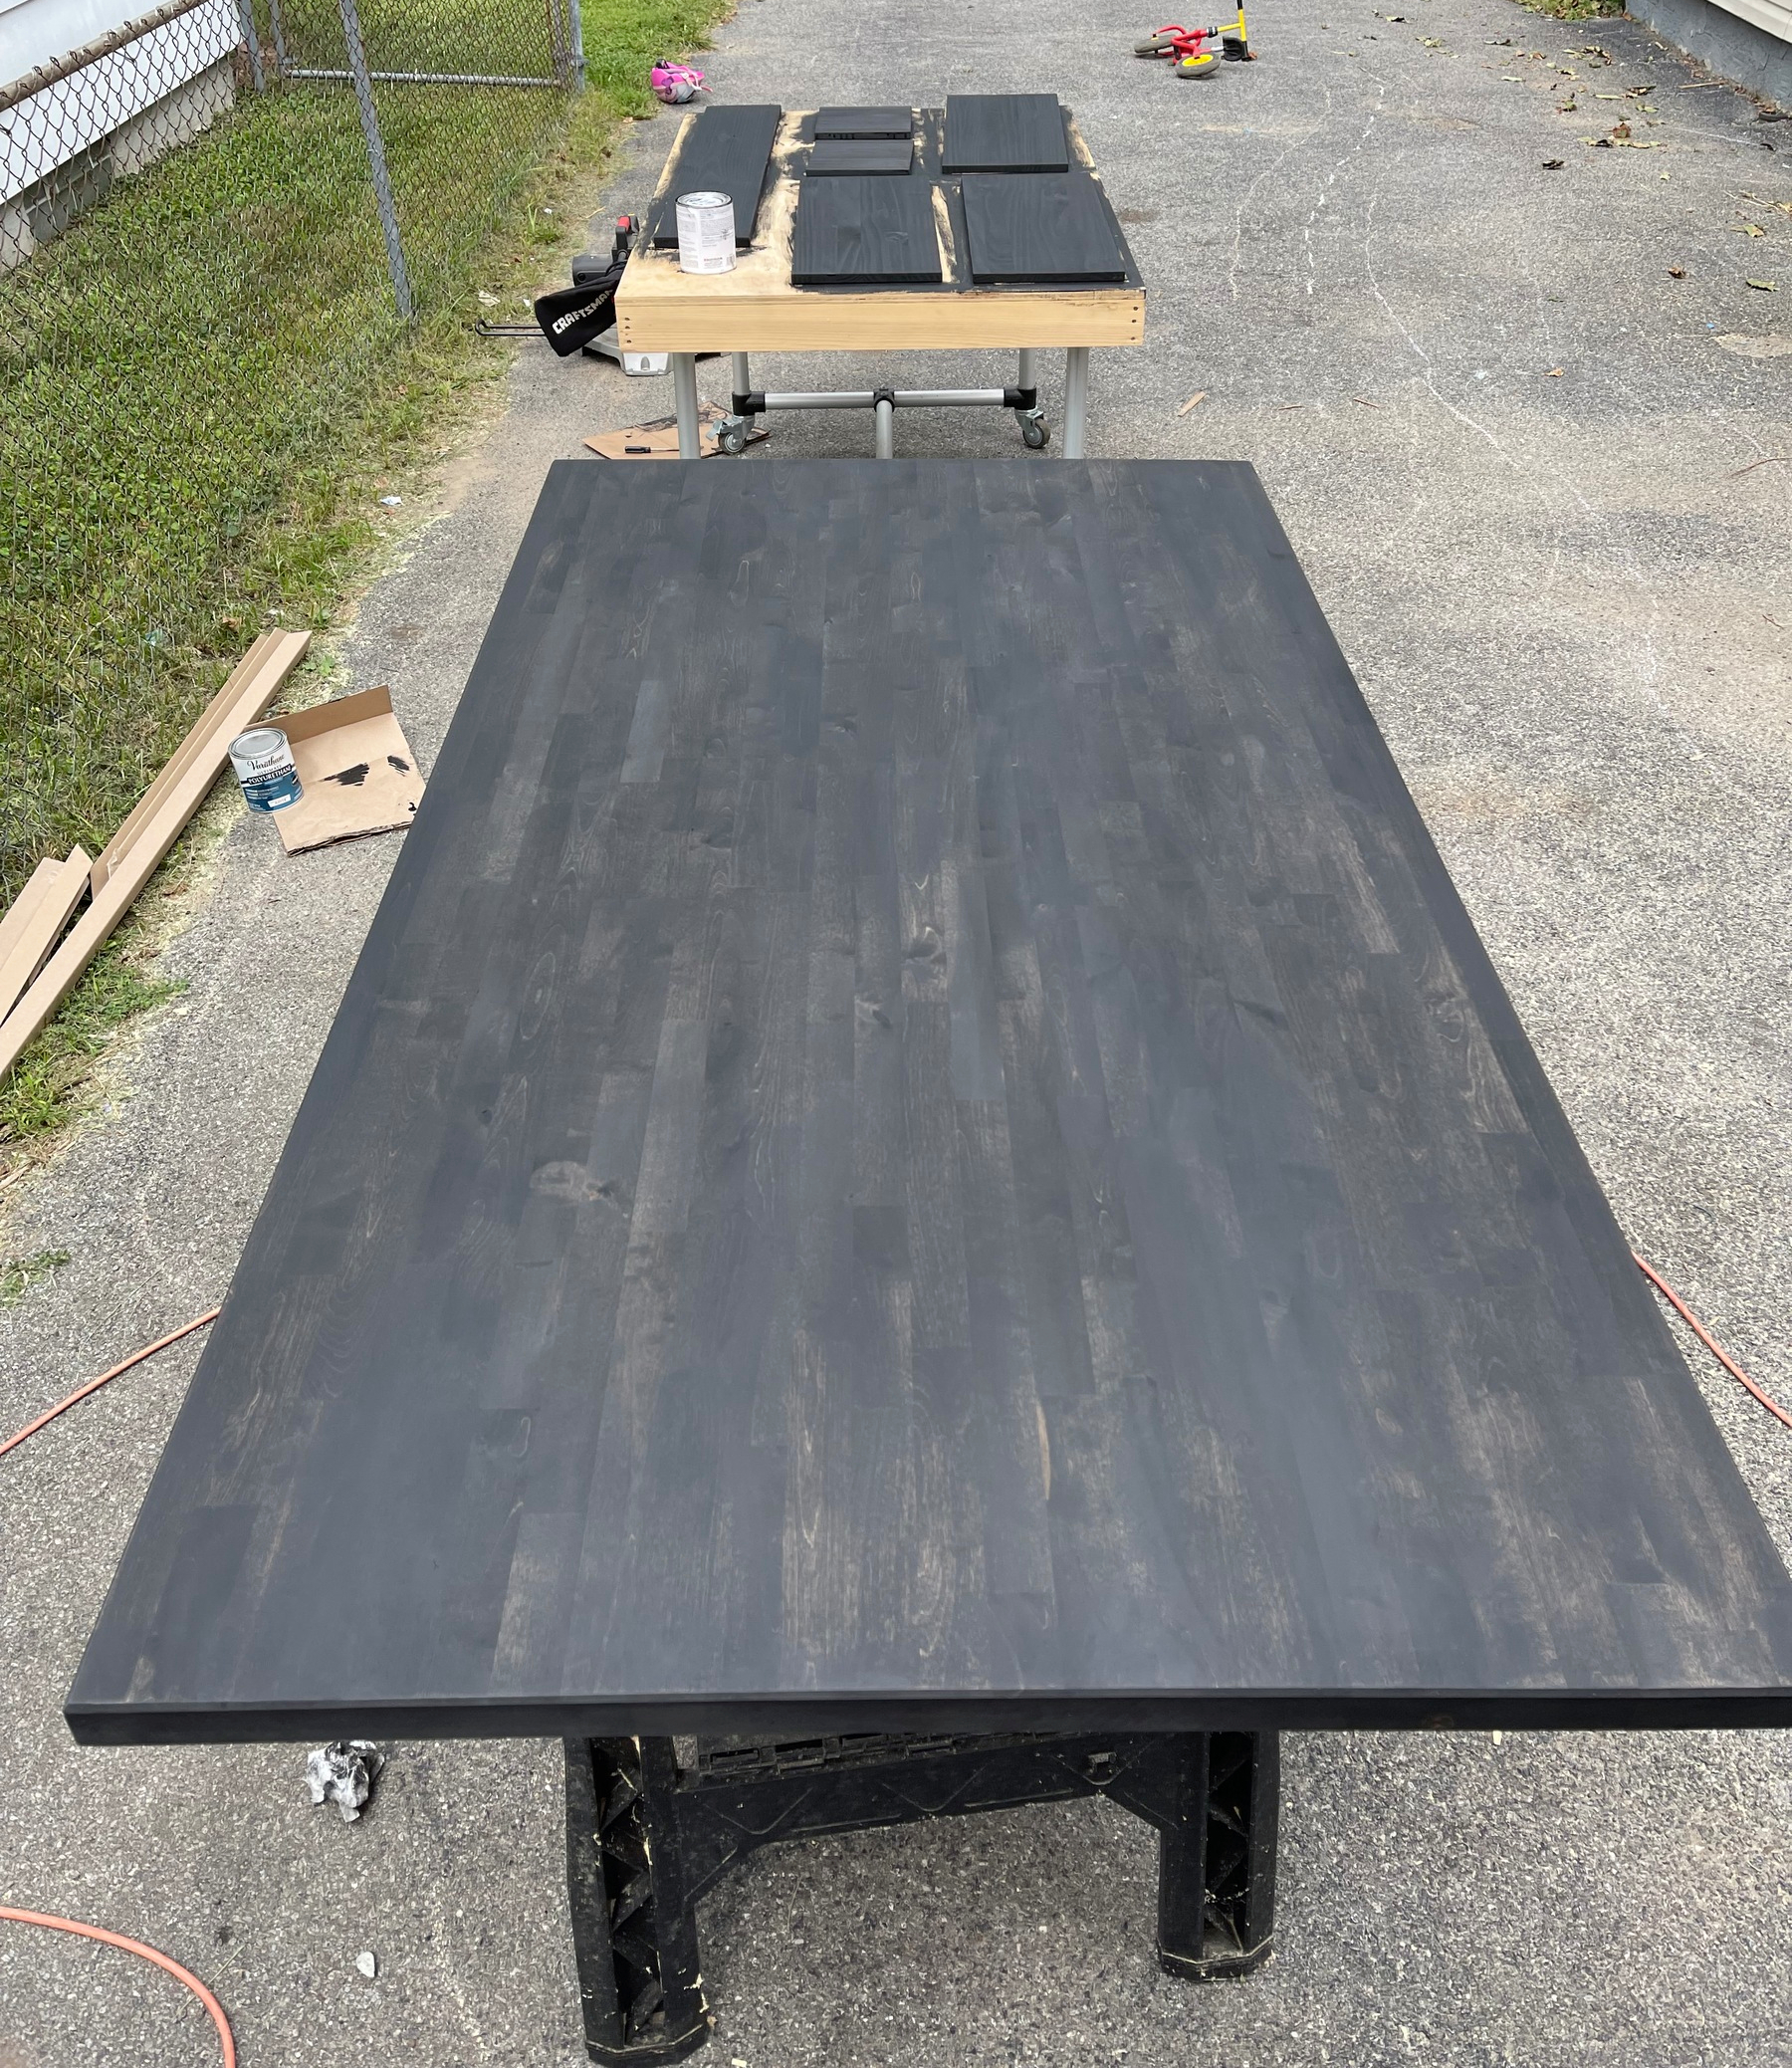
We ended up finding a butcher block measuring 74 inches x 39 inches on Home Depot's website that our marketing manager gave a new finish to. That gave me plenty of room to work with.
Step 3 - Picking The Features
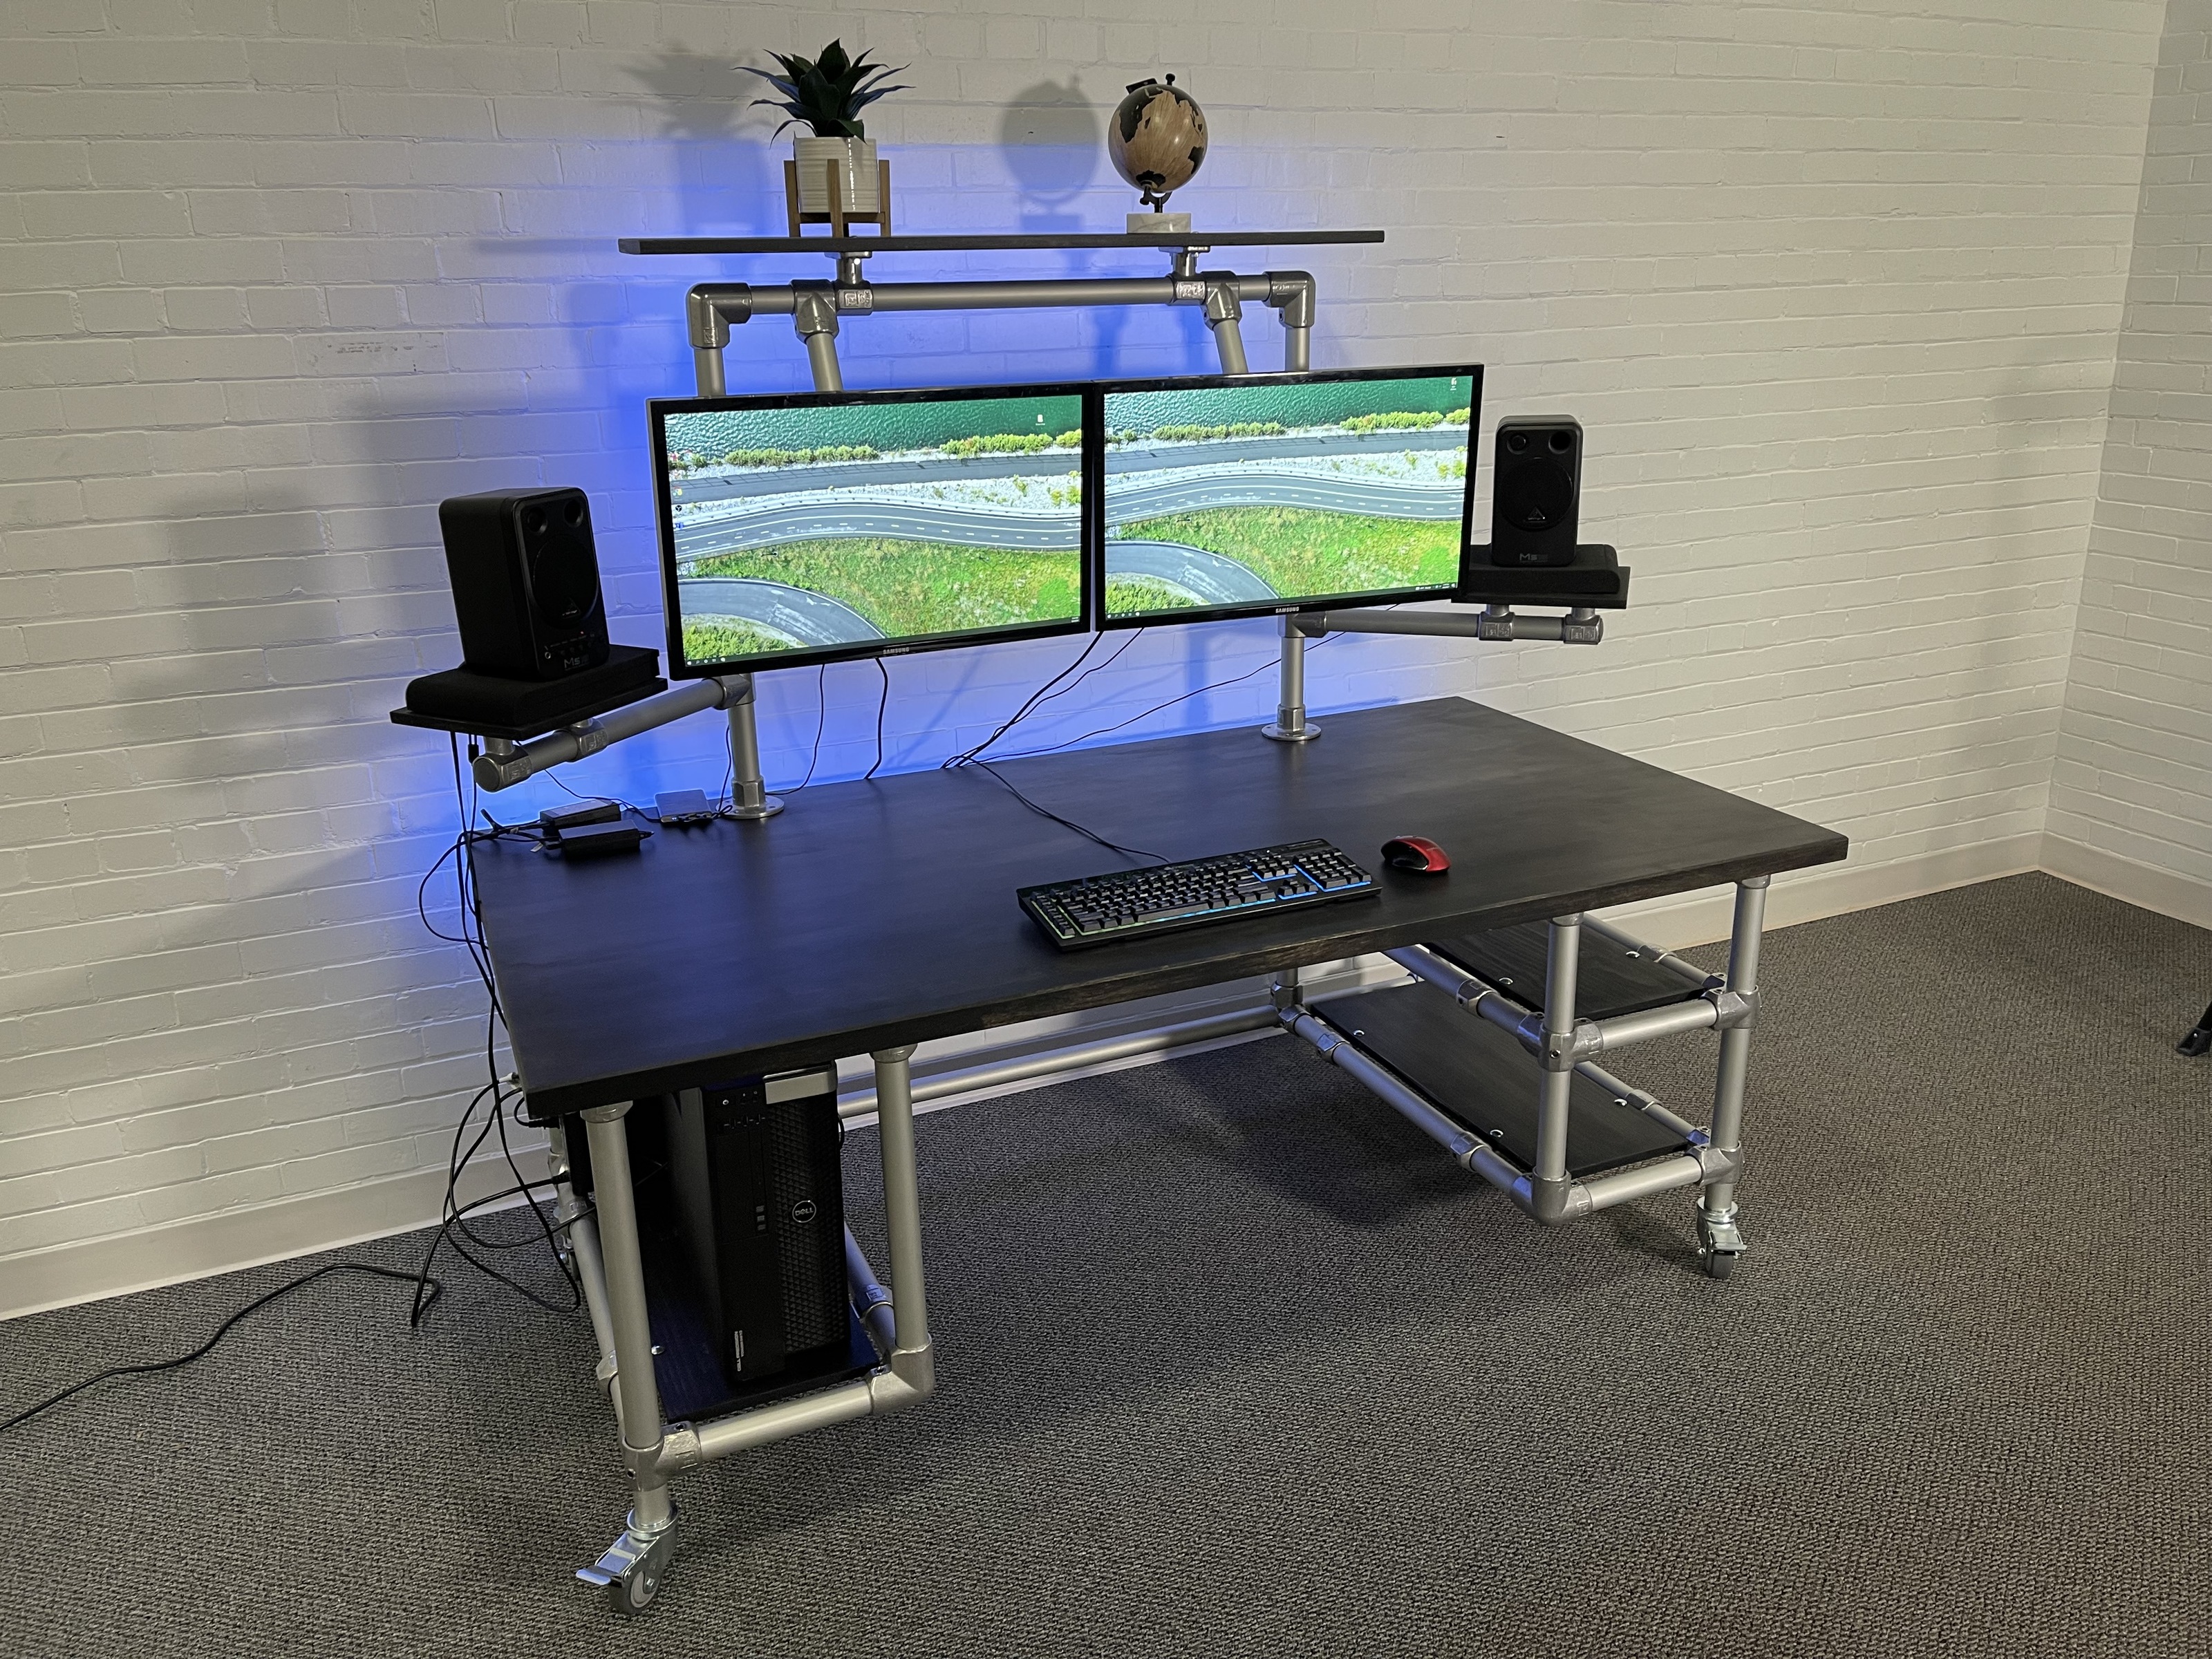
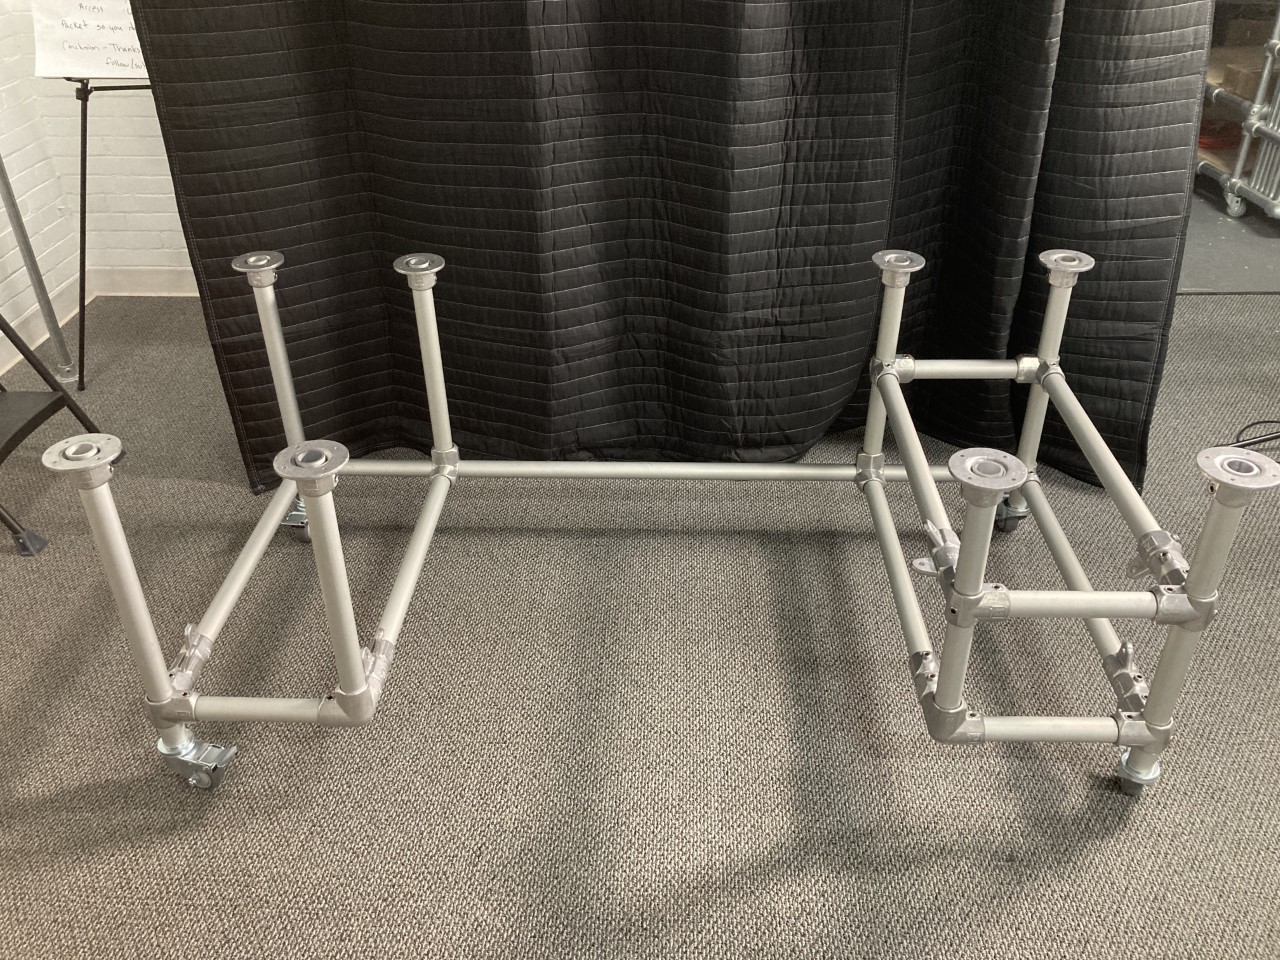
With that much space on either side of the individual sitting at the desk, my mind went immediately to floating-style shelving. One side would be built specifically for the PC tower, the other side would be for miscellaneous items.
This floating style of shelving keeps your desk from having more than 4 legs. The pipes branch off the legs, then turns upwards to connect back to the underneath of the desktop. Then using a tab-like fitting, or in this case, the LM50 Male Swivel fitting, you can set the wood within the pipe frame to create the shelf. Bolt it down and you have a sturdy, yet cool-looking shelf.
I strongly dislike monitors sitting on top of desks. Maybe too personal for a blog of this type, but I can’t stand it. It takes up way too much usable space on your desk and looks more cluttered. That said, I needed to incorporate a way to mount the monitors to the pipe frame while leaving them adjustable for varying sitting heights.
This upside-down “U” shape of connecting flanges to the desktop and having “arms” come off is the simplest design. The arms allow the monitor flexibility in height, as well as some distance from the worker. By tilting the arms forward or backward, the monitor can be fixed into the perfect distance so as to not strain someone's eyes.
This monitor mount design also allowed me the option of adding additional features as well, as you can see in the drawing. We had two large speakers in the marketing room to incorporate into the desk. By adding two additional arms and brackets for attaching wood, you can easily have fully adjustable shelves for speakers.
The only problem left was that the top of the monitor stand looked lonely. I had no purpose for it, but additional shelving on top would cap off the whole desk. This was supposed to be an awesome desk, we can’t have bare spots.
Also, everything is better on wheels. Finishing off the desk with stem casters gave the desk even more flexibility and mobility.
Step 4 - Order It Up / Install
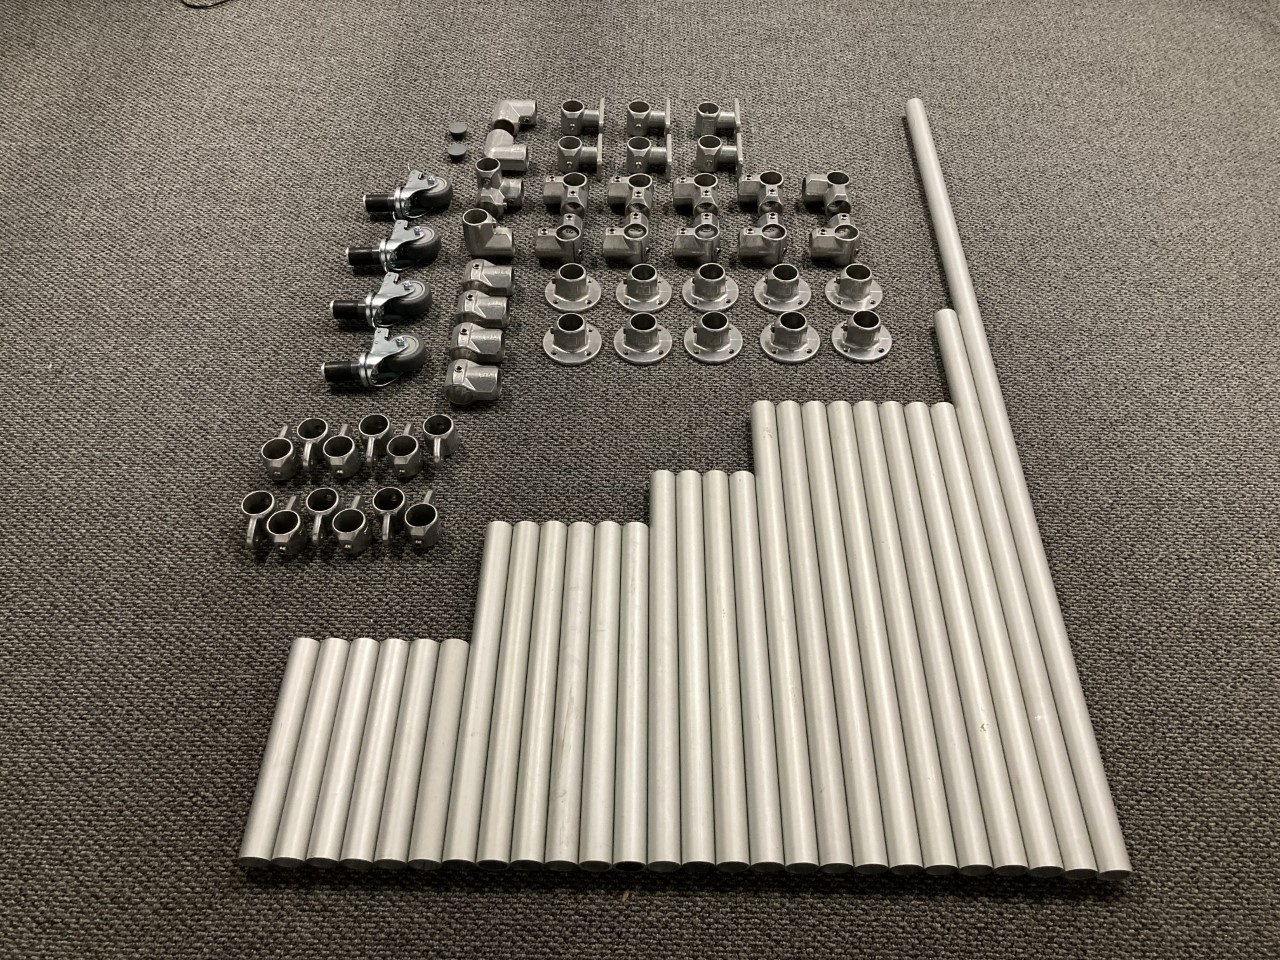
With everything designed in Sketchup, we were able to quickly determine all the exact pipe lengths needed. We also were able to determine what size shelves we’d need to cut so that all parts fit perfectly.
All the pre-cut pipes and fittings arrived within a week of placing an order and after about an hour of playing with the pipe and fittings, we had a pipe frame for our marketing desk!
The wood was cut, sanded, and stained by our marketing manager. Full assembly was done a day later. Throw some LED lighting on the back, utilize the shelving space with knick-knacks and you have yourself the ultimate marketing desk made with Kee Klamps.
