How to Configure an ADA Compliant Railing on a Ramp
We’ve all seen it. The request comes in for ADA compliant handrailing on a ramp or set of ramps. Drawings are handed to you and seem incomplete and at times generate more questions than answers. The details are helpful enough to make assumptions about what is needed, while ambiguous enough to reduce your confidence.
The problem is always becomes budgeting the project accurately. While the drawings gave an initial idea of what is required, onsite measurements and new builds rarely go as expected. Changes in the field are a common, and the more you can understand those potential changes beforehand, the more headaches and stress you can avoid throughout your project.
ADA compliant railing on ramps do not need to be complicated. They certainly don’t need to be estimated incorrectly if you know how to configure them with Kee Klamp fittings and standard pipe.
In this article, I’ll be addressing a few items to help you configure and estimate ADA compliant railing for your ramp project. First, I’ll start with a high-level overview of what ADA requires in an effort to bring clarity to what was written in the drawings. Second, I will show you step by step how we configure the parts needed for your railing, allowing for solid budgetary estimates every time. And finally, I will go over some best practices for installing your ADA compliant railing once you are onsite.
What Does ADA Require?
To get to the configuring of ADA railing more quickly, I’ll give a condensed version of what is expected for railings on ramps. This will give further context to how we configure our railings and estimate out the materials needed.
Handrail is required on both sides of the ramp. (ADA Chapter 5 Section 505.2)
This is as simple as it sounds. Make sure there is enough material quoted to have railing on both sides of the ramp.
Handrail gripping surface must be continuous. (ADA Chapter 5 Section 505.6)
Other than typical pipe and fittings, our Kee Klamp system for ADA railings use internal couplings to join together so that the gripping surface is smooth.
Handrails must extend horizontally for 12 inches at the top and bottom of the ramp. (ADA Chapter 5 Section 505.10.1)
Leveling out the railing on the top and bottom of the ramp before terminating is required by ADA. This is fairly easy in principle, however, there are times where you need to get creative. Fortunately, our Kee Klamp system allows for these oddball customizations.
Anyone who has read compliance-based documentation from the government knows that this list cannot be exhaustive. Nor is it ever this simple. We have already gone through the daunting task of listing out all relevant ADA codes and simplified them for you. For an extensive overview of what ADA requires for handrails, check out our ADA Handrail Guide.
How to Configure your ADA Railing
With a basic understanding of what is needed for your ADA railing on the ramp, we can get into the meat of this article; how to configure the railing.
In order to dial this in and simplify it to the point that someone like me can quote ADA handrailing projects, we need to think in terms of posts. Posts are generally uniform, easily numbered, and allow for simple layouts of railing.
What do I mean by posts?
Given that a majority of the fittings used in an ADA handrailing will land on a post, and where the posts land on the ramp will determine what fittings are needed, this is the simplest route to getting a material list for your railing. There are three details we will need to layout before we get into the specifics: post spacing, types of posts and locations of posts.
All post spacing for our Kee Klamp ADA handrail should not exceed 72” on center. This is the distance we’ve found to be the easiest for configuring as well as leaves the railing strong enough and rigid while children (and probably adults as well) use them for not their intended purpose. Examples being sliding down the railing, swinging around it like a gymnast, the list goes on.
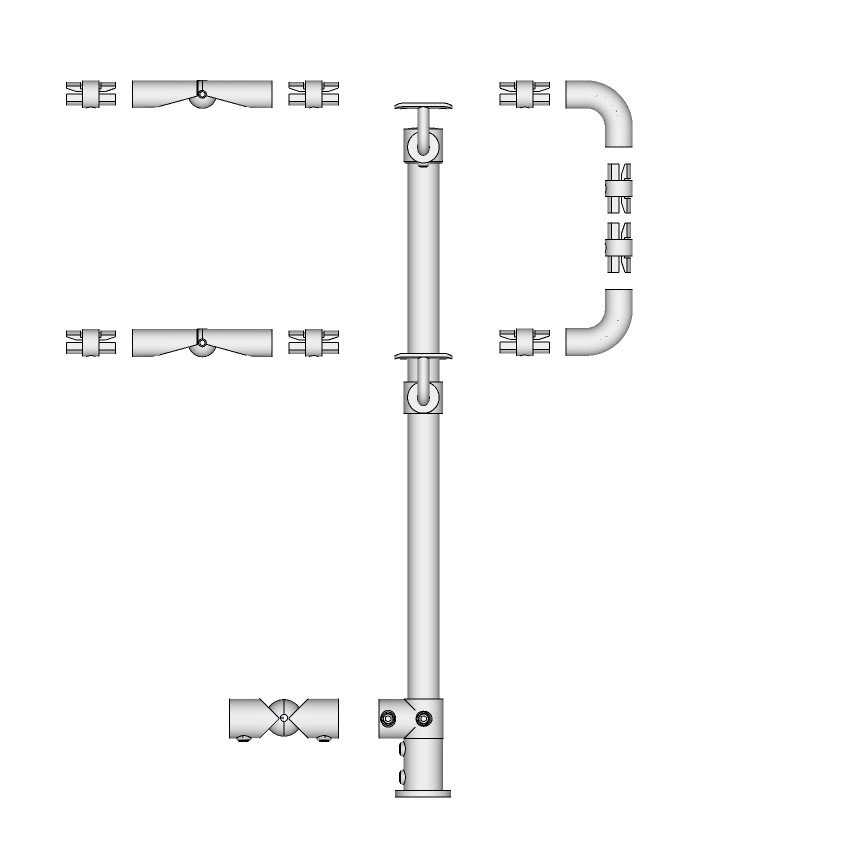
Types of posts are boiled down to a combination of a top rail, middle rail, and / or bottom rail. Any math majors would know quickly that there are many combinations within these three options. However, to simplify it further, these are all the possible combinations for your ADA railing:
- Top Rail Only
- Top and Middle Rail
- Top and Bottom Rail
- Top, Middle and Bottom Rail
There are three basic locations for posts on a ramp: terminations, on ramp and on level surface. Being self-explanatory in their title, these locations will represent every single post in your configuration. Don’t believe me? Let’s see it laid out.
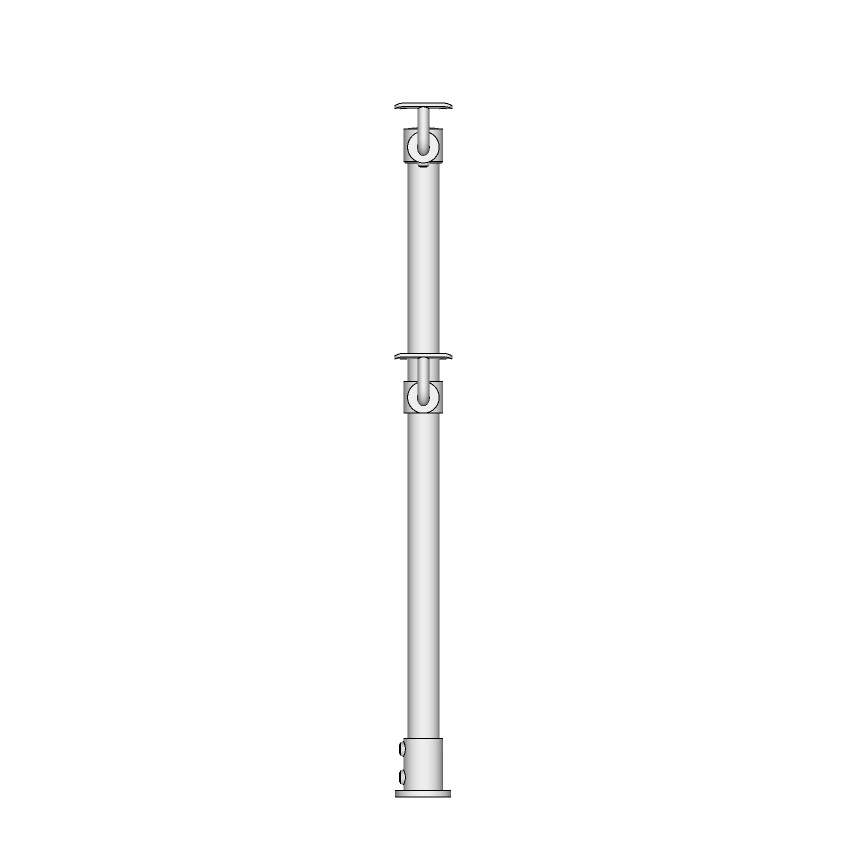
Termination Posts
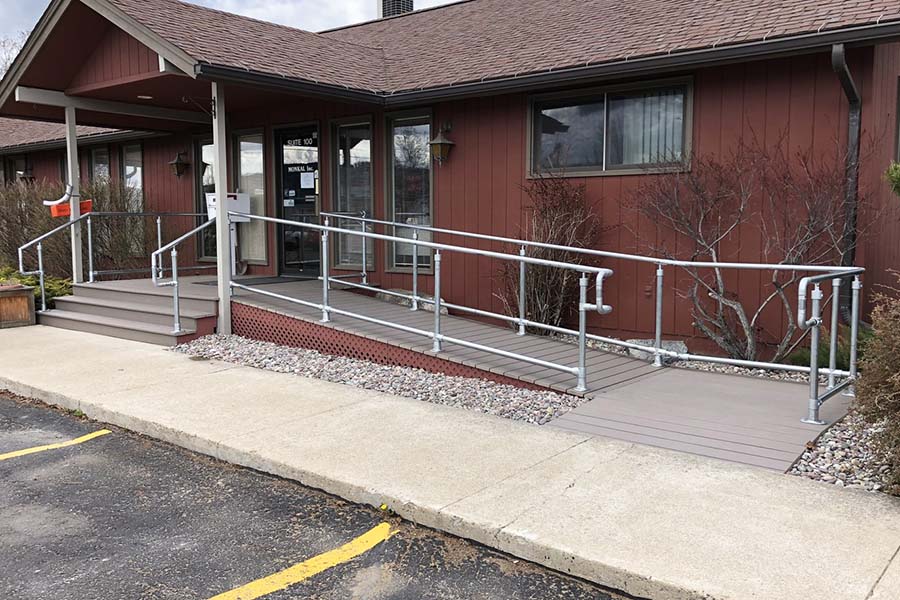
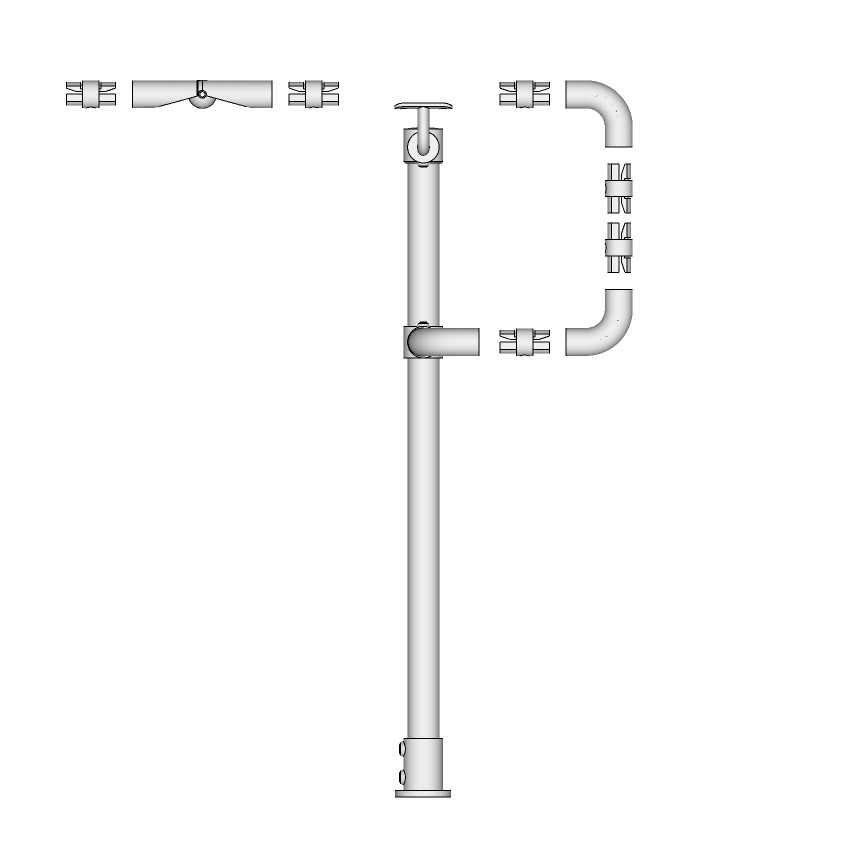
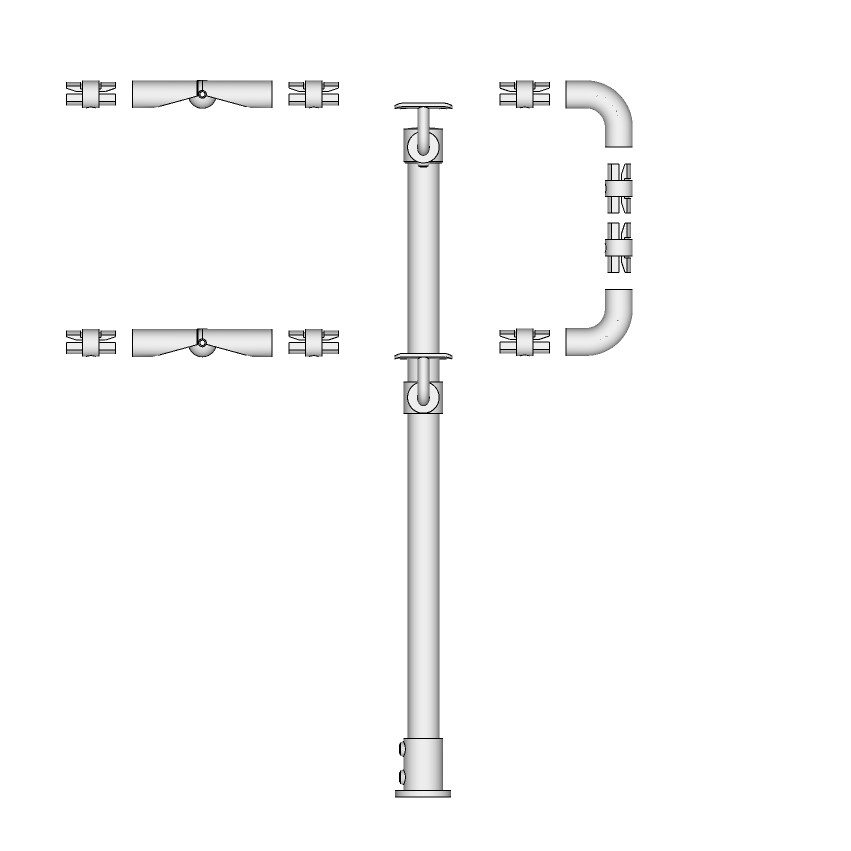
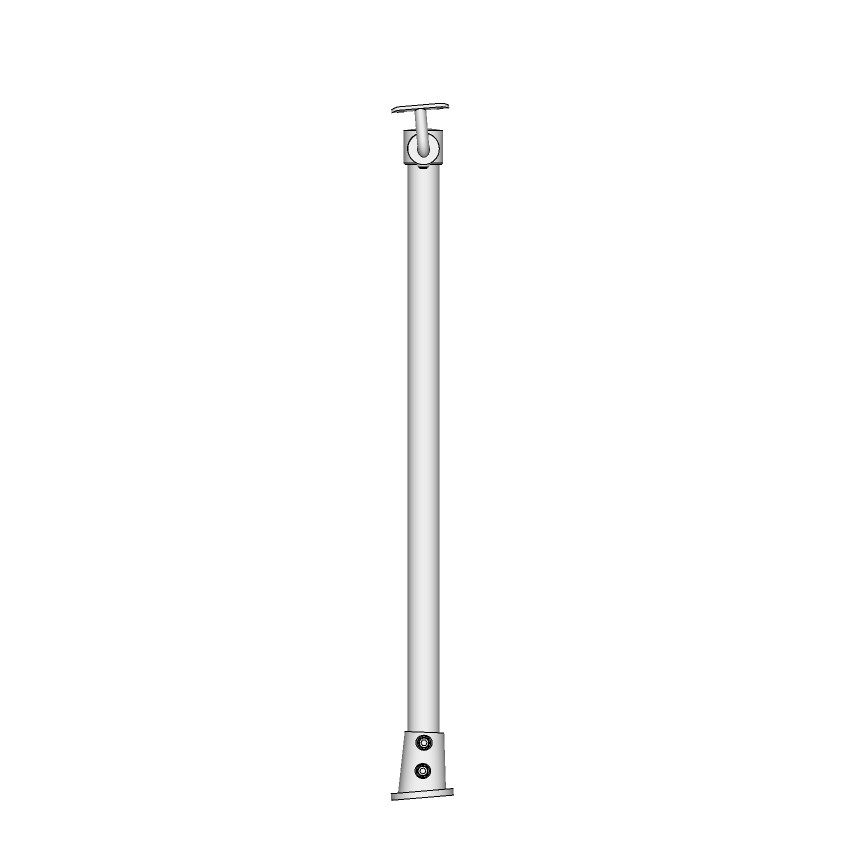
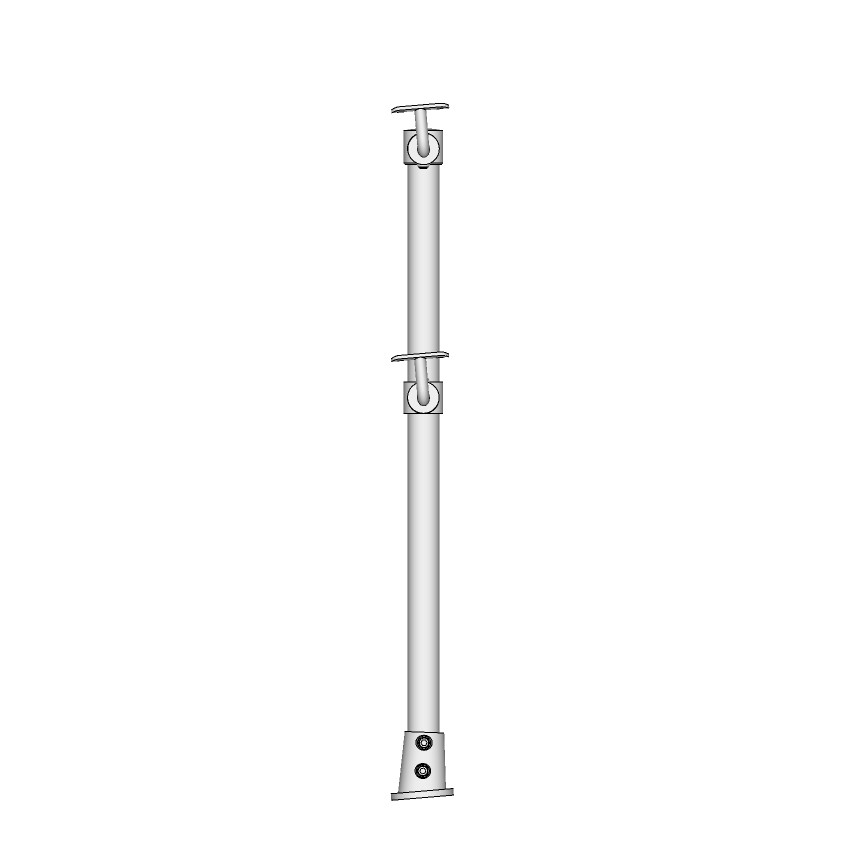
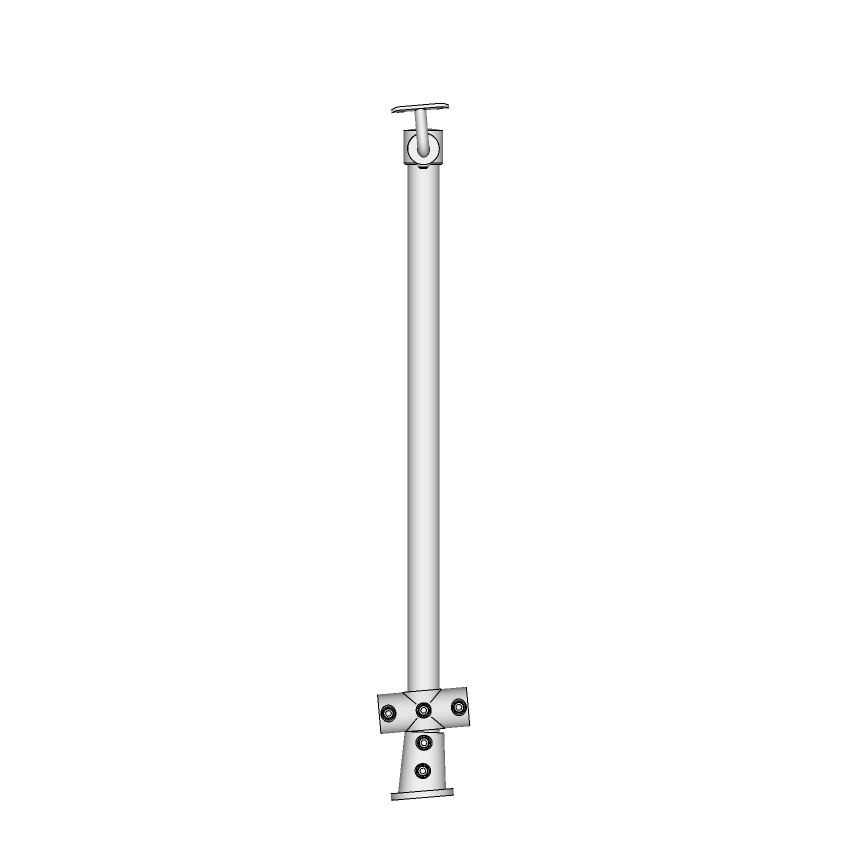
Termination posts will always land on a level surface at the beginning and end of a ramp. This will include a standard railing flange, all the fittings to create a 12” level railing, and the termination of the handrail to the post. These can look dramatically different depending on which combination of rails you are needing.
Termination for top railing only.
Termination post for top and middle railing.
Termination post for top and bottom railing.
Termination post for a top, middle and bottom railing.
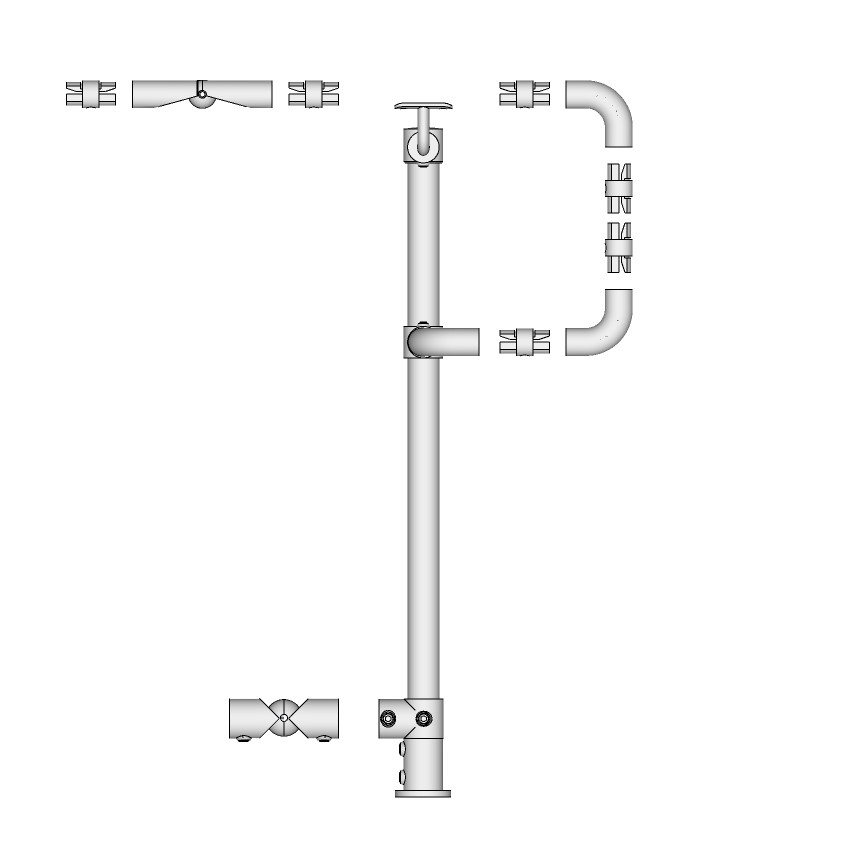
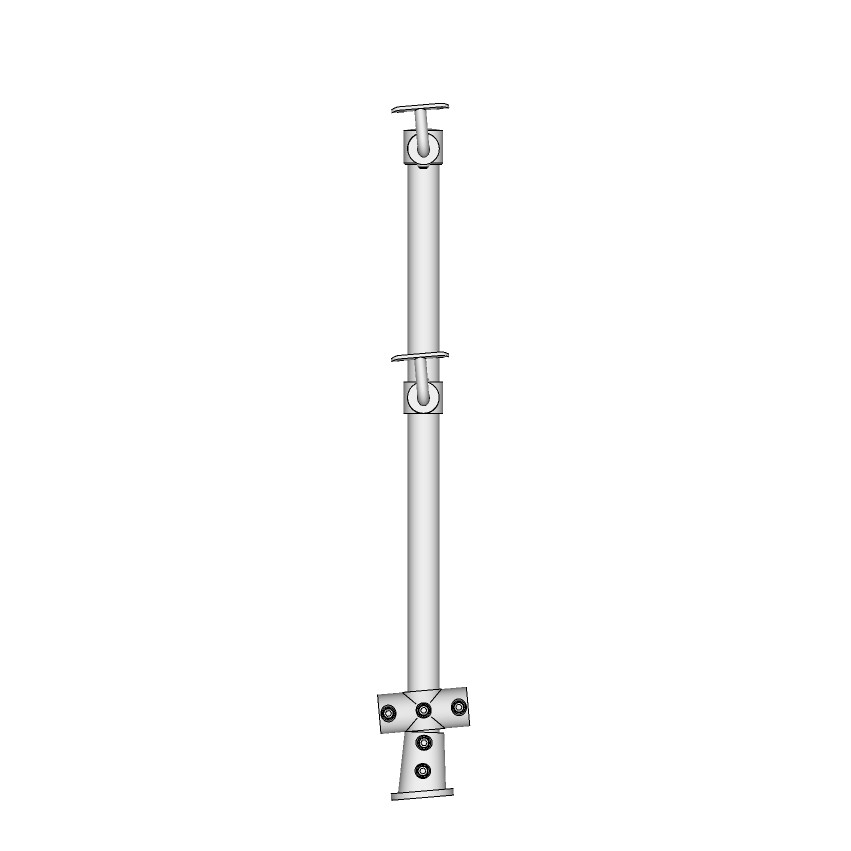
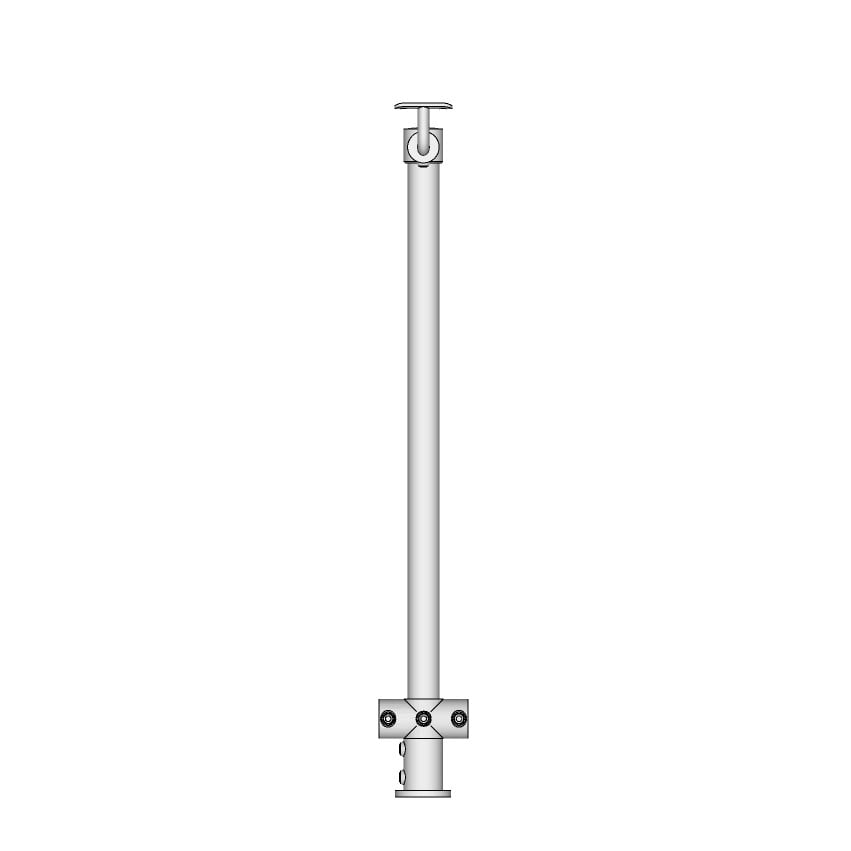
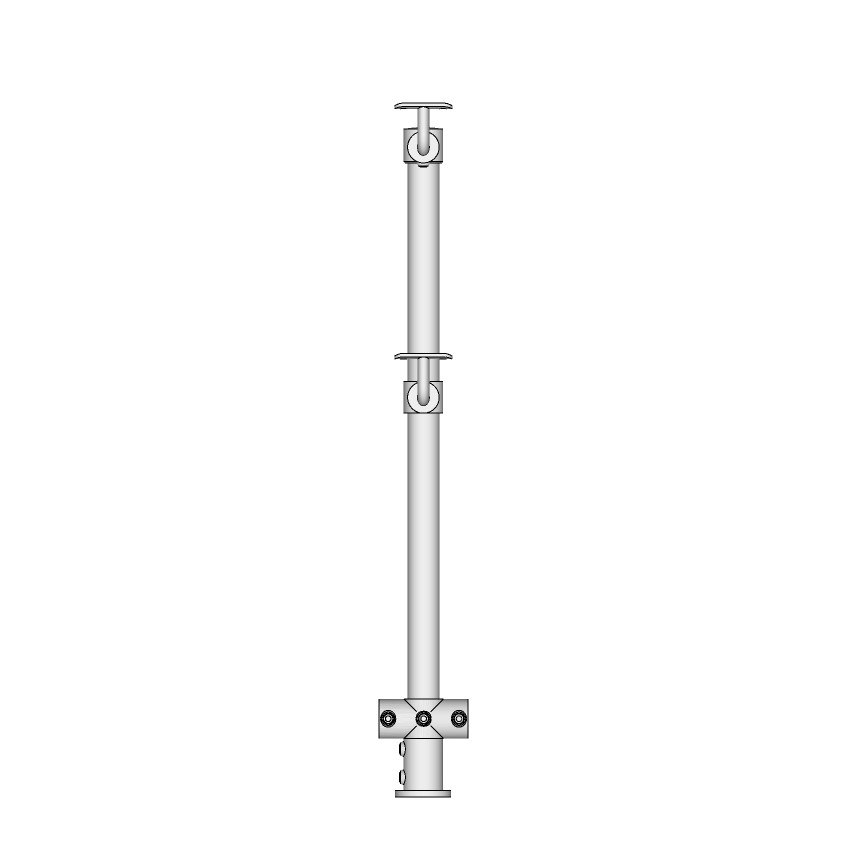
Posts on the Ramp
Posts that are mounted into the ramp portion itself are at a pitch. Given that ADA compliant ramps are required to be at a 1/12 pitch, the adjustable angle flange is perfect for keeping your post plumb. With adjustable degree fittings for your top handrail, middle handrail, and bottom rail, you can easily keep your posts uniform while the railing follows the angle changes.
Post on ramp with top railing only.
Post on ramp with top and middle railing.
Post on ramp with top and bottom railing.
Post on ramp with top, middle and bottom railing.
Posts on Landing
Like terminations, these posts land on a level surface. The main difference being that the handrail will extend the past the post. These are primarily found on landings and switchbacks on ramps. Using a standard base flange for mounting, the fittings needed for these posts don’t need to be adjustable. The railing will simply parallel the surface of the landing.

Post on landing with top railing only.
Post on landing with top and middle railing.
Post on landing with top and bottom railing.
Post on landing with top, middle and bottom railing.
Now that we have an idea of what is required by ADA, standardized post spacing, and the posts defined by location, we are well on our way to configuring your handrail. There is only one more factor that comes into play when it comes to estimating the material needed for your ramp: transitions and turns.
Anytime a ramp goes from level to sloped, or sloped to level, I define that as a transition. There are two fittings used for making the handrail change its angle. One is used exclusively for the handrail portion (top and middle rail) and the other is exclusively used for the bottom rail. Reason being the handrail, as mentioned earlier, needs to be smooth. Meaning there cannot be a fitting wrapping over a pipe when someone is intended to run their hand across the railing, it would no longer be continuous.
For transitions on the handrail, use the 554-7 Adjustable Angle with Internal Couplings..
For transitions on the bottom railing, use the BC53-88 Swivel Elbow.
Configuring Put into Practice
Let’s put into practice everything we just laid out. How would we configure an ADA handrail for a standard 10’ ramp with 5’ x 5’ landing?.
First, what does ADA require?
- Railing needs to be on both sides of the ramp.
- Railing needs to have a top railing and a bottom rail.
- Railing needs to wrap around the landing.
- Railing needs to terminate at the bottom and top of the ramp.
Perfect, we have everything we need to get an estimate on the materials required for the ADA handrailing.
So, how do I sort out posts?
Given that railing needs to be on boths sides of the ramp, and it needs to terminate at the top and bottom, I know I need four termination posts. Given that my post spacing is a maximum of 72" on center, that would equate to a post landing in the middle of the ramp on both sides. This will add two posts on the ramp. And depending on code requirements for how many railings I need (top only, top and bottom, etc.), I can quickly add up all the fittings needed for the ADA railing.
Lastly, how much pipe will I need?
Pipe is also simple to estimate. Add up your total linear foot of the ramp and add some extra for pipe cuts. In this case, we have 20 linear feet of ramp (10 feet on both sides) and 10 linear feet on the landing (5 feet on each side). All posts can be estimated at 36". Keep in mind: All posts are 1 1/2" schedule 40 pipe and all handrails are 1 1/4" schedule 40.
Best Practices for Installing your ADA Railing on a Ramp
I’ve worked with this product for almost a decade and installed a few myself. That does not make me an expert of what you’ll encounter in the field. However, I will speak to a high-level overview of how to work with a modular based ADA handrail system.
Bring a saw
This isn’t your standard welded system, meaning you will be adjusting the handrailing onsite. Having the ability to trim pipe to exact length needed based on real time field measurements will make your life easier. I would avoid ordering pipe in exact lengths. Ordering them longer than needed will allow you to make quick work of customization. Bring a way to cut pipe.
Layout posts before drilling
Place your already defined posts in your desired spot before you drill anything into the concrete. This will give you a quick insight into if modifications are needed before anything is mounted. It will also allow you to determine pipe lengths. Once the posts are laid out, you can begin mounting your flanges for your posts.
Soft install before finalizing
Setscrew based systems are great for permanent applications. Meaning, once you tighten a set screw down to its required torque, it is designed to stay there indefinitely. I would avoid this until you know everything is in the right spot. You could end up damaging your pipe and potentially compromise the fittings strength. Wait to tighten, you’ll be happy you did.
Buy yourself a 6-pack
With the amount of time saved on installing an ADA compliant handrailing, you’ll have time to sit back and relax with a cold one.
Configuring ADA compliant handrailing for ramps does not need to be complicated. By understanding the basic requirements of ADA code, thinking in terms of posts, and laying out your project in a sketch, you can quickly determine the exact Kee Klamp fittings you’ll need to complete your project. As always, we have our team of ADA experts on standby to help design, layout, and quote all your handrailing needs.
