How To: Build a Custom Ergonomic Computer Desk
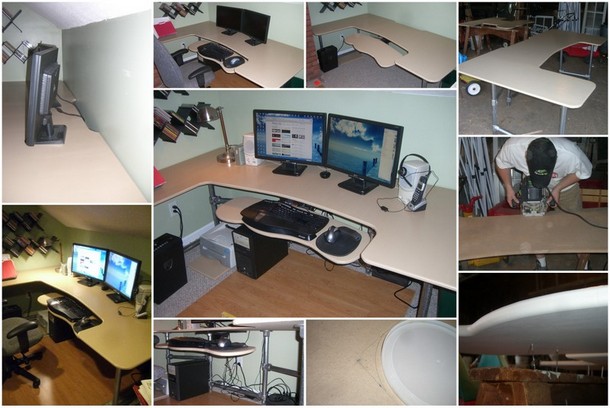
As a web developer, I spend LOTS of time at the keyboard. For me, having an ergonomic computer desk is an absolute essential. Recently, making the transition to working full time for myself, I decided that I needed a quality computer desk that would be adjustable and ergonomic. I quickly found myself frustrated with the high cost of ergonomic desks on the market.
Researching desks started to give me an idea of what I did and did not want in a computer desk. After a discussion with a friend I decided to make the plunge into building a desk to fit my needs.
Basic Strategy
I'm not a woodworker at heart, so I knew I needed to keep the construction of the desk simple. I decided to build the desk legs and foundation using Kee Klamp fittings and fence post. The aesthetic look isn't for everyone, but it makes construction MUCH EASIER. Building the foundation of the desk is as simple as cutting some pipe and using an Allen wrench.
For the desk top I used a custom cut piece of MDF that I primed, painted and sealed (a must if you are using MDF).
To make the desk ergonomic I custom cut some of the remaining MDF into a keyboard tray and bought an articulating keyboard adjustable unit.
Getting Started
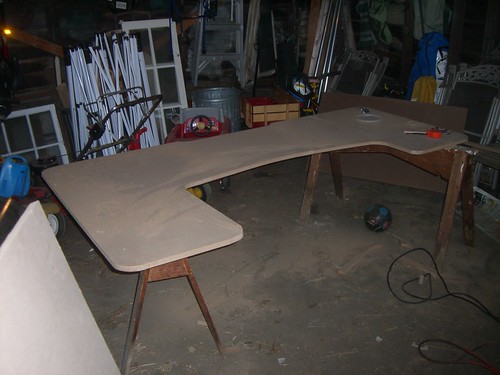
The first thing I did was make a plan. I drew out several sketches on some graph paper to see how I wanted the desktop surface to look. Having a particular space in mind, I made one side of the desk longer than the other.
Here's my drawing:

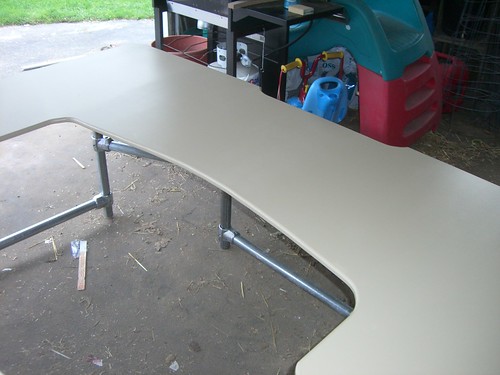
Cutting the Top
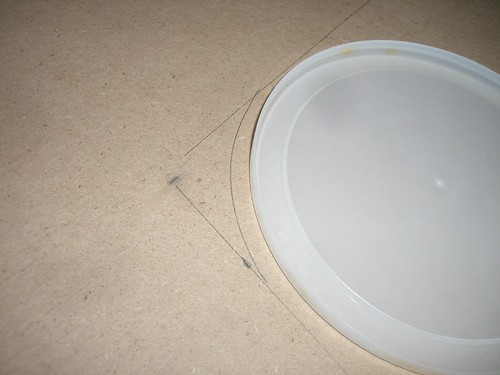
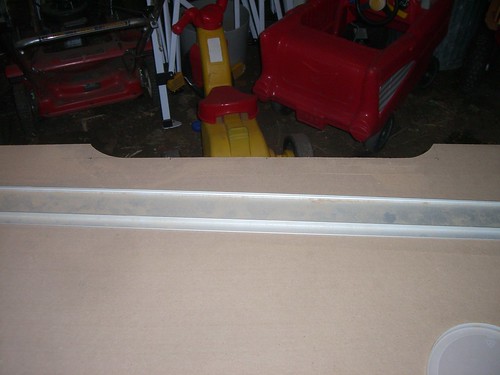
After I had my design, I marked the outline onto a 4x8 sheet of MDF. I used the top of a coffee can as a stencil for my rounded corners.
I supported it on saw horses and made the first couple of straight cuts with a circular saw. I used a straight edge to guide the circular saw so that the edges were perfectly straight.
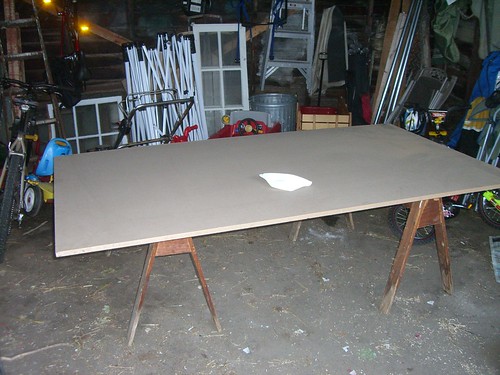
Then I used a HIGH QUALITY jig saw with a SHARP BLADE to cut out the curves and corners.
TIP: You need to be careful with how you support MDF -- it is not as study as plywood and could crack if mishandled.
TIP: I borrowed a high quality jig saw. The performance of a high quality jig saw with a sharp blade is astounding compared to a cheaper unit.
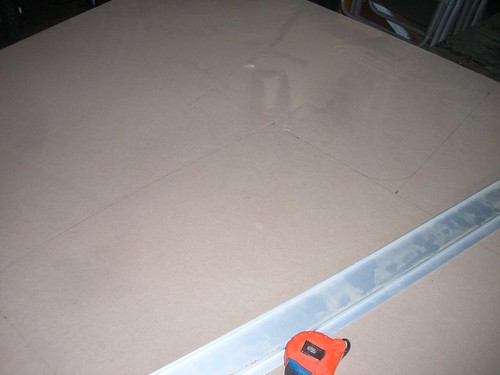
An idea I got while cutting the desk was to include a section in the back for cord management. I cut out an inch deep section in the back of the desk to accommodate power cords and various cables running off the desk.
With that, the initial cut of the top was finished.
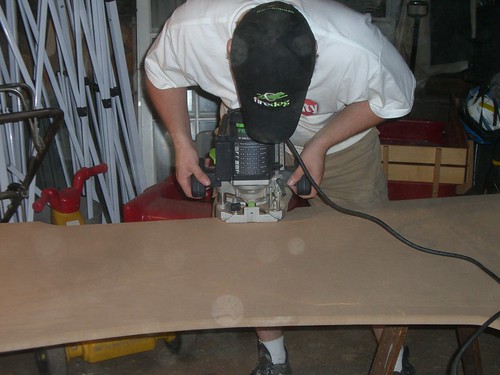
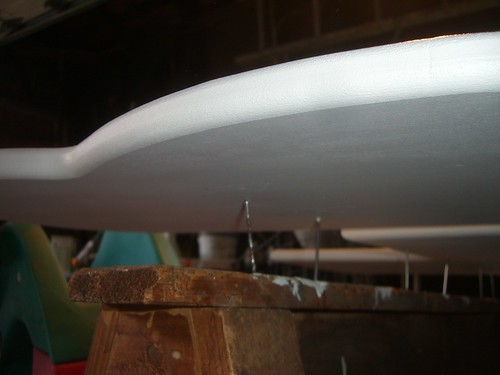
At this point the desk had a rough edge. I wanted a nice rounded edge. Thankfully, a friend of mine had a high quality router. With a simple pass around the edge, the desk top went from a rough cut piece of material to a smooth edged desktop.

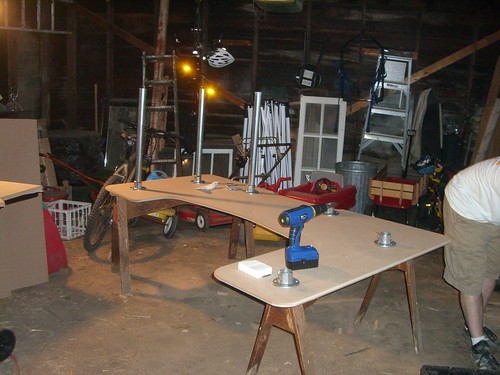
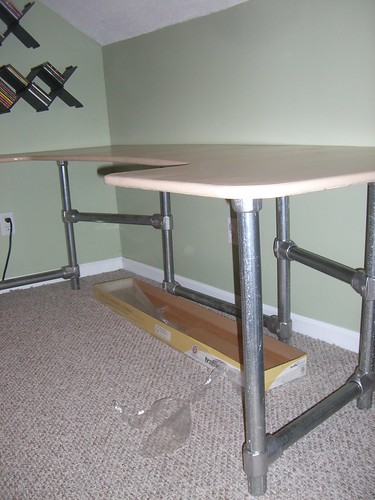
Attaching the Base
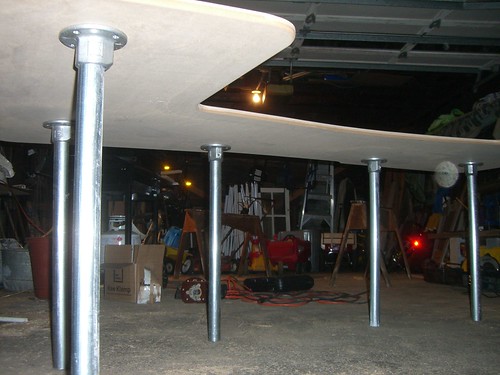
At this point we were ready to start attaching the fittings that would connect the legs to the desk top. I spaced out the Kee Klamp L61-7 fittings on the bottom of the desktop and screwed them in with 3/4" #10 wood screws.
The fence post was cut (you can use a pipe cutter or a sawz-all -- or just have the home center do it for you) to just under the desktop height (measure a height that works for you) and then attached to the fittings.
A Word About Kee Klamp Fittings and Fence Post
I chose to use Kee Klamp fittings on this project for several reasons.
1. They are easy to use. I'm not a carpenter, so it was a quick and easy way to build a study foundation for a desk that would look good. Kee Klamp fittings slip onto pipe and then "bite down" into the pipe with a set screw. Normally they are used as an alternative to welding in the handrail world, but they work great for all sorts of DIY projects as well.
The parts can be pricy, but when you consider the time and resources saved in other areas I think they are "worth" the investment. Literally, it took me minutes to get the desk upright once the desktop was cut out.
3. The Aluminum fittings (Kee Lite) have some aesthetic value for a modern looking office.
4. The size 7 (1 1/4") fittings work well with fence post. I used about 3 1/2 - 8 foot lengths of galvanized fence posts that can be obtained at any home store. Fence post is a lot cheaper than the using galvanized schedule 40 pipe (not to mention it's easier to work with too).
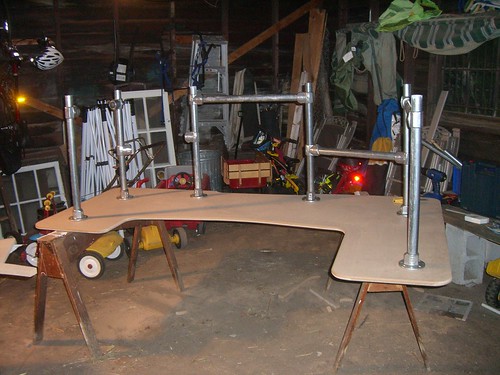
Building the Base
The base consisted of six uprights with a pipe running between each of the uprights. The cross supports made the entire unit very stable. They are necessary so that the horizontal forces on the desk (like when moving it) are not placed upon the MDF. I think without the cross supports it would be easy for the MDF top to crack and break.
The pipe is held in the fittings with a set screw that is tightened down with a standard allen wrench.
Here the cross supports are added with Kee Klamp L10-7 Fittings. They were staggered in height for even greater stability. Once the desk is in its final location the fittings can be adjusted and retightened.
Painting the Desk
Painting the MDF desktop is a must. Without paint, the first time you set a glass of water on your desk you'll really wish you hadn't! The MDF grain swells very easily and also continues to put off dust.
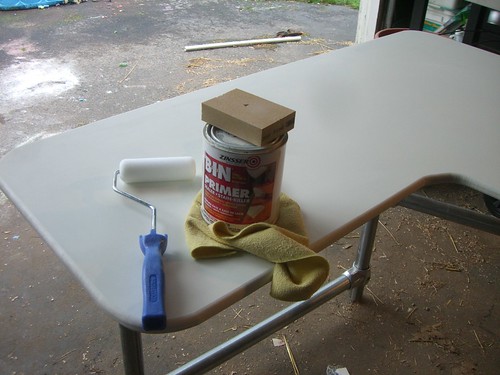
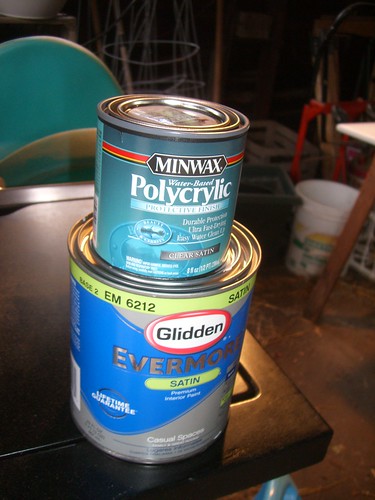
I painted the desk top in a thee part process.
1) Primed with a NON WATER BASED - BIN Primer
2) Painted with an Indoor Latex Paint
3) Finished with a Polycrylic to provide a protective finish.
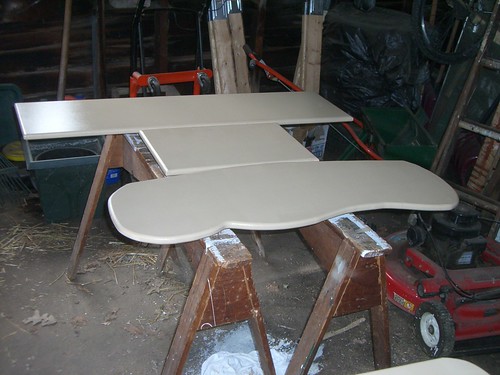
I put one coat of primer on the surface and two on the edges, sanding lightly in between each coat. I also wiped the surfaces down with a tack cloth. Using a mini roller made the paint go on quickly and smoothly.
When I was painting both sides (for the keyboard tray and shelves), I supported them with nails driven into the saw horses. This allowed minimal damage to the underside of the painted surface.
Here is the paint and Polycrylic that I used.
Finished Painting:
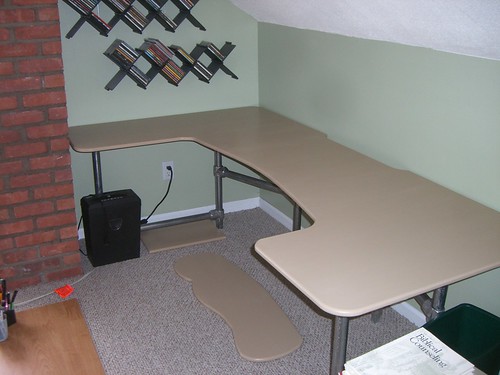
Finishing Touches
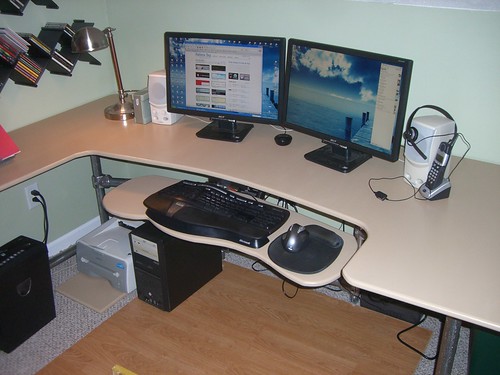
At this point the basic desk was done. Now the only thing that needed to be added was the keyboard tray. I ordered an articulating unit from www.ergoindemand.com. I found their customer service people very helpful.
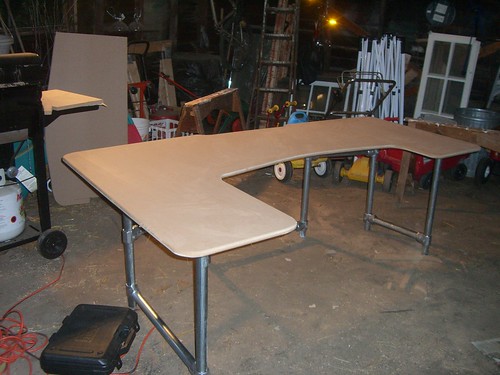
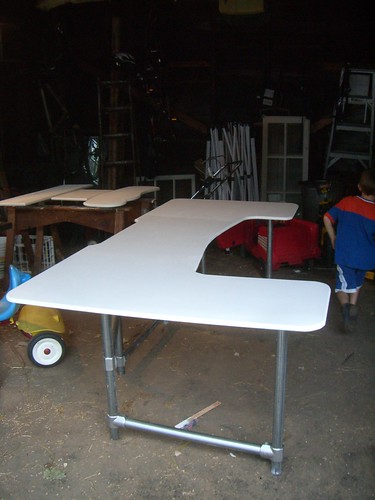
Here is the desk in place, ready for keyboard tray.
Once the desk is in place, I adjusted the cross pieces to make sure that they were spaced properly and evenly.
First I screwed the unit into the bottom of the keyboard tray.
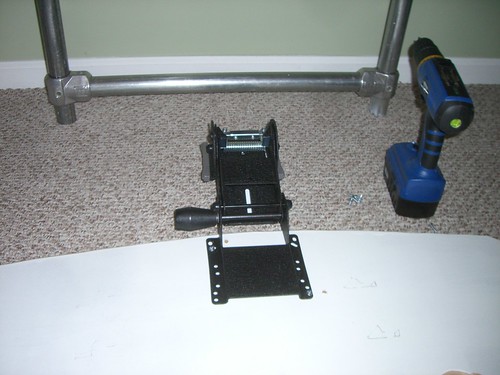
Then I screwed the track onto the bottom of the desk.
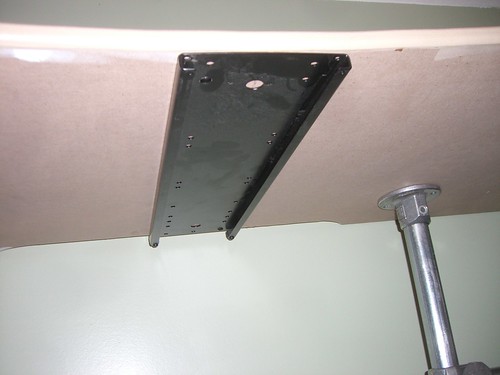
The keyboard tray slid right into the track and worked perfectly.
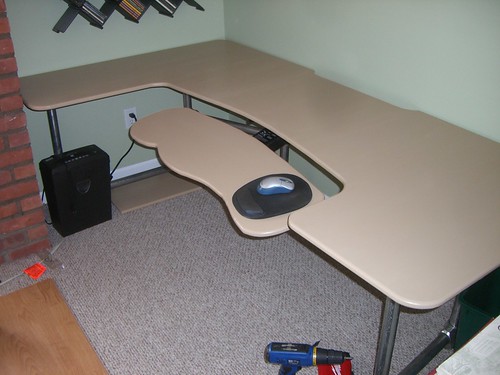
The cord management cut also worked very well.
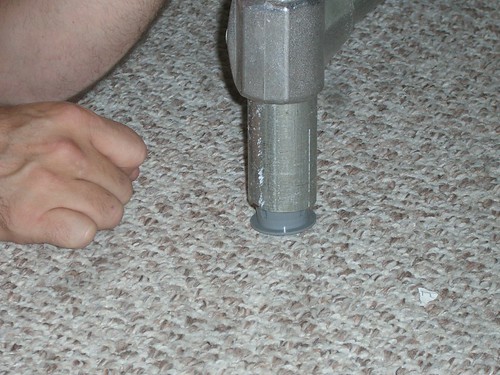
In order to keep the pipe from ruining the floor, I also added some plastic pipe end caps to make the desk easier to move around.
Admiring the Finished Product
To finish it off I laid down some laminate floor so that my chair would roll. I made the extra shelves out of MDF in hopes of using them down the road (that'll be another post).
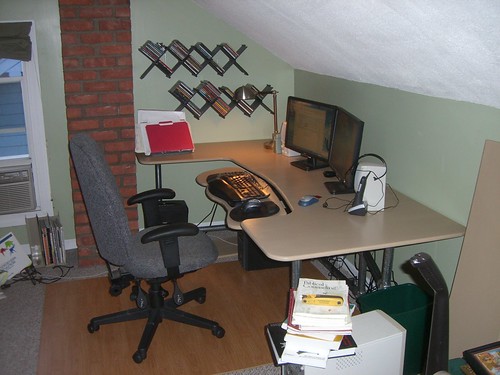
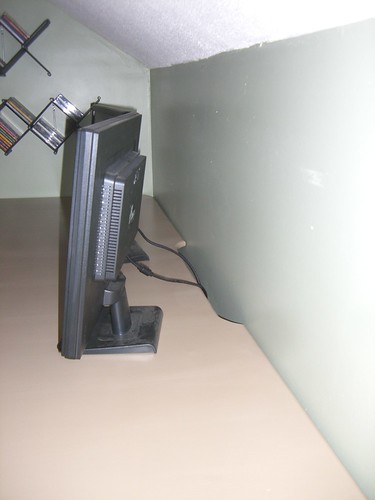
Desk setup with 22" wide screen monitors and ergonomic mouse and keyboard.
At the time of writing I have been using the setup for about two weeks and am very happy with how everything turned out.
Counting the Cost
I mentioned that this was cheaper than buying your own ergonomic desk. The cheapest ergonomic desk that I could find was around $600 (not including shipping), so what did this desk cost:
Parts you'll need
Additional Supplies
- 4'x8' MDF - $25
- 4 x 8' Fence Post - $35
- Various Paint Supplies - $30
- Articulating Keyboard Unit - $100


Additional Supplies
- 4'x8' MDF - $25
- 4 x 8' Fence Post - $35
- Various Paint Supplies - $30
- Articulating Keyboard Unit - $100
Total Cost: Under $450
$450 is NOT Cheap, but it is less expensive than the ergonomic desks that I could find on the market. Of course that also doesn't include the fact that you get the satisfaction of building it yourself and customizing the desk to fit your space.
Doing it Yourself - Sketchup File
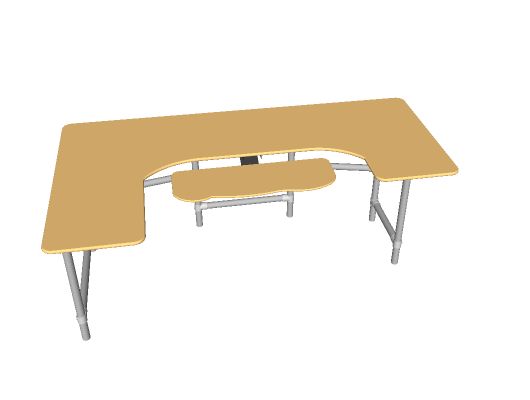
If you want to mess around with the desk in Sketchup I've created a sketchup model that you can use to help you with the design. You can download the sketchup file right here: Ergonomic Desk Sketchup File

Simple Table™ Kits
- Modern, minimalistic look
- Easy to assemble
- Customize the height and width
- Heavy-duty construction


