DIY Ergonomic Computer Desk - Revisited
Years ago I posted a project telling you how to build an ergonomic computer desk. That project involved setting your own desk height, a custom shape to the desktop and an articulating keyboard. I have to say, I loved that desk, so much so that I wanted to improve upon it and make it even better. Recently I renovated my entire office. I built a lot of new pieces out of wood, pipe and Kee Klamp fittings. I decided it was time to construct myself an entirely new desk, to improve upon what I had built in the past.
Why Rebuild the Desk?
The goal of building this desk was to keep all the features I liked of the old desk while adding a few things. In this version of the desk I added the following:
- Shelves underneath the desktop.
- Better cord control
- A removable section of the desk.
- An elegant wood top (as opposed to the painted MDF top of the past)
Design & Materials
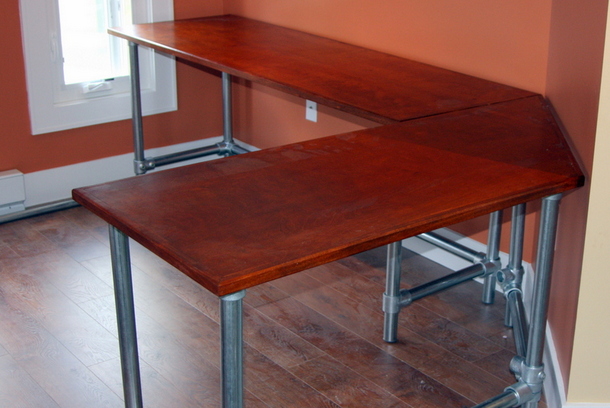
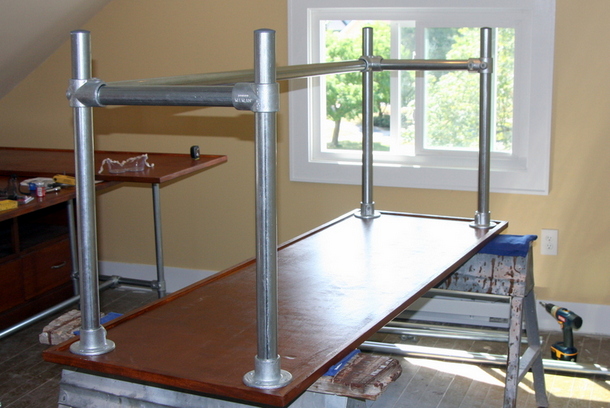
The design of this desk is fairly straight forward. I have designed the legs to attach to the bottom of the desk, and then be made rigid by support braces further down on the legs. This technique is very easy to build with, very stable, and could be used to hide the cords very nicely. Instead of making a curvy top cut out of MDF, I decided for a more straight edged, modular approach. I planned on making two separate desks that could be joined together. This is obviously more costly, but it is also more flexible. Another thing you'll notice is that I cut the secondary desk to fit into the corner of my new office. This is what you get when you build your own desk, you can make it fit like a glove to your existing space!
As far as materials go, the base is built out of pipe and Kee Klamp fittings. The wood tops were made custom by a carpenter, but you could easily use your own reclaimed wood top, a desktop from IKEA, or something else of your own making.
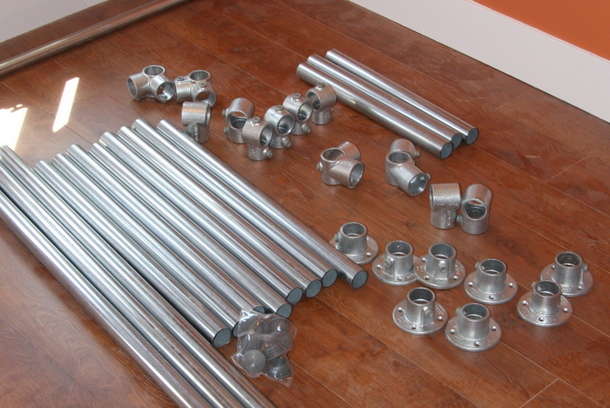
Desk parts you'll need


Additional Supplies
- 2 x Custom Desktops
- 1 x Custom Cut Keyboard Tray
- 1 x Keyboard Tray Support - 02-ARMCML from Ergo In Demand.
How to use the parts for the desk:
- 21-7 Side Outlet Tees - Corner Bracing
- 19-7 Adjustable Side Outlet Tee - Angled Corner Bracing
- 10-7 Single Socket Tee - Ends for Bracing
- 133-7 Plastic Plugs - Caps for Ends of Legs
- 27.5" Pipes for Legs
- 19" Pipes for Side Supports
- 19" Pipes for Back Supports on Angled Desk
- 66" Pipes for Back Support on Straight Desk
Shelf parts you'll need

Additional Supplies
- 2 x Custom Cut Shelves
How to use the parts for the shelves:
- 10-76 Single Socket Tees (multi-size)
- 70-6 Rail Supports - Supports for Shelves
- 133-6 Plastic Plugs - Ends of Shelves
- 15-6 Elbows - Ends of Shelves
- 6" Pipes for Small Shelf Supports
- 14" Pipes for Small Shelf Support
- 12" Pipes for Angled Shelf Supports
Cost: Before you get carried away adding up the cost of the fittings, pipe and wood, I'll just come out and say it: the price of this desk is on the high side. My goal was not to build a desk on the cheap, but to build something that I wanted. In short, cost was not my principal object. If you are looking for a more inexpensive design, check out my first ergonomic desk.
Now onto the actual instructions.
Attaching the Legs & Bracing
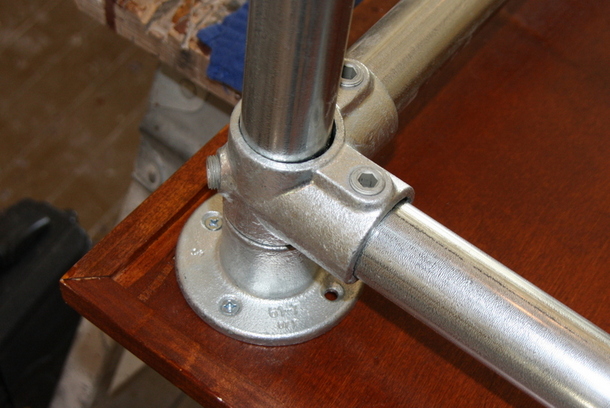
The first step is to attach the legs to the desktop. Tip the desktops upside down, place the flanges in the four corners of the desk. Insert the leg pipes. Then, without attaching the flanges to the desktop, add the bracing to the legs. Basically, you want to get the base structure in place before you attach the flanges to the desk. Once the bracing is in place, you can then screw the entire structure to the desktop. The bracing and the flanges are Kee Klamp fittings, so you can tighten the set screws onto the pipe to keep the fittings in place. These fittings can be adjusted later by loosening and tightening the set screw.
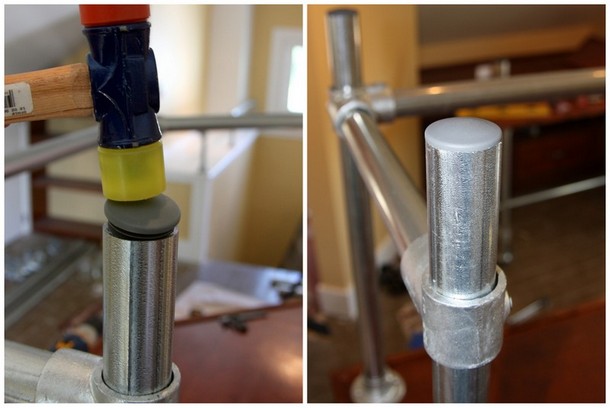
After the legs are attached, put the plastic plugs into the pipes. Use a rubber mallet to hammer them in. The plastic plugs prevent the leg pipes from scratching the floor.
Adding the Shelves
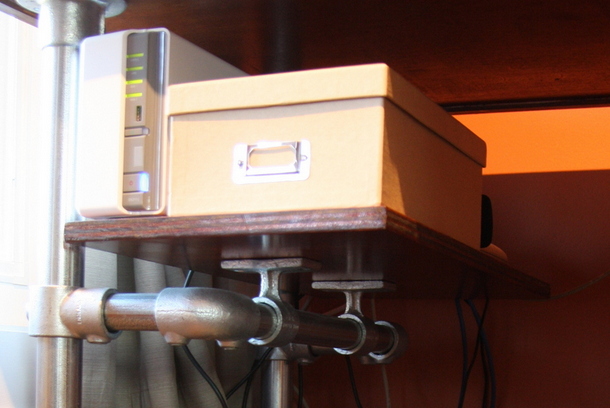
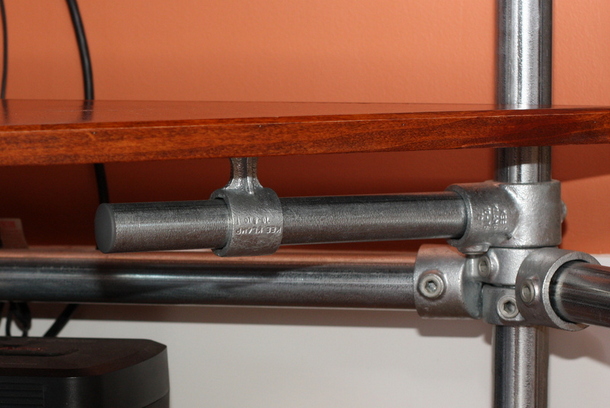
At this point, if you were just building a desk, you'd be done. I built the shelves for the desk by attaching a pipe support to the leg of the desk. I built the shelves using a smaller diameter pipe. I was able to do this by using a multi-sized tee. The pass through has a larger size for the leg. The socket side has a smaller pipe size for the shelf support. The shelf is attached to the pipe support using the Type 70 Kee Klamp rail supports. Take a look at the pictures to see how the shelves are attached.
Adding the Keyboard Tray
I made a custom keyboard tray out of a piece of plywood and had it stained the same color of the desk. The articulating keyboard device is screwed to my custom tray and then screwed underneath the desk. I got the keyboard tray from ergoindamand.com. They don't have it listed on their site, but you can still buy it from them. It's the: 02-ARMCML

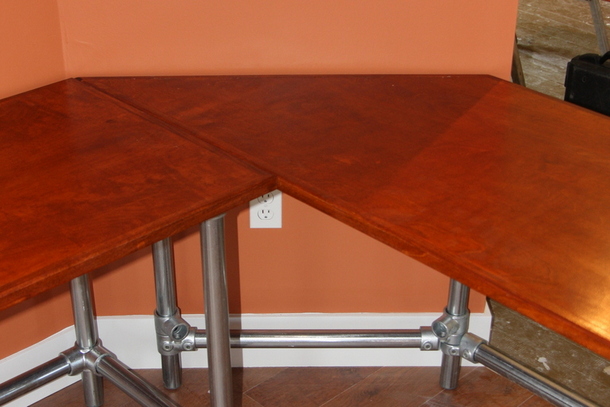
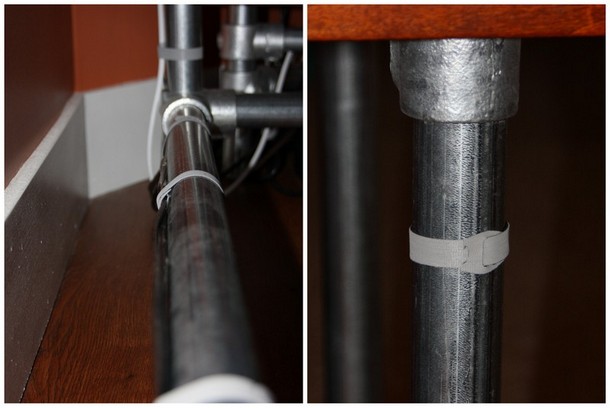
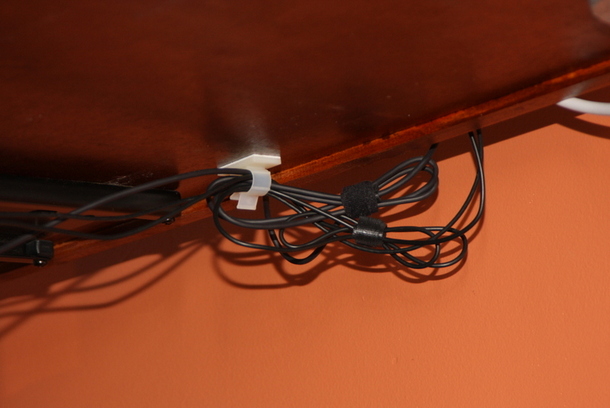
Controlling the Cords
I bought some Velcro cord straps. They come in a roll, and are pretty inexpensive. I ran my cords along the pipes and then attached them with the Velcro straps. The result was that all the cords are nicely tucked away so they cannot tangle or be seen.
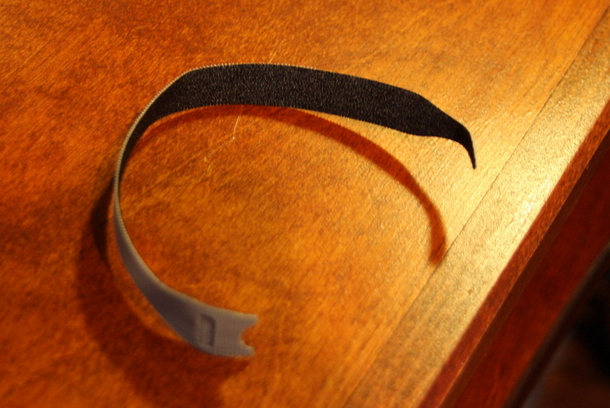
I also used some plastic cords straps with doubled sided tape to control the cords from the keyboard tray.
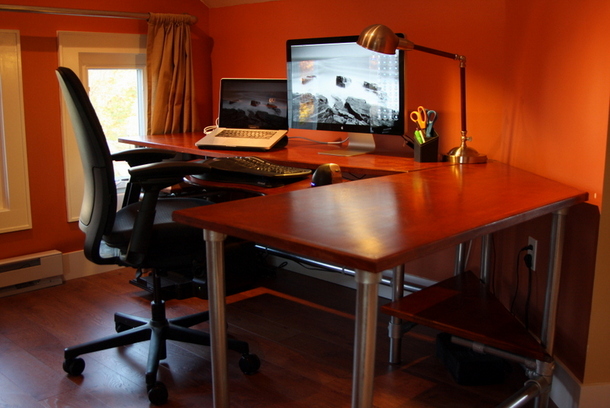
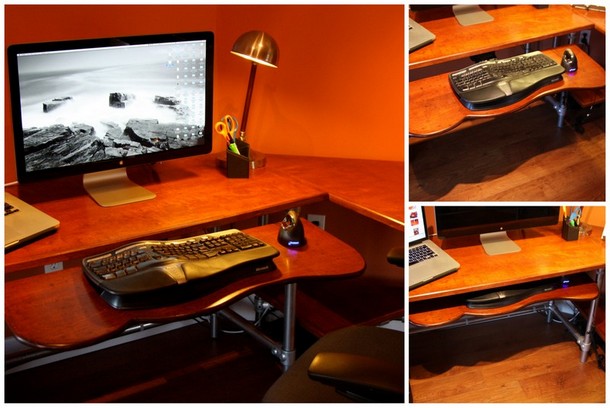
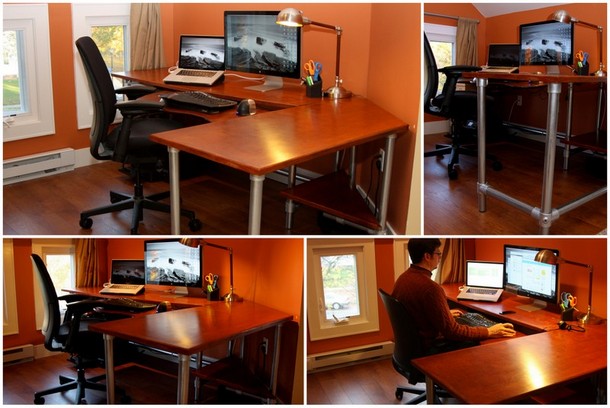
The Finished Product
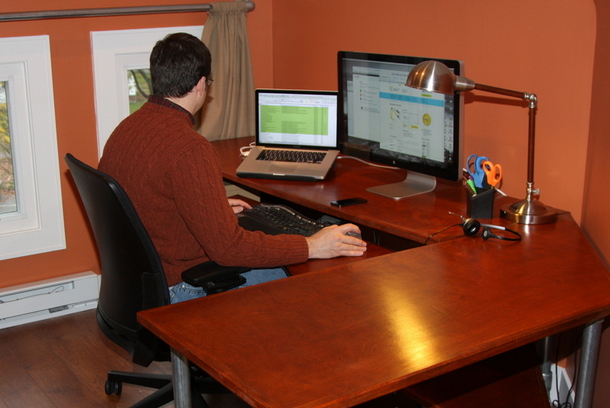
The finished ergonomic desk is great: The keyboard tray allows me to place the keyboard at the exact height, the cords are hidden from sight, the shelves work well to store my router, modem, and backup device, and the finished wood matches all the other furniture in my new office.
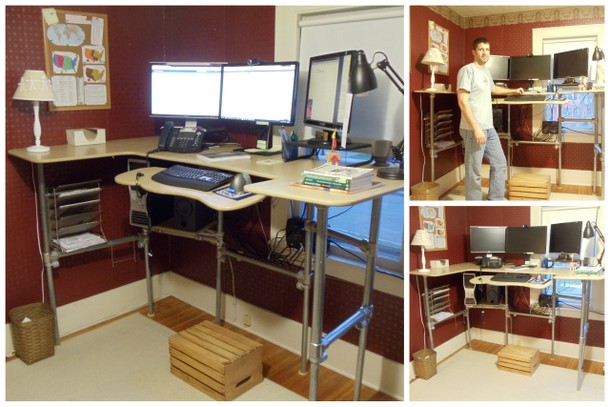
Ergonomic Desk Epilogue
For those of you concerned about my old desk, don't worry, I gave it to my friend and he is getting great use of it. It lives on in a new home! In fact, not only does it live on, it's been up-cycled into a standing desk! Here's some images, and be on the look out for a blog post on that project in the near future.
Check out this gallery of desk projects for more inspiration. There are many DIY desk designs that can be easily constructed. Not sure what you want to build or what to use? The projects team at Simplified Building will be glad to discuss your idea and help you with your selection of Kee Klamp and pipe.


