How to Build Your Own Workbench/Storage Shelf
Out of all the virtually unlimited projects you can make with Kee Klamp fittings, the workbench/storage shelf is undoubtedly one of the most versatile. You can use it in your garage to hold your tools, in your living area to display knick knacks, or in your bathroom to hold towels and toiletries. This combination workbench/shelf can also function quite well in a nursery, bedroom, kitchen, pantry, foyer, game room, or any other nook and cranny around your home. Admitting that this piece was a winner for all of our customers was a given.
However, our challenge with this undertaking was to make it as cost-effective as we could, since the wood alone could add hundreds of dollars to the project. In the effort to illustrate that a low-cost alternative could be easily accomplished, we tackled the project with a $200 budget. We succeeded using top-rail fence posts and a 4x8 plywood sheet from our local Home Depot. Below, you will see how you too can succeed by following our easy, six-step system.
Tools and Materials
| Qty. | Description |
| 1 | Tape Measure |
| 1 | Allen Wrench (to secure Kee Klamp fittings) |
| 1 | Pipe Cutter |
| 1 | Pair of Latex Grip Gloves (extremely handy for cutting pipe) |
| 1 | Circular Saw |
Raw Materials from Home Depot
| Qty. | Description |
| 3 | 10.5 foot pcs of Top Rail Fence Post (1-3/8") |
| 1 | 4x8 Sheet of Plywood |
| 10 | Screws with Washers |
Kee Klamp Fittings from Simplified Building
| Qty. | Description |
| 4 | 20-6 Side Outlet Elbow 1" |
| 8 | MH50-6 Swivel Member |
| 4 | 61-6 Flange |
| 2 | 105-6 Sheeting Clips |

Step One: Cut the Pipe to Desired Length
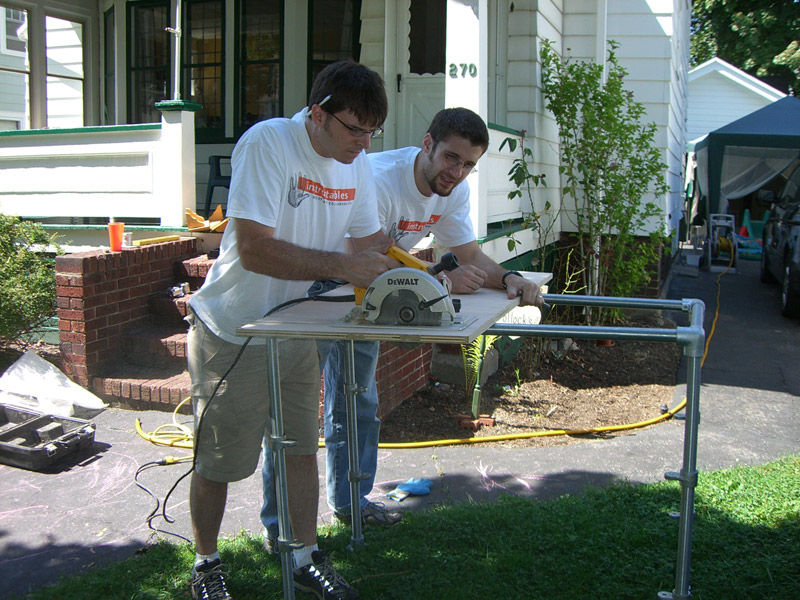
Use the latex grip gloves to more safely and easily hold the pipe while you cut it. Alternately, have someone else hold the pipe while you cut it. You can ultimately cut the pipe to any desired length. However, we chose the sizes below because they allowed us to more efficiently use the 4 x 8 sheet of plywood.
2 | 20-1/2" (side rungs)
2 | 44-1/2" (runners)
4 | 39" (legs)
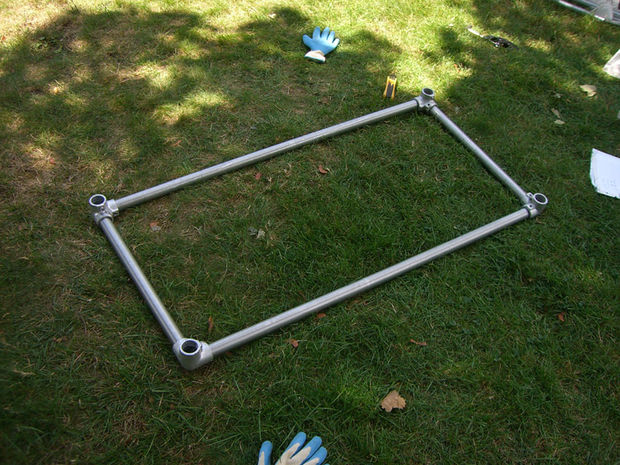
Step Two: Assemble the Workbench/Shelf Top
Create the top of the workbench/shelving unit by affixing the 4, 20-6 side outlet elbow Kee Klamp to the 2 runner pipes and 2 side rung pipes.
Step Three: Assemble and Attach Workbench/Shelf Legs
Just like the dimensions of the workbench/shelf top, you can also build the legs to your desired length. We decided to simply divide the pipe into thirds to construct the legs for this piece.
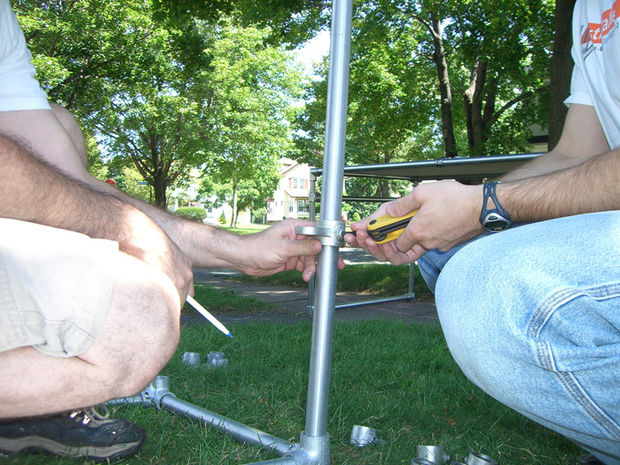
To follow our lead, mark the pipe at the points where you divide it into thirds. Then, insert a leg into one of the 20-6 Kee Klamp fittings attached to the workbench/shelf top.
- Slip one of the MH50 fittings onto the top shelf mark and tighten the set screw.
- Slip another MH50 fitting onto your second shelf mark and tighten the set screw.
- Attach one of the 61-6 flanges to the bottom of the leg and tighten the set screw.
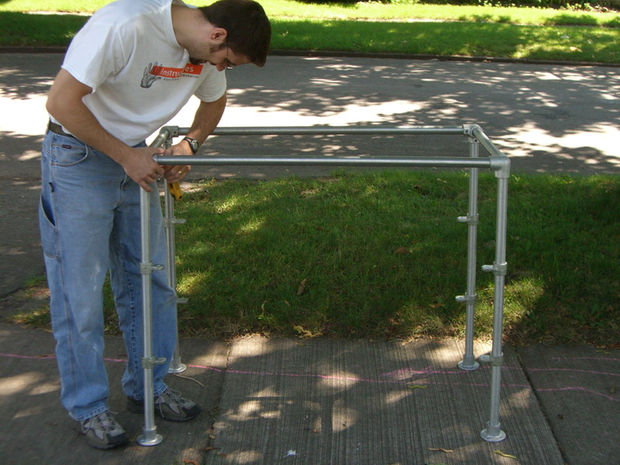
Repeat this sequence to attach the other three legs to the workbench/shelf.
NOTE: If one or more of the legs is crooked, tip the workbench/shelf over, and loosen and re-adjust the set screws until the leg becomes straight and stationary.
Step Four: Cut the Shelves
Cut the shelves to fit your desired length. For our workbench/shelving project, we had the staff at our local Home Depot cut our 4x8 sheet into 4 pieces. Then, we trimmed the pieces ourselves with a circular saw, taking about 3-1/2" off of the bottom shelves to make them fit perfectly into the design.
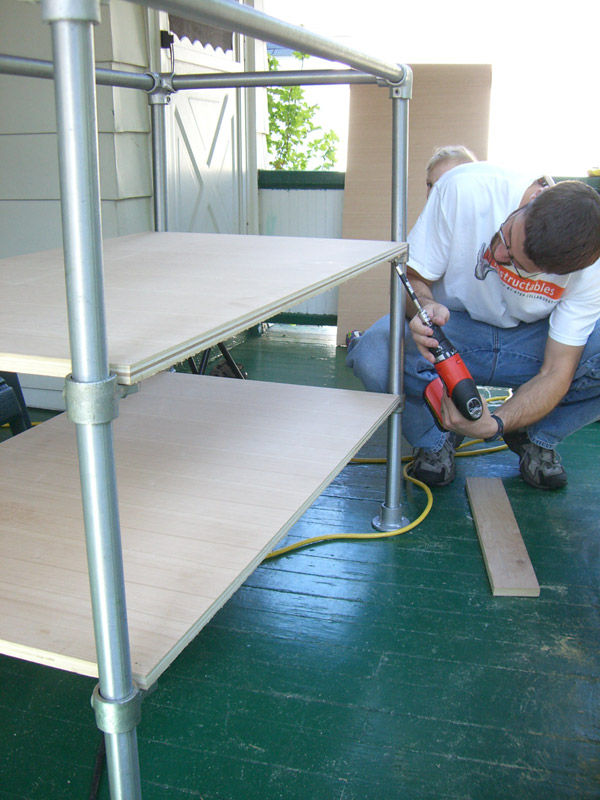
Place the cut boards onto the MH50s. Then, drill the screw, with the washer attached, into the board and through the hole in the MH50.
For best results, pre-drill the holes into the wood to keep the wood from splitting. Then, turn the entire shelf on its side and drill the screws into the wood while the shelf is on its side. Finally, drill the screws onto the higher shelf before you drill them onto the lower shelf.
NOTE: Ensure that the screws you use are short. If the screws are too long, they will poke through the top of each shelf.
TIP: If you loosen the set screws on each of the MH50 fittings, you can move the shelves up and down.

Step Six: Install the Top
Place the top on the bench. Attach the top to the workbench/shelf with a 105-6 Kee Klamp fitting placed in the middle of the runners on each side. The 105-6 fittings are clips that use tension to hold the top of the workbench/shelf down. Don't forget to use a small screw to ensure that it does not poke through the top of the workbench/shelf.
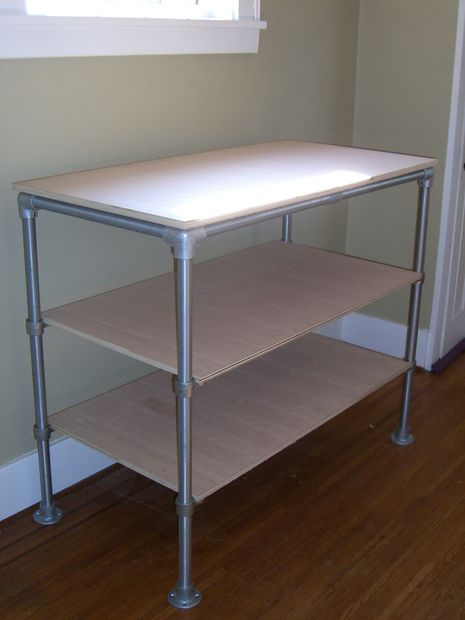
NOTE: As you can see from the picture below, during our project we discovered that after you attach one of the 105-6 fittings to one side of the shelf, you can use the clips as hinges.

Here is the picture of our completed shelf. At this point, you might want to sand it and stain it to match your living area. Or, you could add doors to the front of the unit to give it a more polished look. Please let us know if you need additional assistance designing or constructing your workbench/shelf. We would also like to see the pictures of your completed workbench/shelf, so please drop us a line with a photo to let us know how our instructions worked out for you.


