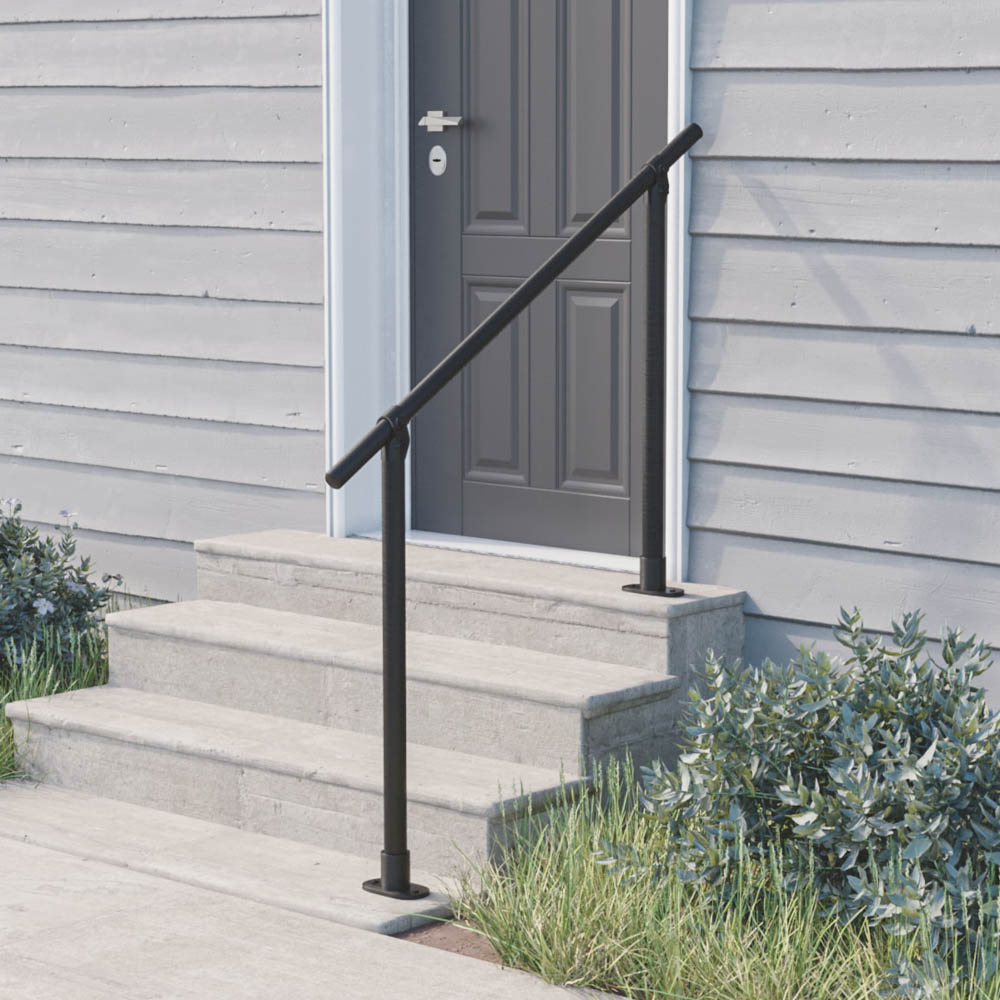
How to Install Railing on Concrete Steps
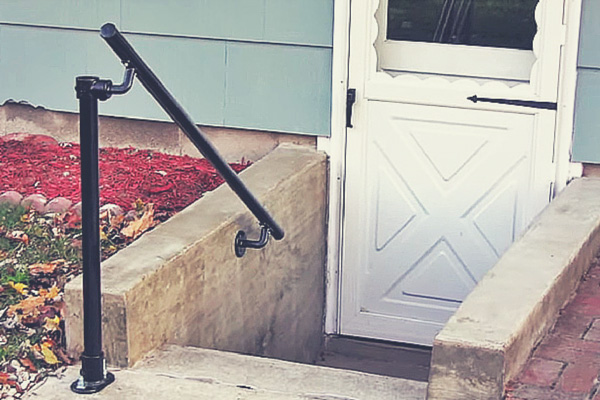
If you're looking to install a railing to concrete steps or a concrete wall, we're here to help. While it may seem like a tough task, it's simpler than you may think. We'll show how easy it can be to attach a railing to concrete using a Simple Rail handrail kit. Here's how you do it...
Attaching the Railing to a Concrete Base

To attach your railing to concrete you will need a hammer drill to drill into the concrete, a standard drill for drilling into the pipe, an Allen wrench to tighten the fittings, a hammer, a tape measure, hack saw, vacuum, extension cord, and a sharpie marker.
Survey Your Location
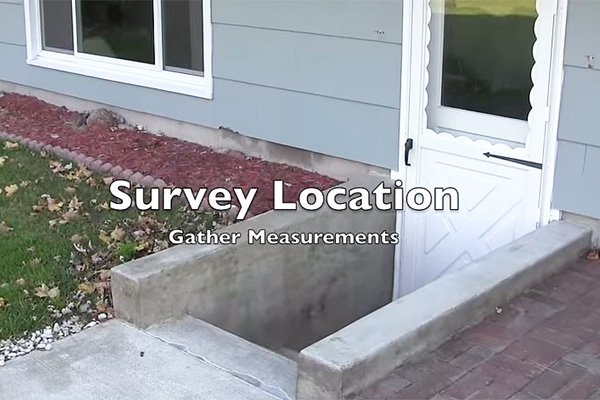
First survey your location. Make sure it will be a suitable place for a railing and the type of railing you are looking to install. (We offer a variety of railing solutions for every situation. If you're unsure, contact us to receive help.)
Clean the area if necessary to ensure proper contact and to make it safer to work around.
Test Fit Your Railing
The next step is to test fit your railing. Grab a buddy or two and hold up the railing in the install location. This will help you to better envision the process and what the end product will look like. Better to do this now so you have an idea of what it will look like rather than have to adjust later because you're not satisfied with the placement.
Mark Holes for Base Flange(s)
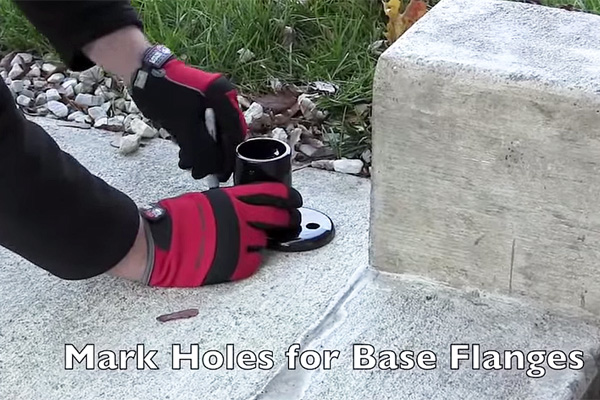
Place the flange on the concrete base where you will install the railing. Mark holes with a sharpie marker.
Drill Holes for Anchors
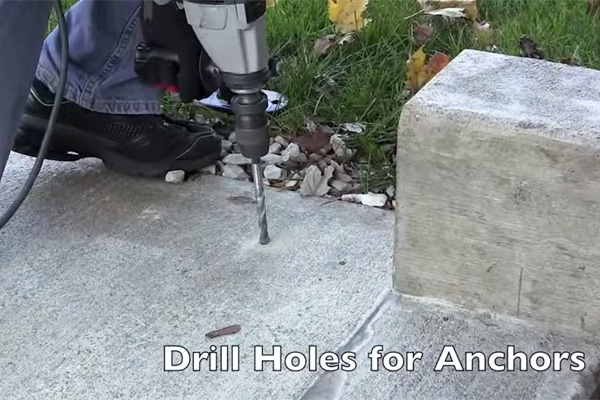
Bring the flange up and put it to the side. Grab your hammer drill and drill into the concrete where you marked the holes.
Clean Debris
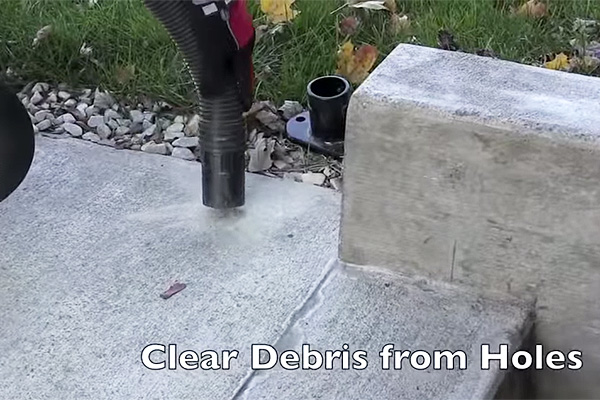
To ensure proper contact, make sure you clean out any debris you made from drilling the holes. You can do this with a brush or vacuum. A Shop-Vac works great!
Hammer in Anchors
PLEASE NOTE:
Due to customer feedback and our desire to continuously improve our products, we now include concrete sleeve anchors with our ground-mounted railing kits. These sleeve anchors eliminate the need to saw off any excess bolt-ends and require fewer tools for installation without sacrificing structural integrity. Here is a video of these anchors in use on one of our railing kits.
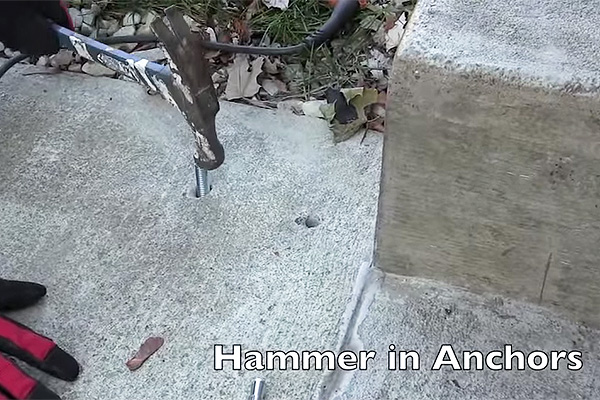
With the holes drilled and the debris cleaned out, you can now hammer in the concrete anchors. Slide the anchor into the hole and pound it in.
Place Flange on Concrete Anchors
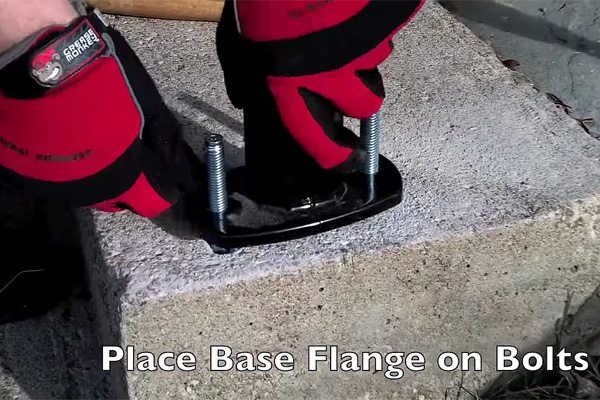
Place the flange onto the concrete anchors you just hammered in.
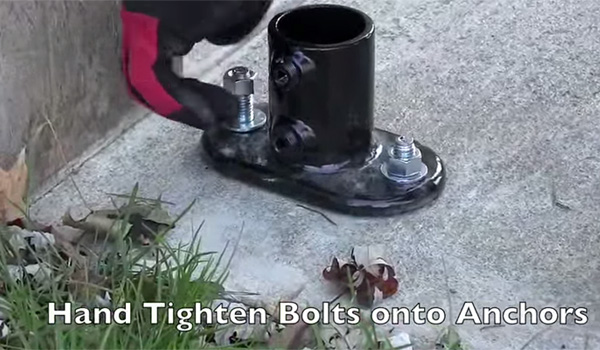
Hand Tighten Bolts onto Anchors
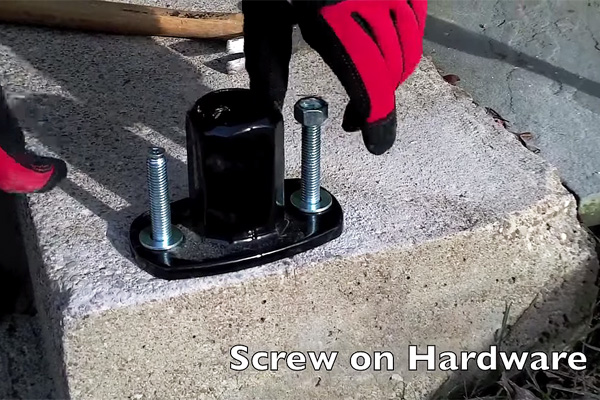
Slide the washers onto the anchors and hand tighten the nuts down first.
Tighten Down Nuts to Concrete Anchor with a Wrench
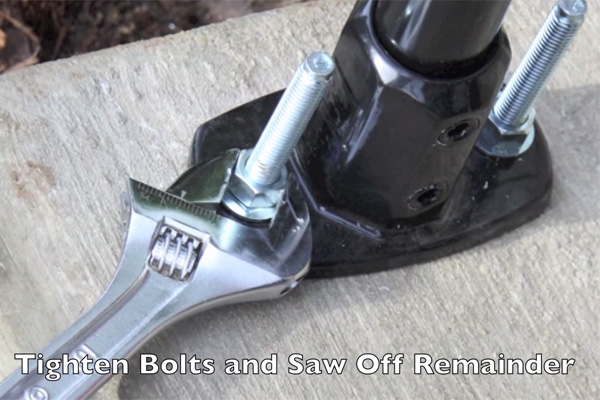
With the nuts hand tightened onto the anchors, you can now tighten them down with a wrench to secure the flange to the concrete base.
Trim Bolt Ends
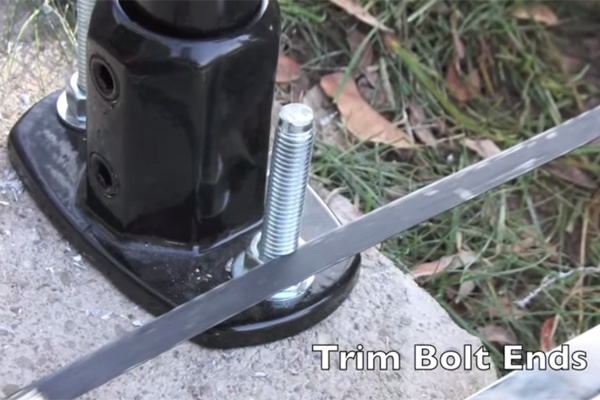
If there's excess material from the concrete anchor sticking out, trim it off using a hack saw.
Insert Pipe and Tighten Down
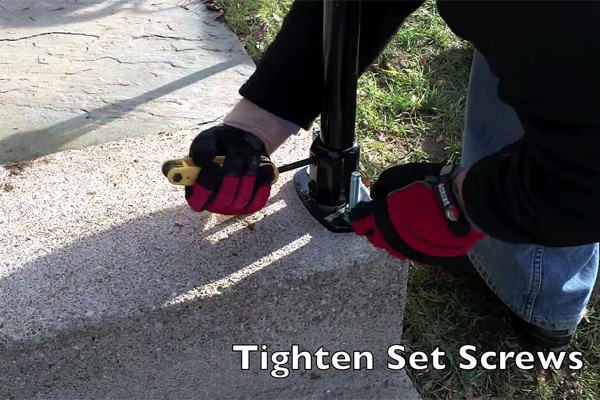
Slide the pipe into the flange. Then tighten the corresponding set screw using an Allen wrench.
Attach the Handrail Bracket

Now you can attach the handrail bracket to the top of the pipe that you just tightened down. Slide the bracket onto the top of the pipe and tighten the set screw to secure it.
Mark Holes on the Handrail
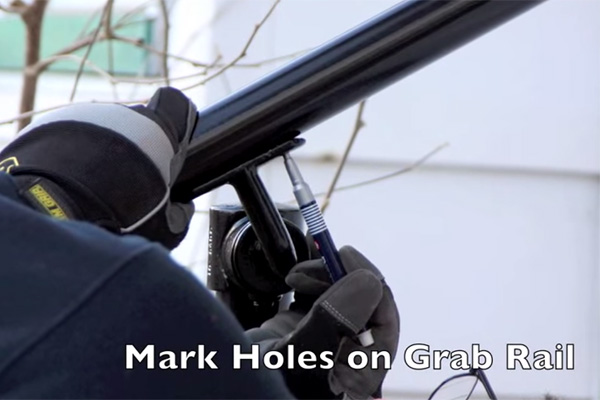
Place the handrail over the bracket you just attached and line it up to the proper position. Then mark holes on the handrail where you will be attaching it to the bracket.
Drill Pilot Holes
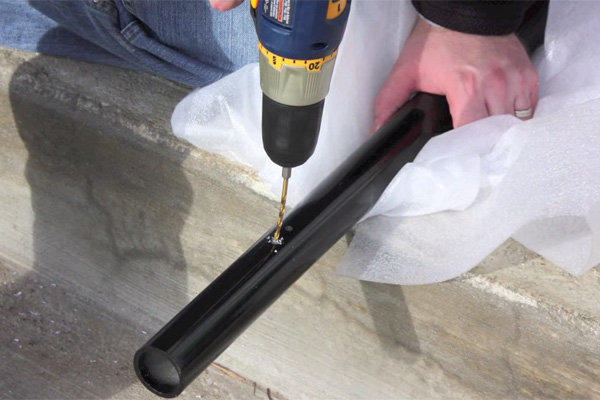
With the holes marked you can place the handrail on the ground or another sturdy surface to drill the pilots holes.
Attach Handrail
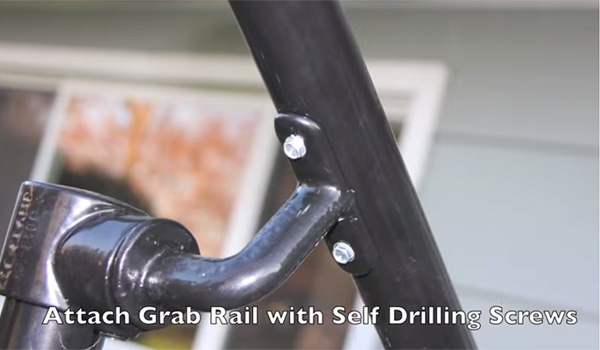
Now that the pilot holes are drilled, you can line up the handrail with the bracket and attach it using self drilling screws.
Simple Rail™ Handrail Kits
Like this project? Now building a simple handrail is even easier! Constructed with Kee Klamp fittings, Simple Rail handrails are durable and easy to install. Simple Rail™ kits are great for home owners, business owners and landlords.
Browse Simple Rail KitsAttaching Railing to a Concrete Wall
The process for attaching the railing to the concrete is nearly the same as attaching it to the concrete base. The main difference is the type of fastener you will use to attach it to the concrete. This time we will use concrete screws rather than concrete anchors.
Mark Holes on Wall

First, mark the holes on the concrete wall using a sharpie marker where the handrail bracket will go.
Drill Pilot Holes
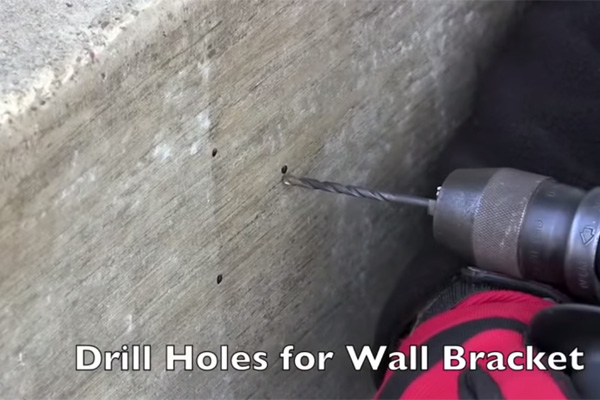
Now, drill the pilot holes using a hammer drill. Make sure to clean any debris from the holes using a brush or vacuum.
Attach Wall Bracket

Line up the bracket with the holes you just drilled and use concrete screws to attach it to the concrete wall. Tapcon screws work great for this!
Attach Handrail to Bracket

Now you can attach the railing to the bracket using self-drilling screws.
Hammer on End Caps
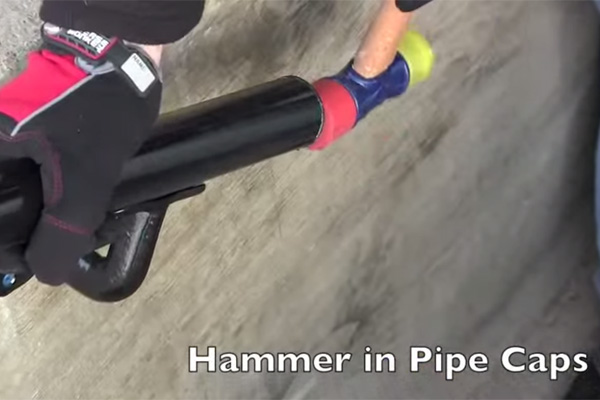
Finally, with everything attached, the only thing left to do is hammer on the end caps. Use a soft edge mallet to protect the railing and secure the end caps onto the pipe.
There you have it. That's how you can attach railing to a concrete base and/or concrete wall. Working with a Simple Rail handrail kit is just that - simple. It's easy to use and easy to assemble. We offer a variety of stair railing kits and railing solutions to suit any situation perfectly. Hopefully, this tutorial has helped you, and if you have any questions about your railing install or our railing solutions, please don't hesitate to contact us and we will be happy to assist you!
Simple Rail™ Handrail Kits
Like this project? Now building a simple handrail is even easier! Constructed with Kee Klamp fittings, Simple Rail handrails are durable and easy to install. Simple Rail™ kits are great for home owners, business owners and landlords.
Browse Simple Rail Kits


