Workbench/Shelf
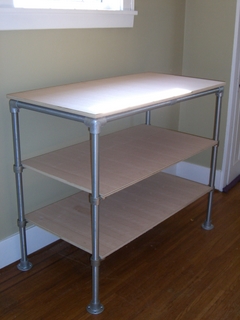
We have been busy brainstorming ideas of how people can use Kee Klamp fittings to build a whole bunch of cool things for their homes. Tricia has started to come up with a whole line of items that can be used in the basement/garage. She has also been thinking about a whole bunch of kitchen ideas.. but those are coming later. In the process she came up with this cool shelf design that can be used just about anywhere in the house.
All said and done this project should cost you less than $200 and will provide you with a quality piece of furniture that you can break down and setup again and again!!
Step 1 - The Plans
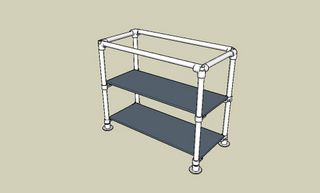
Tricia made the plans for this is Google's Free SketchUp program. http://sketchup.google.com We modified the design slightly for our project. That's the great part about Kee Klamps, you can completely customize the project.
Step 2 - The Parts and Tools
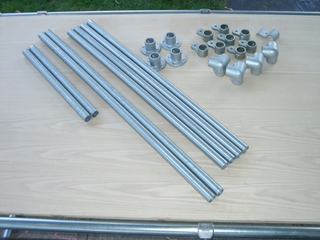
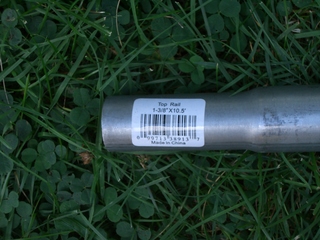
Part of this project was an experiment. One of the things we've constantly been told is that the cost of the pipe often makes the project very expensive. Well, with this project we decide to see if we could cheapen it up a bit. We were successful! We found that top rail fence post that you can buy from Home Depot works just fine with our size 6 fittings.
(See Part and Tool list below for detailed material and tool imformation.)
Step 3 - Cut the Pipe
There is flexibility in designing your shelf. We chose the sizes (Listed below in the Parts List) because it allowed us to efficiently use a 4x8 sheet of plywood.
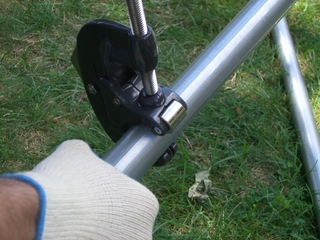
While cutting the pipe use a latex grip glove; it will make it much easier to hold. You might also have someone else hold the pipe for stability while cutting.
Step 4 - Build the Bench/Shelf Top
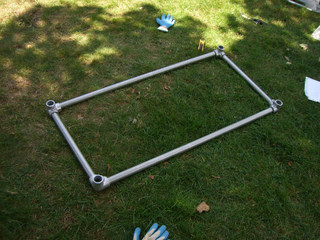
Using the 2 runner pipes, the 2 side rung pipes, and the 20-6s assemble the bench/shelf top.
Step 5 - Assemble and Install Legs
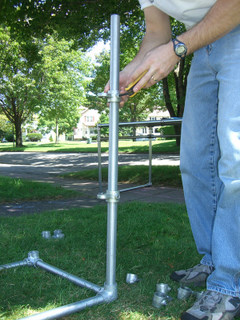
Mark the shelf height on each leg. Again you can be selective about how you want to do this. For our shelf we simply divided the pipe into thirds and made our marks there.
Insert the leg into a 20-6 fitting that is a part of the top rectangle.
Slip-on the first MH50 onto your shelf mark and tighten the set screw.
Slip-on the second MH50 onto your second shelf mark and tighten the set screw.
Attach the 61-6 Flange the bottom of the leg and tighten the set screw.
Repeat this four times.
NOTE: your legs may initially be somewhat crooked. To rectify this tip the bench over on it's legs and adjust the how far some of the pipe is going into the fittings. You can do this by loosening and re-tightening the set screw.
Step 6 - Cut and Install Shelves
Cut the shelves to length.
We had Home Depot cut our 4x8 sheet into 4 pieces. We did the trimming ourselves with a circular saw. We took off about took off about 3-1/2" on the bottom shelves to make them fit.
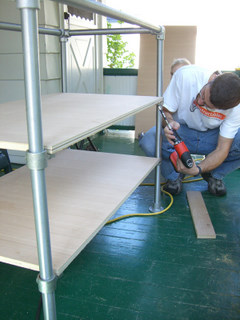
Installing the Shelves
To install the shelves we simply placed the boards on the MH50s and screwed up through the whole with a screw (with a washer on it). If you want to make it easier (we did) you can tip the entire shelf on it's side and screw that way. Predrilling your holes will help the wood to keep from splitting.
Also helpful is to screw on the higher shelf before the lower (we learned this by experience).
**Make sure your screws are short enough that they don't poke through the top of your shelves.
Note that if you loosen the set screws of the MH50 you can move the shelf up and down.
Step 7 - Install Top
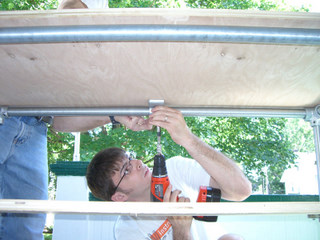
Finally place the top on the bench and attach with the 105-6 (one on each side). The 105-6 is a clip that uses tension to hold the top down. Again, use a screw small enough so it doesn't poke through the top.
Step 8 - Your Done!
That's it..
There are probably some other things you could do to spiff this thing up. Tricia has a design for adding doors to the front. You might also consider finishing the wood if you're going to use this in a living space.
Have fun with it and tell us about your experience!
Thanks..
The guys a Simplified Building Concepts (Sam and Chris are in the pictures)
